
PDF Generation Template Editor
Open-source visual PDF generation engine with customizable templates and developer-friendly APIs.
This guide helps you quickly learn the core workflow of the ComPDF Generation Template Editor, from creating an HTML template and importing a JSON data source to inserting placeholders and exporting the final PDF. Whether you are using the editor for the first time or preparing templates for team reuse, you can follow this guide to complete the full setup and output process.
After deployment, you will enter the main interface of the ComPDF Generation Template Editor. To get started quickly, we recommend reading the “Quick Start” section first and generating your first PDF before exploring advanced table handling, data formatting, and troubleshooting.
Terms:
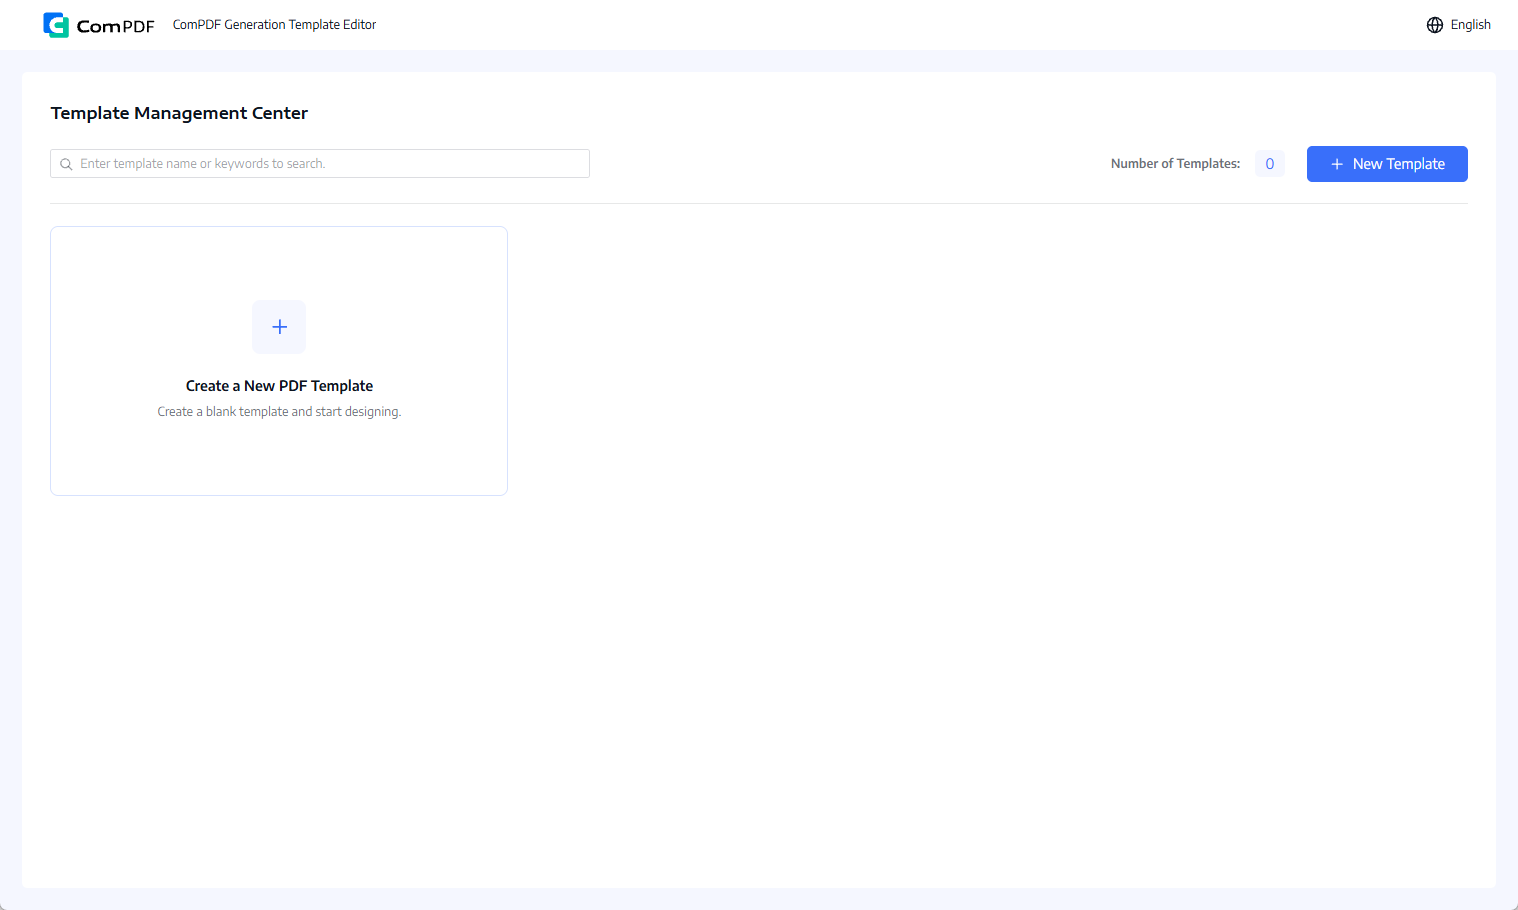
If you want to complete the shortest end-to-end flow first, follow these steps:
Use the following minimal JSON sample for testing:
{
  "customer_name": "ACME Corp",
  "invoice_no": "INV-20260802",
  "amount": 1280.5,
  "date": "2026-08-02"
}You can start with the following sample content in the rich-text template editor:
Customer Name: {{customer_name}}
Invoice No.: {{invoice_no}}
Amount: {{amount}}
Date: {{date}}After exporting the PDF, you can quickly confirm that the template, data source, and placeholders are configured correctly.
This section explains how to create a new HTML template and manage it later from the template management center.
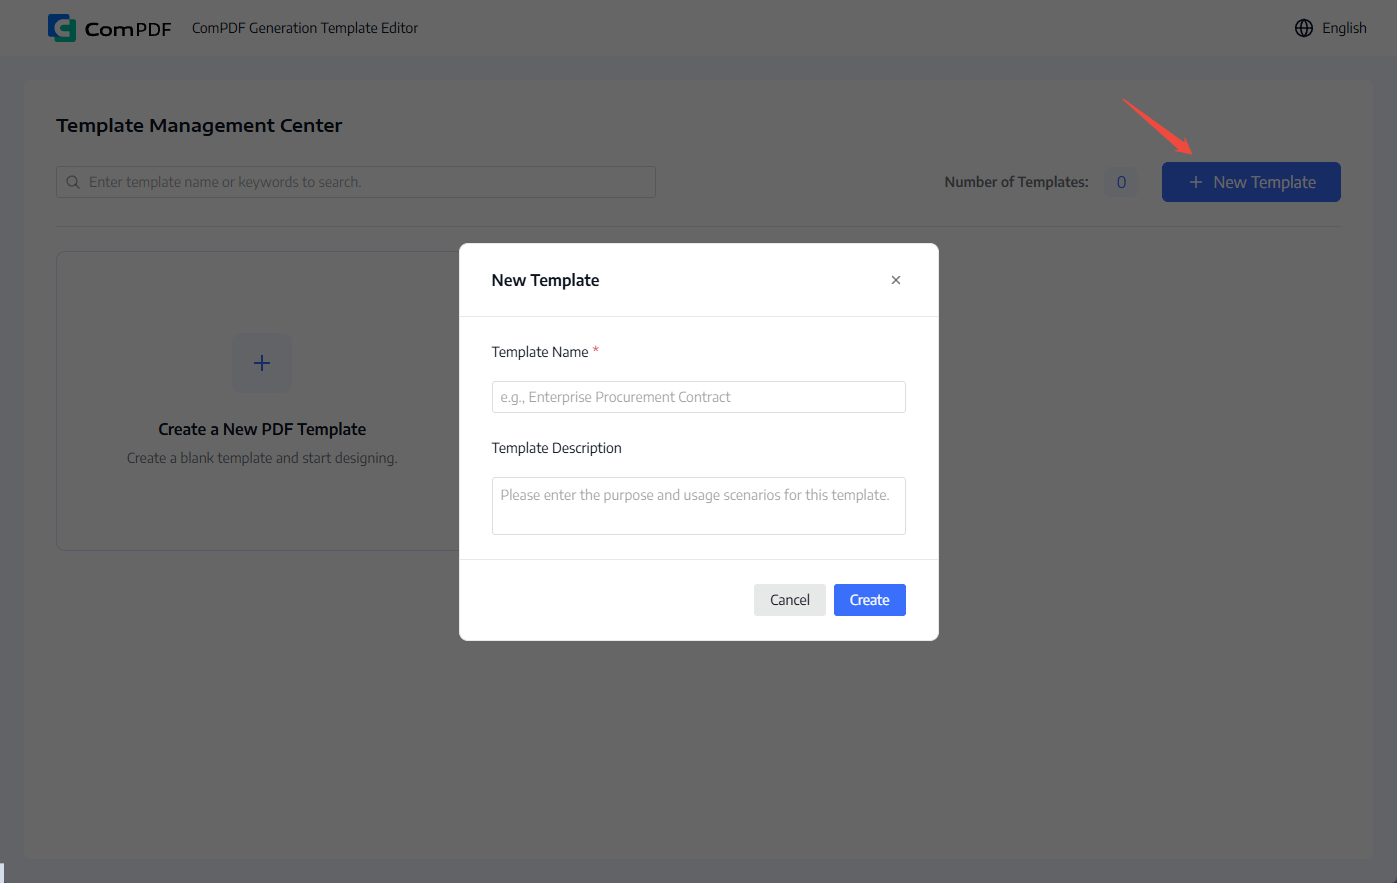
Click Import Template from the template list, then select a file to create the corresponding template. The following file formats are supported:
.zip, .dito: Import a template package and create the corresponding template.After importing, open the template from the template list to continue editing, configure its data source, or export a PDF.
Once the template is created, you can open the editor to design its content, layout structure, and basic styling.
You can edit the template much like a document, adding text, images, paragraphs, tables, and layout styles directly in the editor.
Start from scratch This is useful when you are designing a new document layout for the first time.
Modify an existing template This is useful when you want to reuse and refine a previously saved HTML template.
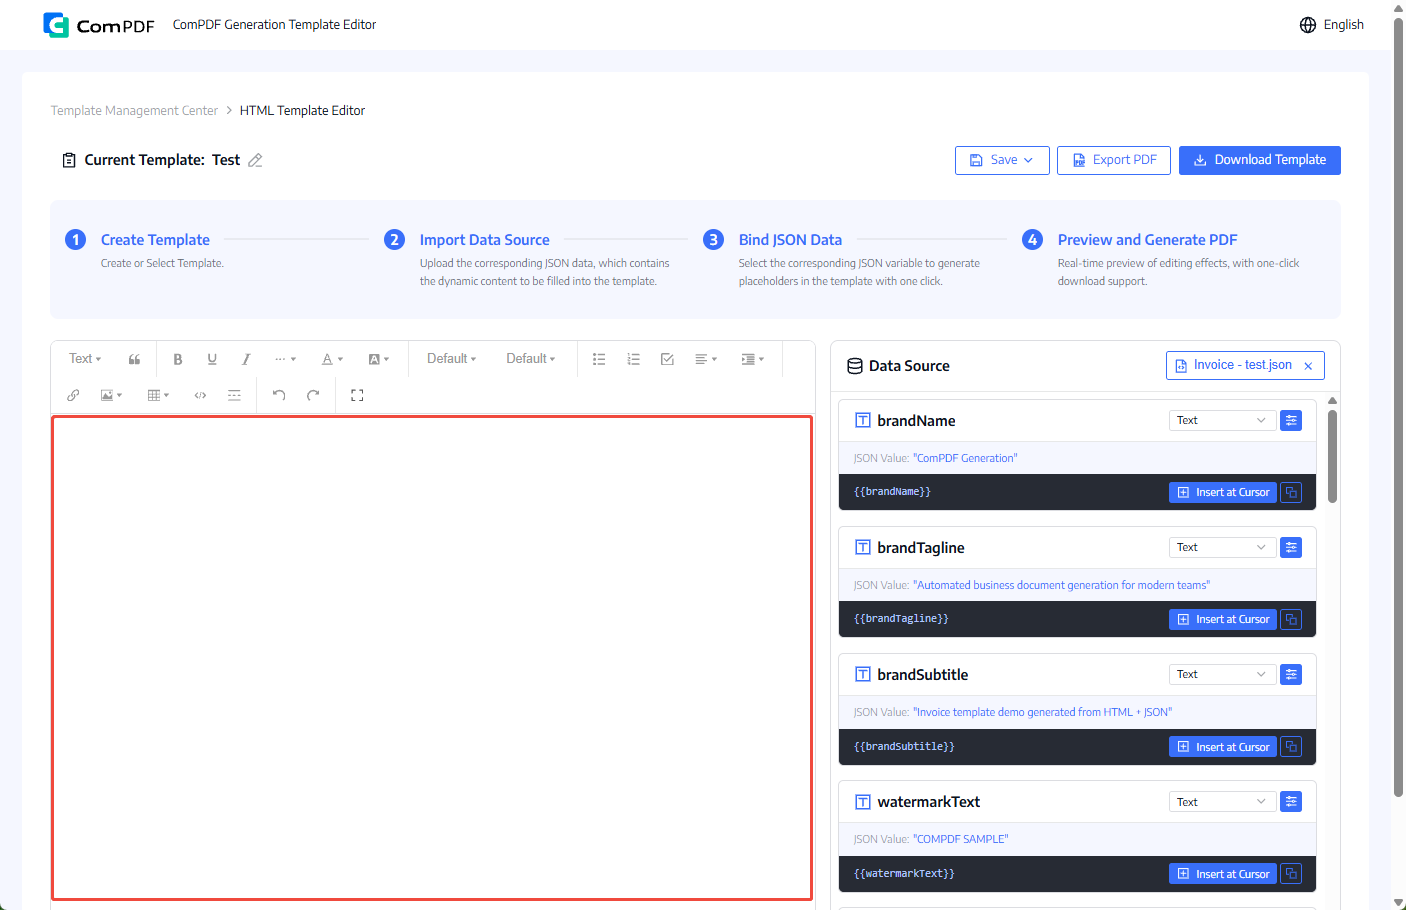
Before inserting dynamic content, you need to import a JSON data source so the editor can recognize the fields available for mapping.
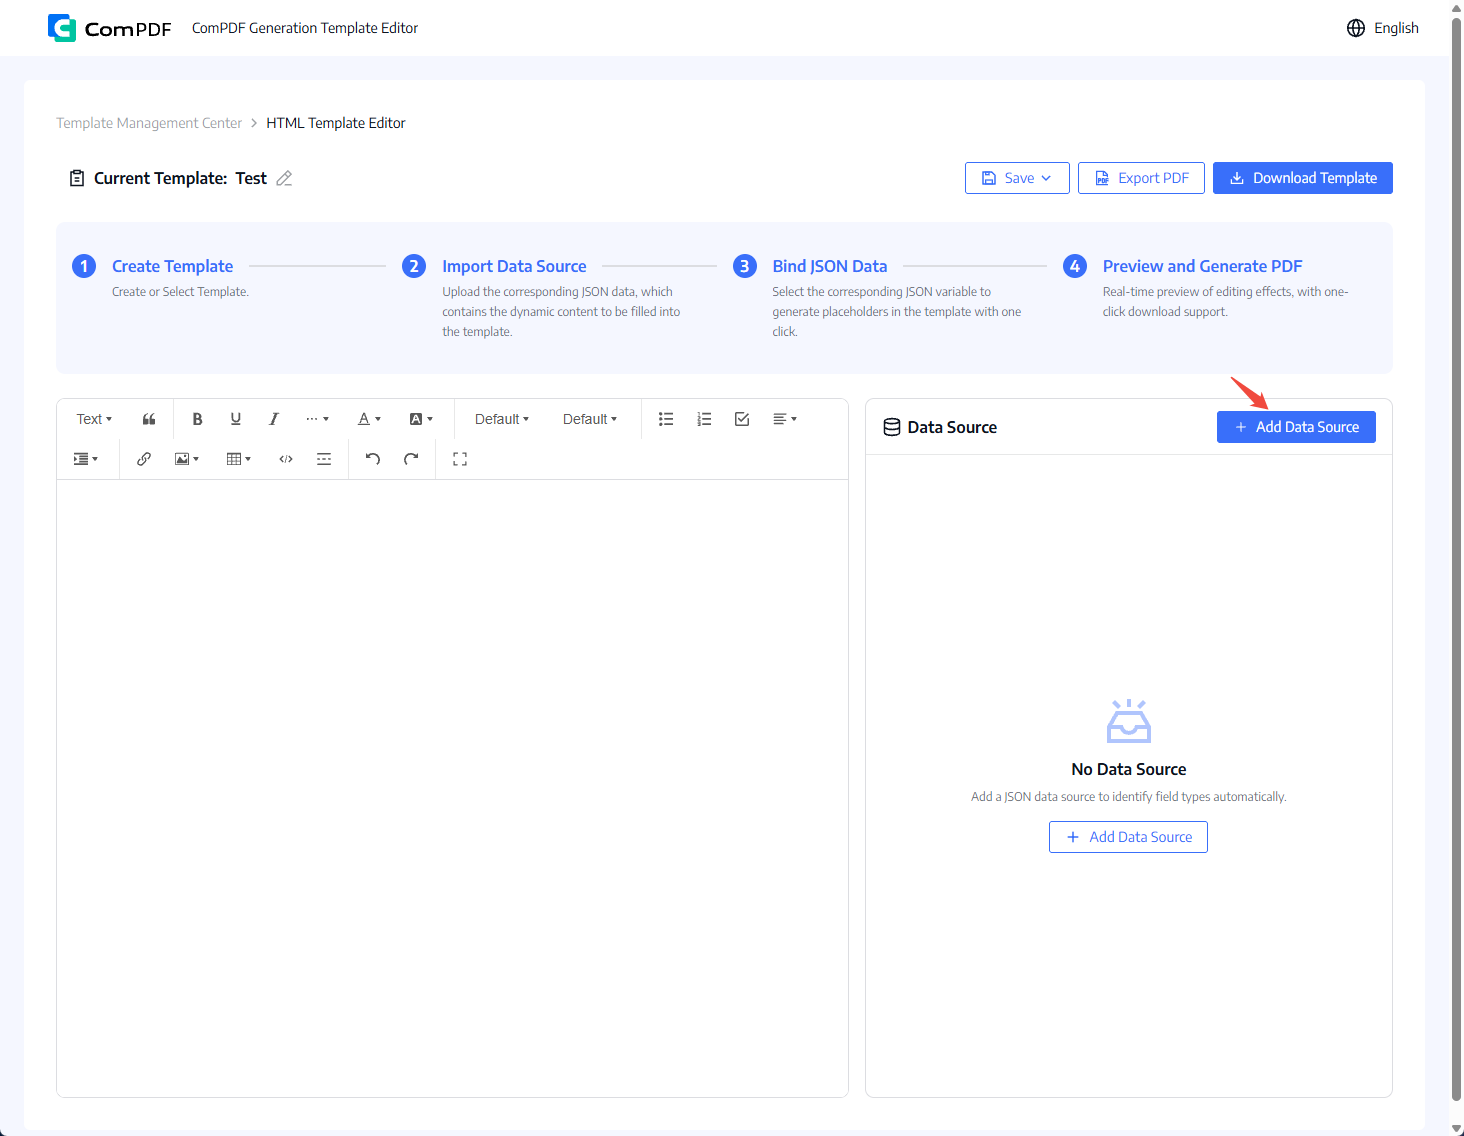
Upload a JSON file
Paste or type JSON code directly
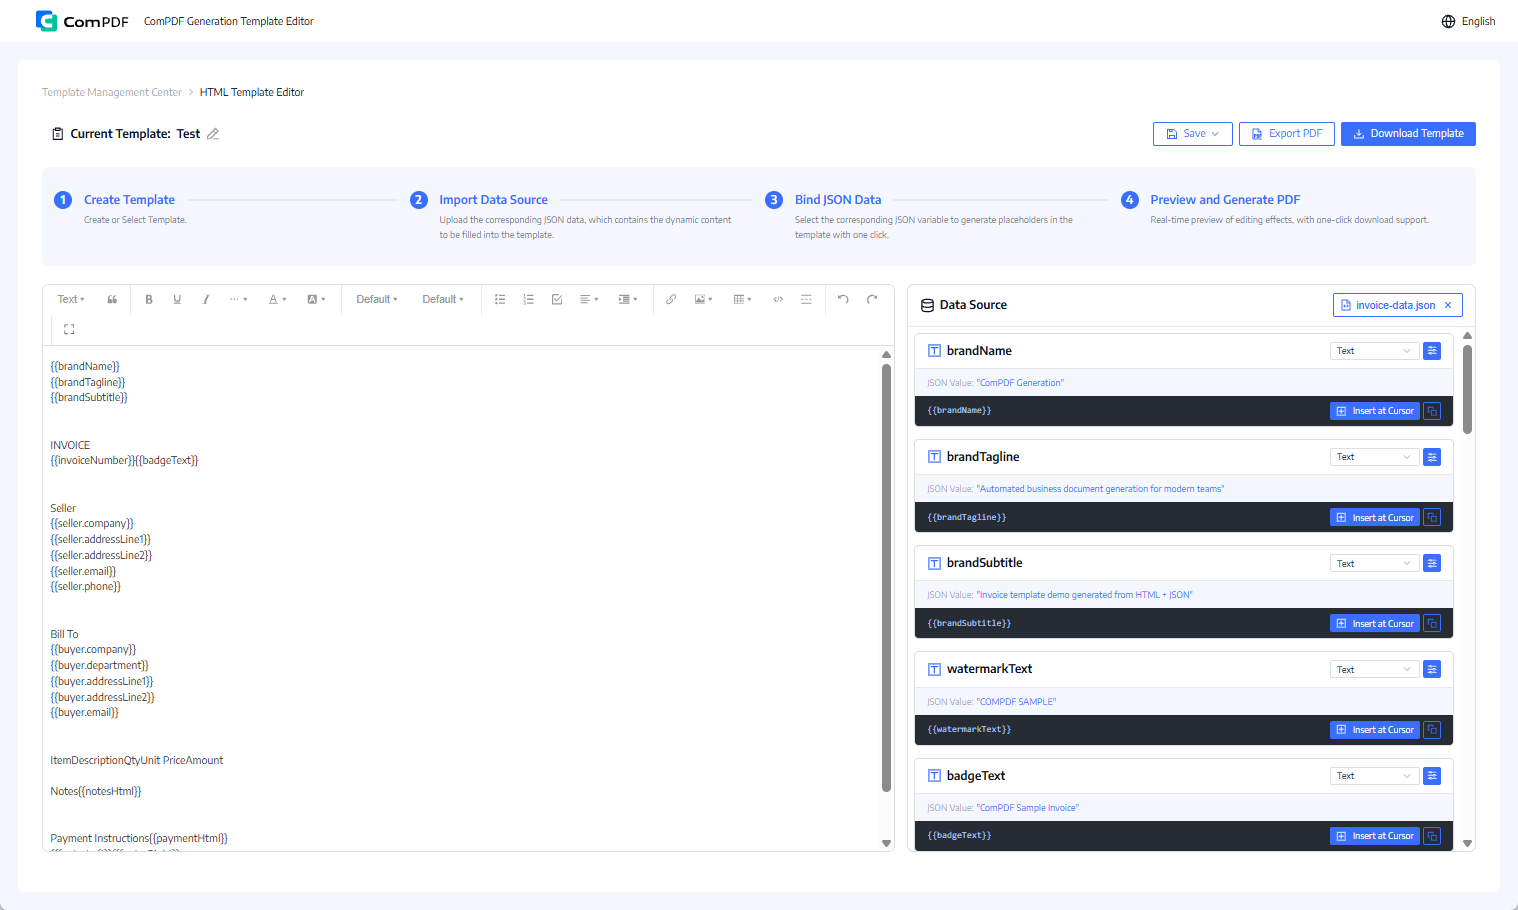
If you need specific display rules for field values, you can configure data formatting in this section to match different business document requirements.
If you want to adjust how placeholder values are displayed in the final output, click the button shown below and configure the field as needed. Common options include calculations, conditional logic, and date formatting.
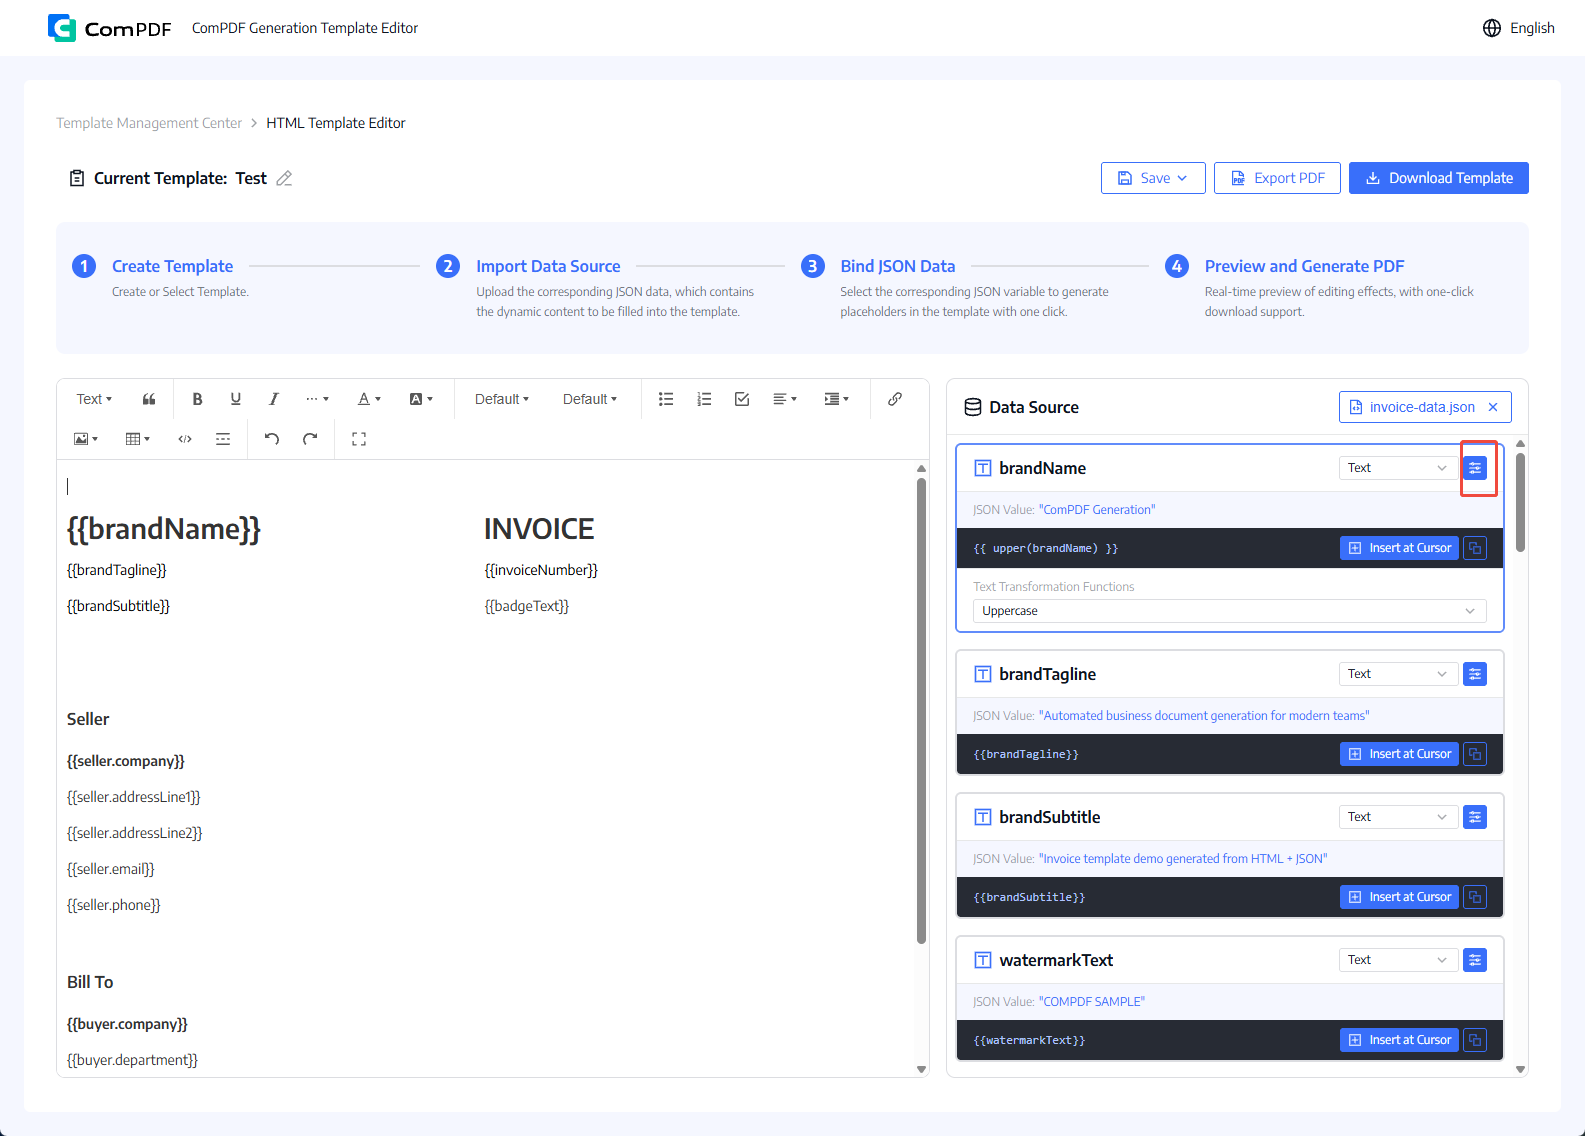
| Type | Supported Processing |
|---|---|
| Text | Concatenate strings, convert to uppercase, convert to lowercase |
| Number | Addition, subtraction, multiplication, division, exponentiation, modulo, rounding, multiply two values, divisibility checks, odd/even checks, size comparison, equality comparison, currency symbols, and symbol-position settings |
| Date | MM/DD/YYYY, DD/MM/YYYY, YYYY-MM-DD, YYYY-MM-DD HH:mm:ss |
| Image | Width (px), height (px) |
| Boolean | Display text for true, display text for false |
After setting a field type to Number, select a currency format, currency symbol, and whether the symbol appears before or after the amount. Supported symbols include US$, $, €, ¥, £, CN¥, CHF, A$, CA$, HK$, S$, ₹, ₩, NT$, R$, R, Rp, ₺, ฿, RM, د.إ, ر.س, ₽, and ₫.
After importing the data source, you can insert fields into designated positions in the template as placeholders. During PDF generation, the system automatically replaces these placeholders with actual data.
If certain fields require specific formatting in the generated PDF as shown below, configure the field format first according to Configure JSON Field Formatting, then insert the fields into the HTML template.
displaying currency symbols for amounts,
converting text to uppercase,
performing calculations based on JSON data,
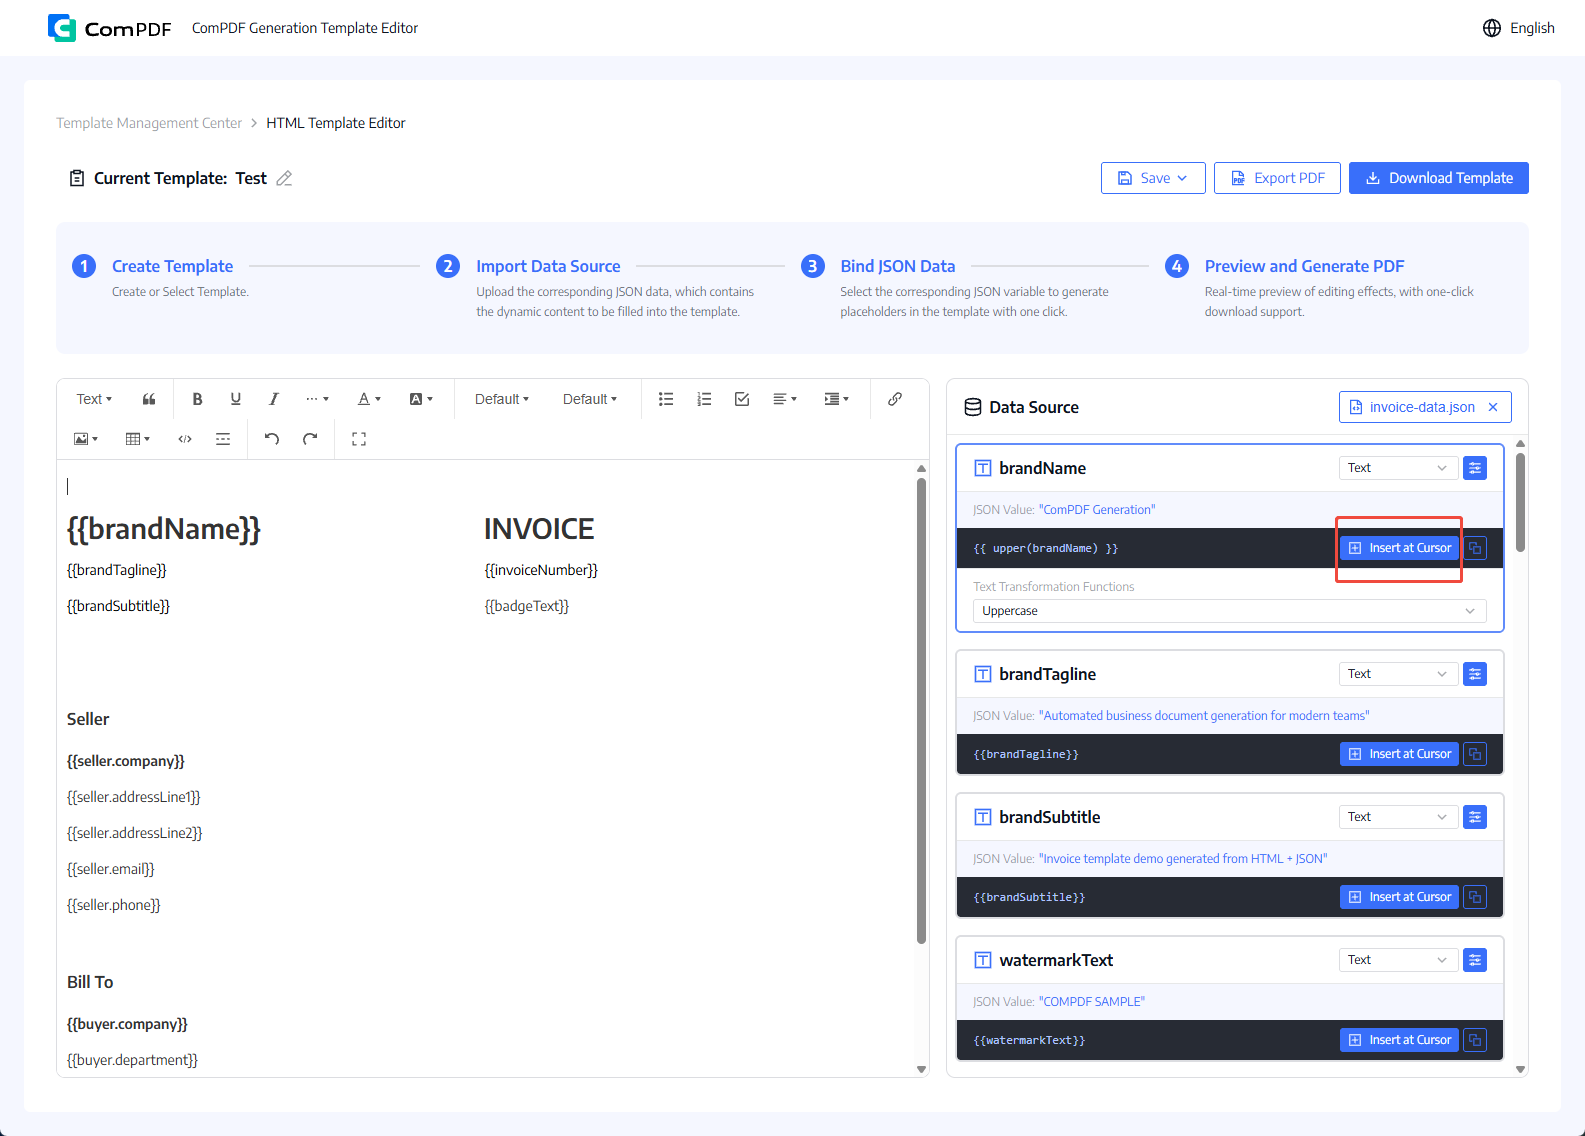
Method 1: Place the cursor where you want to insert the field in the left editor. Select the target field from the data source panel on the right and click the Insert at Cursor button to add the field into the HTML template.
Method 2: Click the Copy button beside the data you want to insert, then paste it directly into the rich text editor on the left, and the system inserts the field as a placeholder at the current cursor position.
Once the template design is complete, the system automatically replaces placeholders with actual data during PDF export.
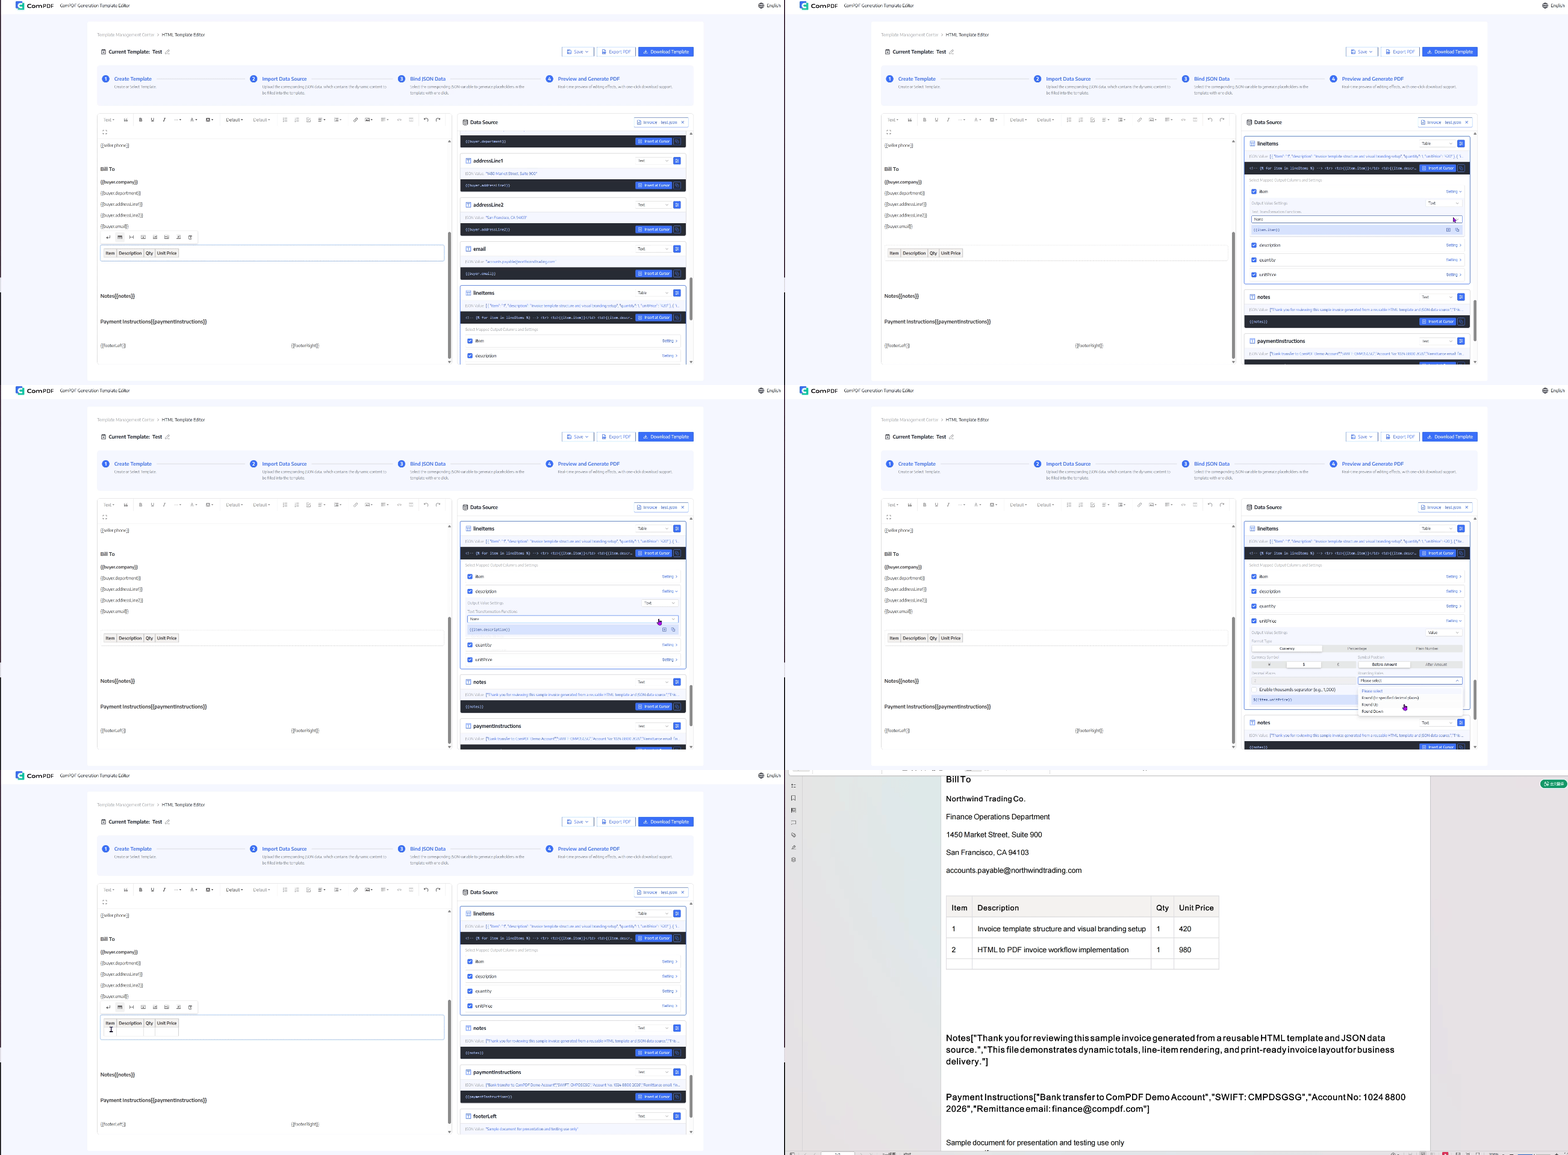
If you need to populate list-based or line-item data in a template, use the following workflow to insert table data row by row into the HTML template.
Prepare the relevant table data in the data source first, then insert placeholders into the data row of the template table. The system will populate the table based on the field mapping.
Step 1: Prepare list-type data in the data source, such as order details, product information, or expense records.
Step 2: Insert a table into the HTML template and keep one row as the detail data row. This row will be used as a loop block for automatically populating JSON data.
Step 3: Insert corresponding field placeholders into the first cell on the left side of the data row, such as product name, quantity, unit price, and total amount.
Step 4: Verify that placeholder names exactly match JSON field names.
When generating the document, the system automatically creates additional rows based on the number of items in the list and fills in the corresponding values.
After editing the template, save your current work in time so it can be revised later, versioned properly, or reused across scenarios.
Two save options are available at the top of the editor:
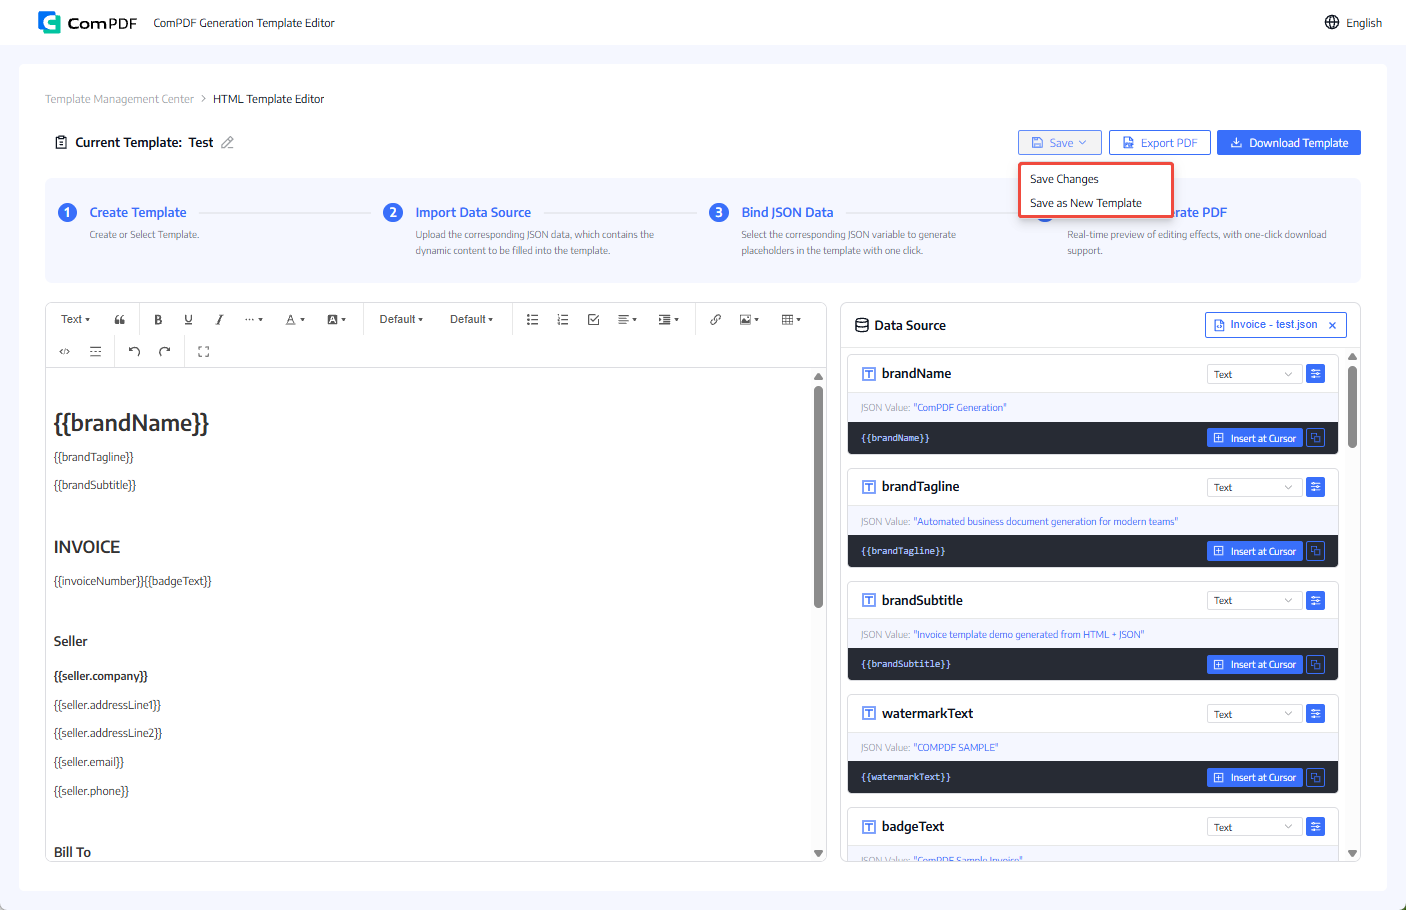
Click Download HTML Template at the top to export a template package for local backup, team sharing, archiving, or later migration.
The package usually includes:
Before exporting from the target template page, confirm the following:
Once everything is confirmed, click Export PDF to generate the file.
If export fails or the output is not as expected, check the following items in order:
If you edited the template but did not save it, the system may not export based on the latest content. Click Save Changes first, then try exporting again.
If the JSON structure is incorrect, missing brackets, or contains invalid field syntax, the system cannot recognize the data source correctly. Validate the JSON first and re-import it.
If variable names in the template do not exactly match JSON field names, the system cannot replace them correctly. Check spelling, letter case, and hierarchy carefully.
If the template contains wide tables, oversized images, or complex layouts, the exported PDF may show page breaks, truncation, or layout issues. Optimize the layout and test with sample data first.
For multi-row tables, nested structures, or complex layouts, start with a minimal version first and add elements gradually so problems are easier to isolate.