
CocoaPods is a leading dependency manager for Swift projects, streamlining the integration of libraries like the ComPDF PDF Library for iOS. Utilizing CocoaPods simplifies the process compared to manually adding SDK frameworks.
This tutorial will guide you through integrating the ComPDF iOS PDF Library into your project using CocoaPods. We'll start with instructions on installing CocoaPods—if you already have it, you can skip this step. Next, you'll learn how to add ComPDF to your project and leverage the iOS PDF Viewer to display PDF files seamlessly.
Requirements for iOS CocoaPods Integration
To integrate the ComPDF iOS PDF library through CocoaPods, the following requirements are needed.
- iOS 10.0 or higher.
- Xcode 13.0 or newer for Swift.
- CocoaPods: Follow the Step 1 to finish the CocoaPods Installation.
- ComPDF iOS PDF Library: Access the ComPDF PDF library for iOS on GitHub.
- License of ComPDF iOS PDF Library: Obtain a 30-day trial license by applying on the ComPDF website. It will be sent via email.
Note: ComPDF requires the latest stable version of Xcode available at the time the release was made. This is a hard requirement, as each version of Xcode is bundled with a specific version of the iOS Base SDK, which often defines how UIKit and various other frameworks behave.
Step 1: Install CocoaPods for iOS PDF Library Integration
CocoaPods is available as a Ruby gem you can install by running gem install cocoapods. Using the default Ruby available on macOS can require you to use sudo when installing CocoaPods: sudo gem install cocoapods. To avoid this, we recommend using a Ruby version manager like rbenv.
Step 2: Install & Integrate ComPDF iOS PDF Library
Open the terminal and go to the directory containing your Xcode project: cd .../PDFViewer. Run pod init. This will create a new Podfile next to your .xcodeproj file:

Open the newly created Podfile in a text editor and add the ComPDF pod URL:
# Uncomment the next line to define a global platform for your project
# platform :ios, '10.0'
target 'PDFViewer' do
# Comment the next line if you don't want to use dynamic frameworks
use_frameworks!
+ pod "ComPDF", podspec:'https://www.compdf.com/download/ios/cocoapods/xcframeworks/compdfkit/2.0.0.podspec'
# Pods for PDFViewer
endRun pod install and wait for CocoaPods to download and integrate ComPDF into your project. Open your application’s newly created workspace (PDFViewer.xcworkspace) in Xcode.
Step 3: Apply the License Key for Your iOS PDF Project
Find the License Key
Accurately obtaining the license key is crucial for the application of the license.
1. In the email you received, locate the XML file containing the license key.
2. Open the XML file and determine the license type through the <type>online</type> field. If present, it is an online license; if absent or <type>offline</type> is present, it is an offline license.
Online License:
<?xml version="1.0" encoding="UTF-8" standalone="no"?>
<license version="1">
    <platform>ios</platform>
    <starttime>xxxxxxxx</starttime>
    <endtime>xxxxxxxx</endtime>
    <type>online</type>
    <key>LICENSE_KEY</key>
</license>
Offline License:
<?xml version="1.0" encoding="UTF-8" standalone="no"?>
<license version="1">
    <platform>ios</platform>
    <starttime>xxxxxxxx</starttime>
    <endtime>xxxxxxxx</endtime>
    <key>LICENSE_KEY</key>
</license>
3. Copy the LICENSE_KEY from the <key>LICENSE_KEY</key> field.
Apply the License Key
Go to the ComPDF official website's Online Sales Interface to submit a trial application and receive an immediate free trial license for iOS platforms, valid for 30 days. Before using any ComPDF SDK classes, you must perform the following steps to apply the license to your application:
1. In AppDelegate.swift, import the header file ComPDF.
2. Depending on the type of authentication obtained in the previous step, whether online or offline, initialize the license using the respective method based on your requirements.
3. Initialize the license:
- Online license:
Follow the code below and call the method CPDFKit.verify(withOnlineLicense: "LICENSE_KEY") { code, message in } in func application(_ application: UIApplication, didFinishLaunchingWithOptions launchOptions: [UIApplication.LaunchOptionsKey: Any]?) -> Bool. You need to replace the LICENSE_KEY with the license you obtained.
  func application(_ application: UIApplication, didFinishLaunchingWithOptions launchOptions: [UIApplication.LaunchOptionsKey: Any]?) -> Bool {
  // Set your online license key here. ComPDF is commercial software.
  // Each ComPDF license is bound to a specific app bundle id.
  // com.compdfkit.pdfviewe

    CPDFKit.verify(withOnlineLicense: "YOUR_LICENSE_KEY_GOES_HERE") { code, message in
    }
}
- Offline license:
Follow the code below and call the method CPDFKit.verifyWithKey:"LICENSE_SECRET" in func application(_ application: UIApplication, didFinishLaunchingWithOptions launchOptions: [UIApplication.LaunchOptionsKey: Any]?) -> Bool. You need to replace the LICENSE_KEY with the license you obtained.
  func application(_ application: UIApplication, didFinishLaunchingWithOptions launchOptions: [UIApplication.LaunchOptionsKey: Any]?) -> Bool {
  // Set your license key here. ComPDF is commercial software.
  // Each ComPDF license is bound to a specific app bundle id.
  // com.compdfkit.pdfviewer

    CPDFKit.verify(withKey: "YOUR_LICENSE_KEY_GOES_HERE")
    return true
}
Step 4: Verify the Swift PDF Library CocoaPods Integration
Open the created Xcode workspace and import ComPDF into any of your source files:
import ComPDFAfter you run the target, ComPDF has been successfully integrated into your project.
Step 5: Open a PDF File with Your iOS PDF Viewer
The following guides are given in Swift to open PDF files with the iOS PDF Viewer you created just now.
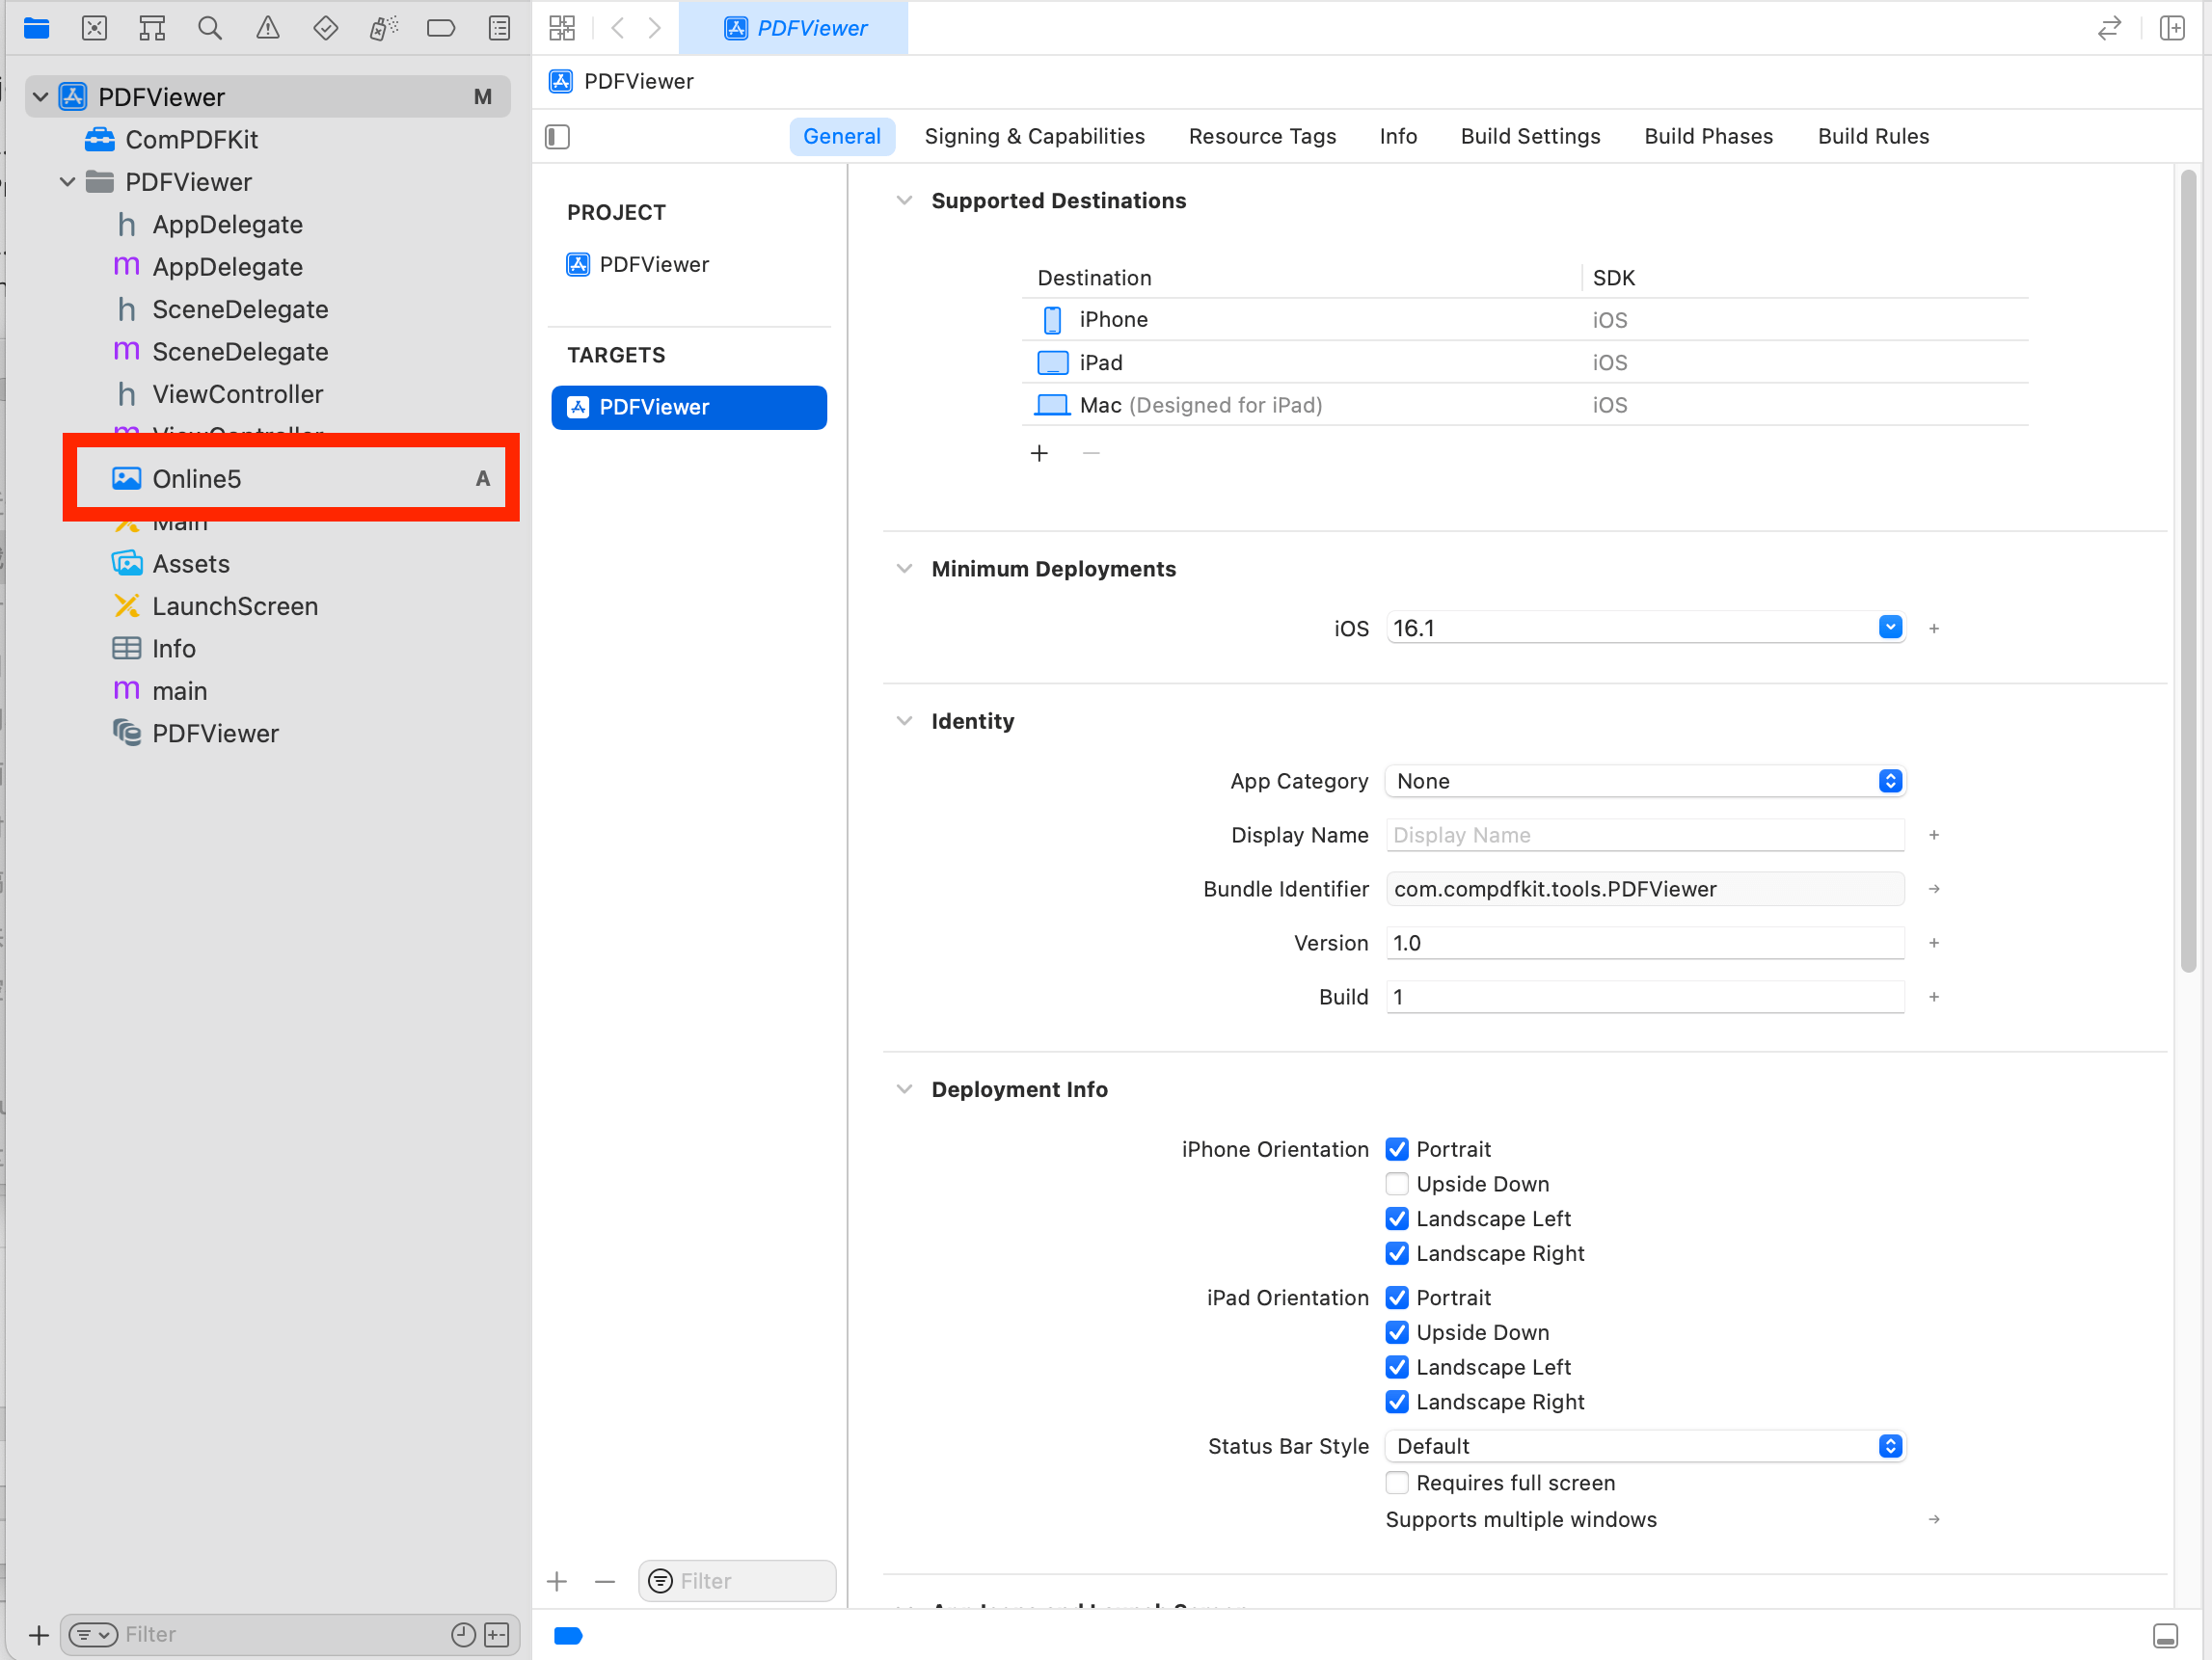
1. Prepare a test PDF file, and drag and drop it into the newly created PDFView project. This way, you can load and preview the local PDF document using NSBundle. The following image shows an example of importing a PDF document named “Online5” into the project.
2. Create a CPDFDocument object through NSURL, and create a CPDFView to display it. The following code shows how to load PDF data using a local PDF path and display it by CPDFView.
guard let filePath = Bundle.main.path(forResource: "Online5", ofType: "pdf") else { return }
let url = URL(fileURLWithPath: filePath)
let document = CPDFDocument(url: url)
let rect = self.view.bounds
let pdfView = CPDFView(frame: self.view.bounds)
pdfView.autoresizingMask = [.flexibleWidth, .flexibleHeight]
pdfView.document = document3. Add the created CPDFView to the view of the current controller. The sample code shows below.
self.view.addSubview(pdfView)The code shown here is a collection of the steps mentioned above:
override func viewWillAppear(_ animated: Bool) {
super.viewWillAppear(animated)
guard let filePath = Bundle.main.path(forResource: "Online5", ofType: "pdf") else { return }
let url = URL(fileURLWithPath: filePath)
let document = CPDFDocument(url: url)
let rect = self.view.bounds
let pdfView = CPDFView(frame: self.view.bounds)
pdfView.autoresizingMask = [.flexibleWidth, .flexibleHeight]
pdfView.document = document
self.view.addSubview(pdfView)
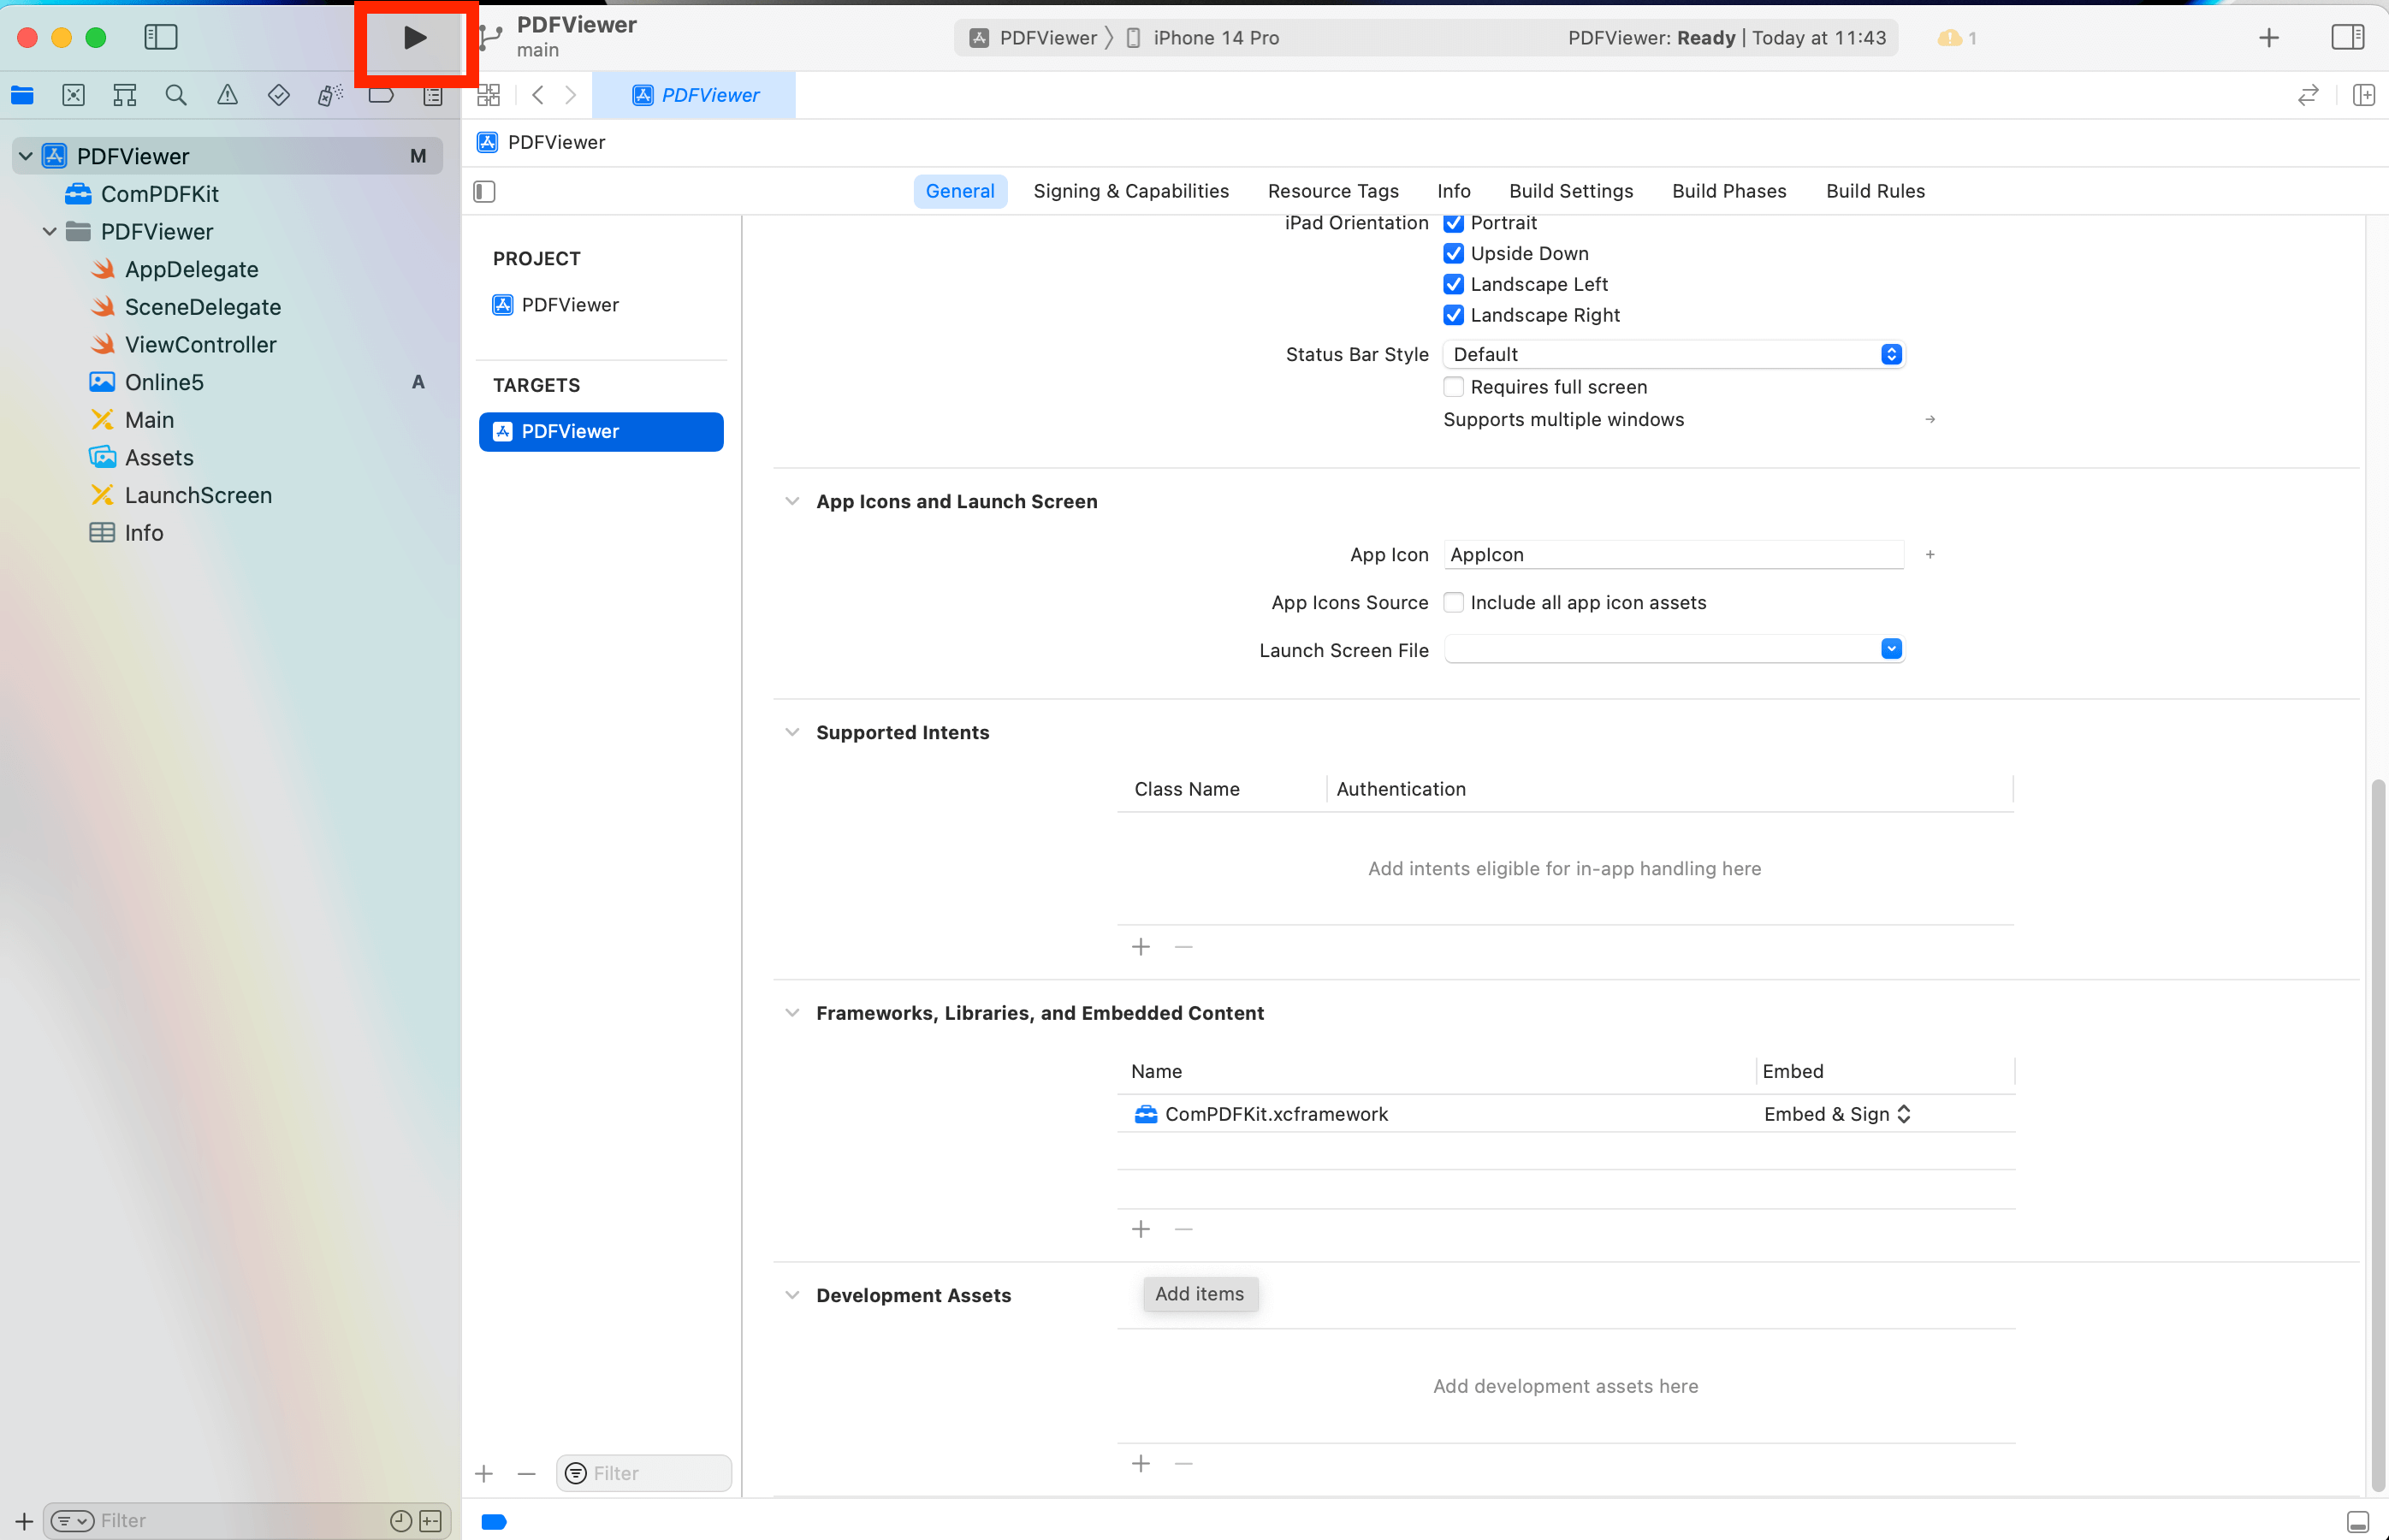
}4. Connect your device or simulator, and use shortcut Command_R to run the App. The PDF file will be opened and displayed.
What's More
Now, you have integrated the ComPDF iOS PDF Library through CocoaPods with Swift and get an iOS PDF Viewer to view PDF documents.
Explore further to unlock additional functionalities — such as annotating PDFs, managing forms, and implementing password protection. Whether you're developing an enterprise application or a small utility tool, ComPDF offers robust and scalable solutions tailored to your needs.
More about ComPDF for iOS:
- Developer Guides: For detailed integration information.
- Tech Support: Contact the ComPDF support team whenever you have problems with ComPDF products.
- Purchase iOS PDF SDK Online: ComPDF provides Lite and Plus version iOS PDF SDK for enterprises.
- Sales Team: To get more details and an accurate quote.
- Stay updated with the latest improvements through our Changelog.