PDF Generation Template Editor
Open-source visual PDF generation engine with customizable templates and developer-friendly APIs.
The ComPDF React Native SDK supports the following languages by default:
Adding Additional Localization to ComPDF
You can add additional translations by putting them into the res/strings-XX directory of your app. Android will automatically merge all string resources at build time. You can also override ComPDF strings of existing languages by putting them into the respective string folders.
Tip: To view a list of all available ComPDF string resources, copy them to your project from the following URL:
Here’s an example of adding French support:
app/src/main/res/values-fr directory in your project and create a strings.xml file in that directory.strings.xml file.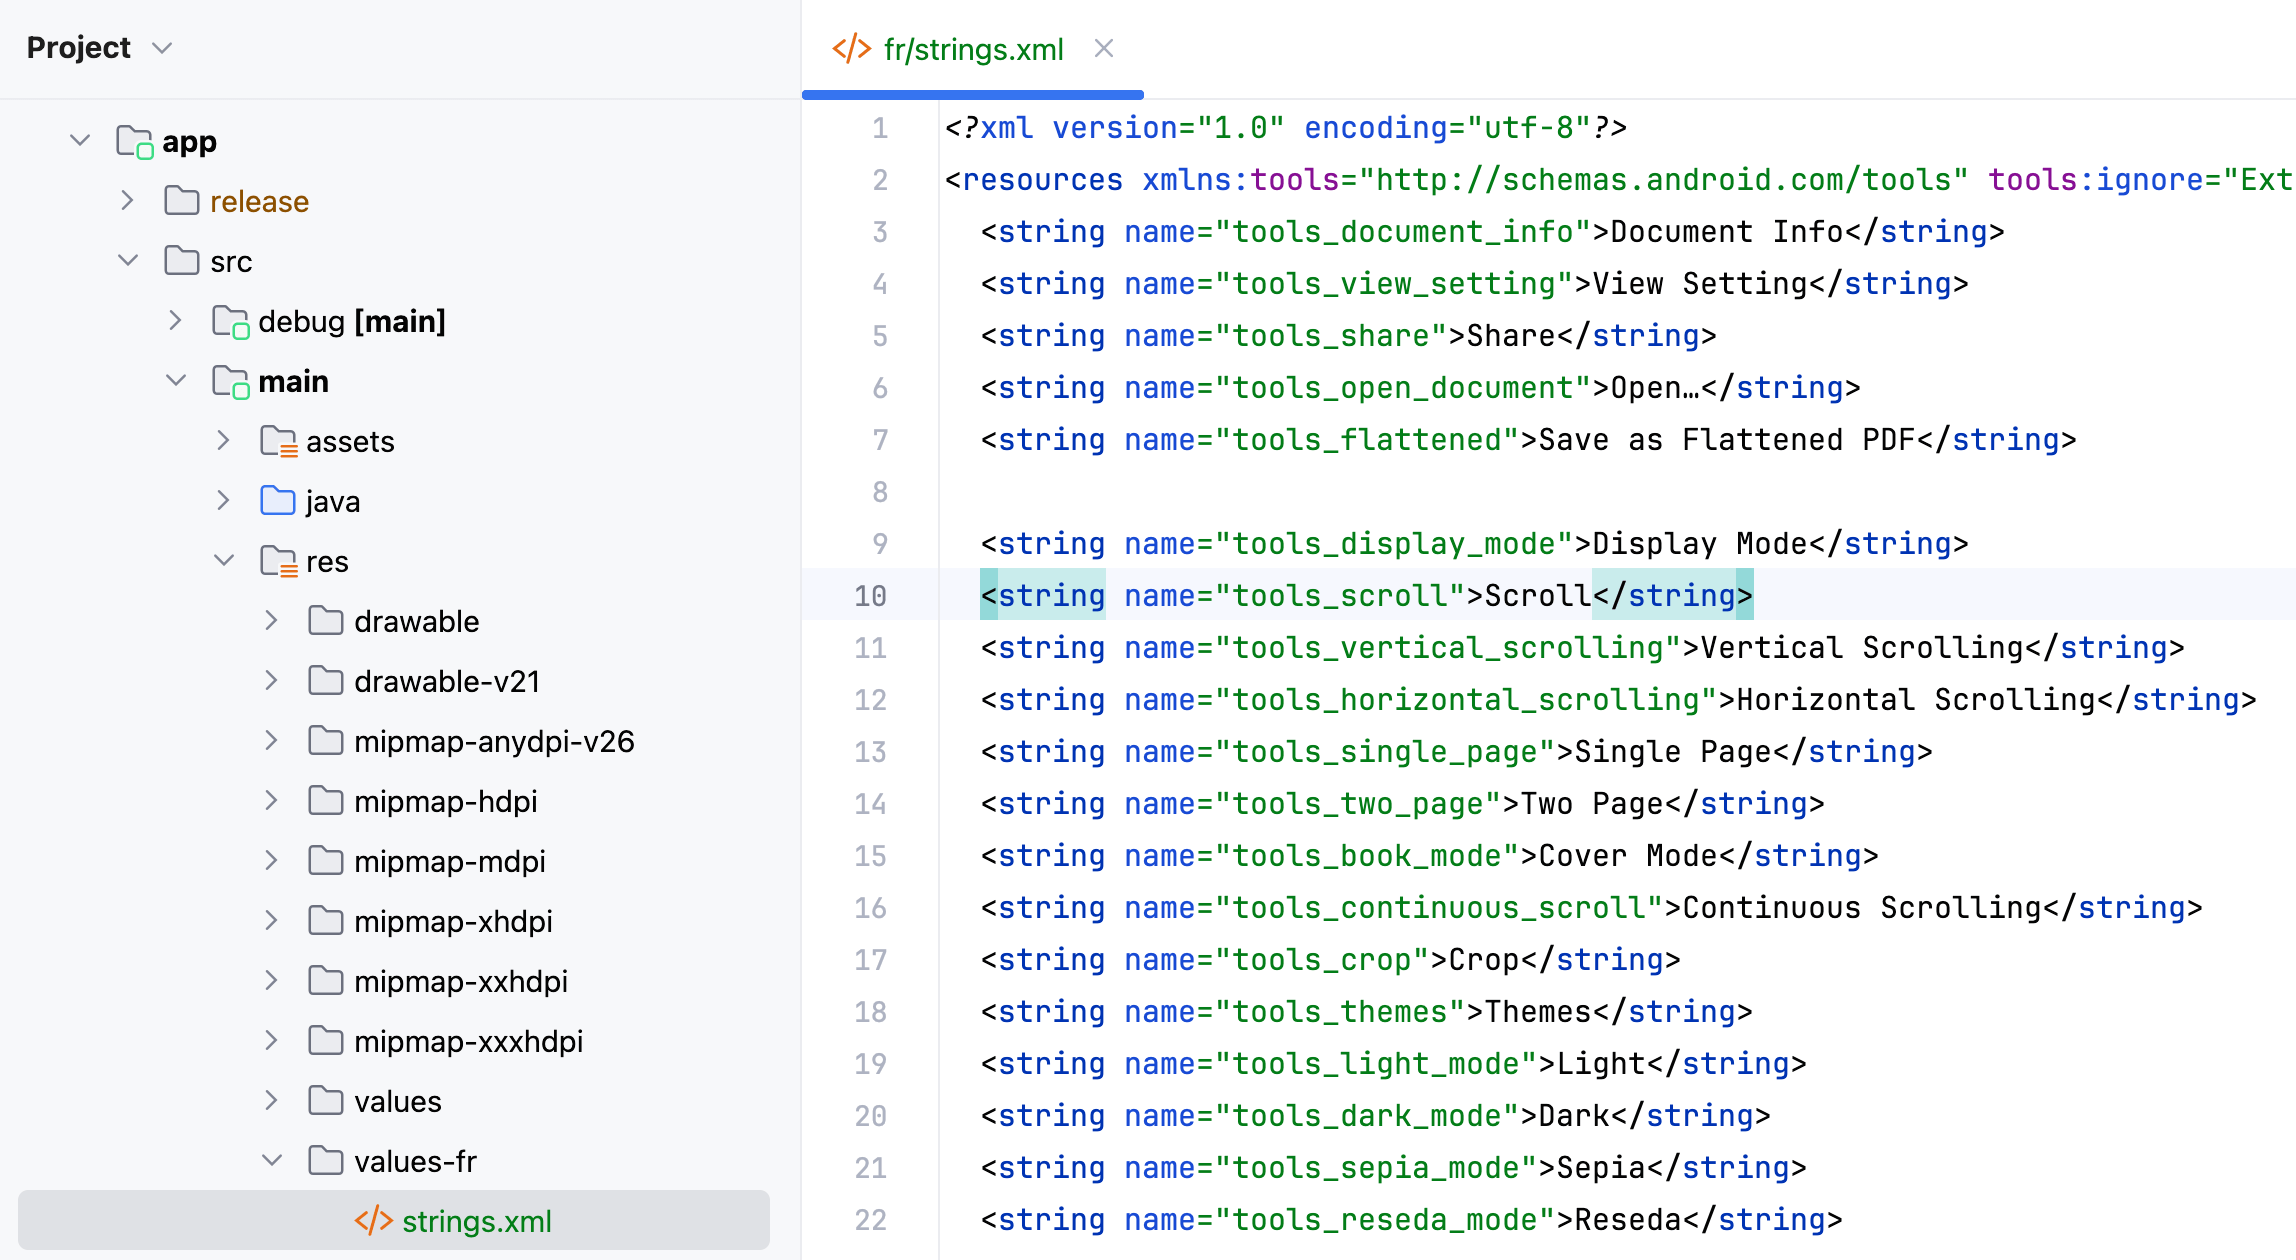
Original content:
<string name="tools_document_info">Document Info</string>Translated to French:
<string name="tools_document_info">Informations du document</string>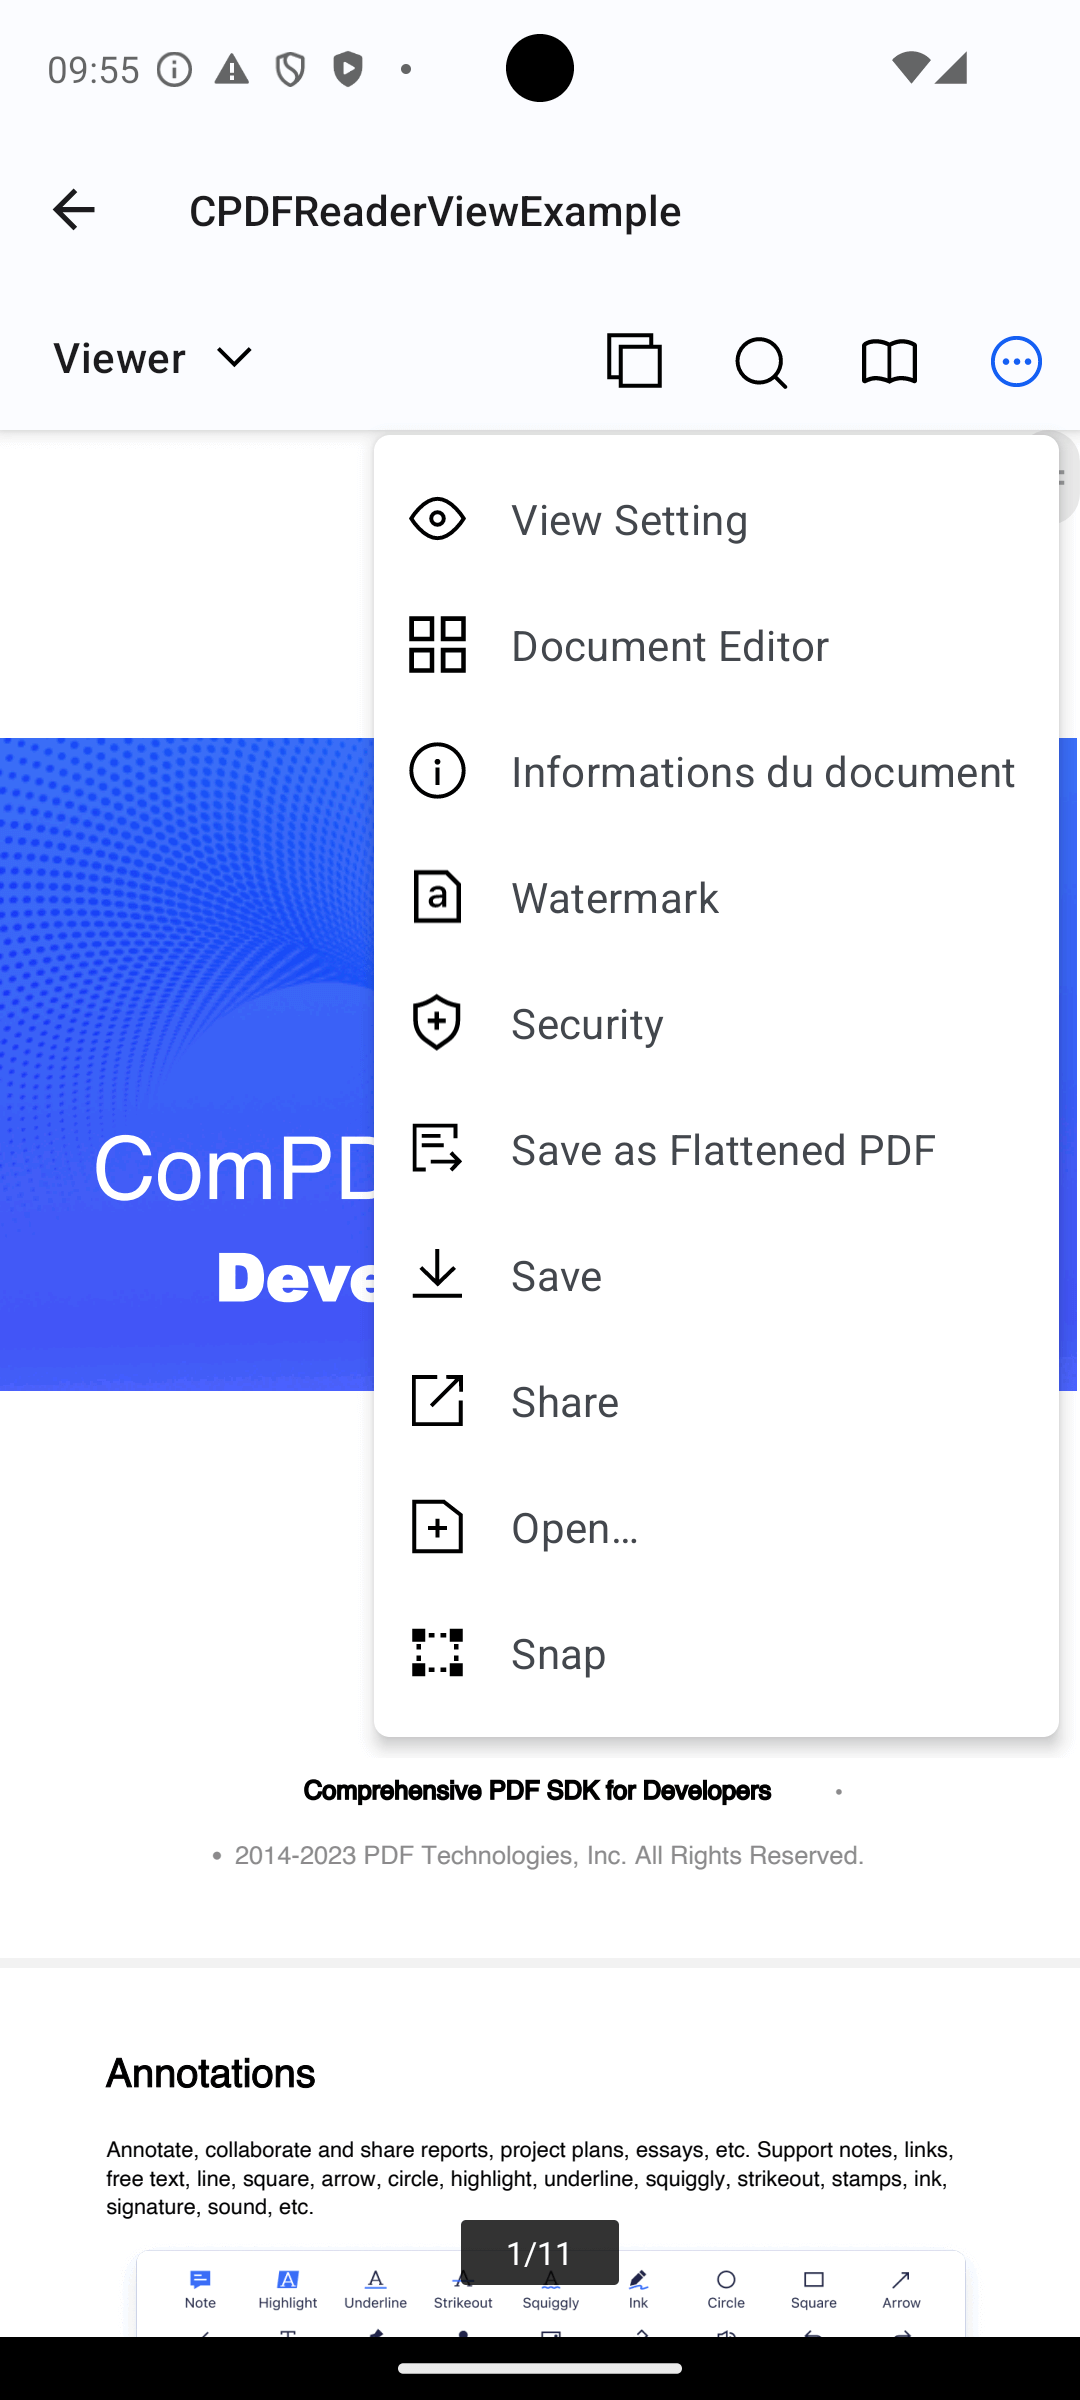
Configure the languages that require internationalization
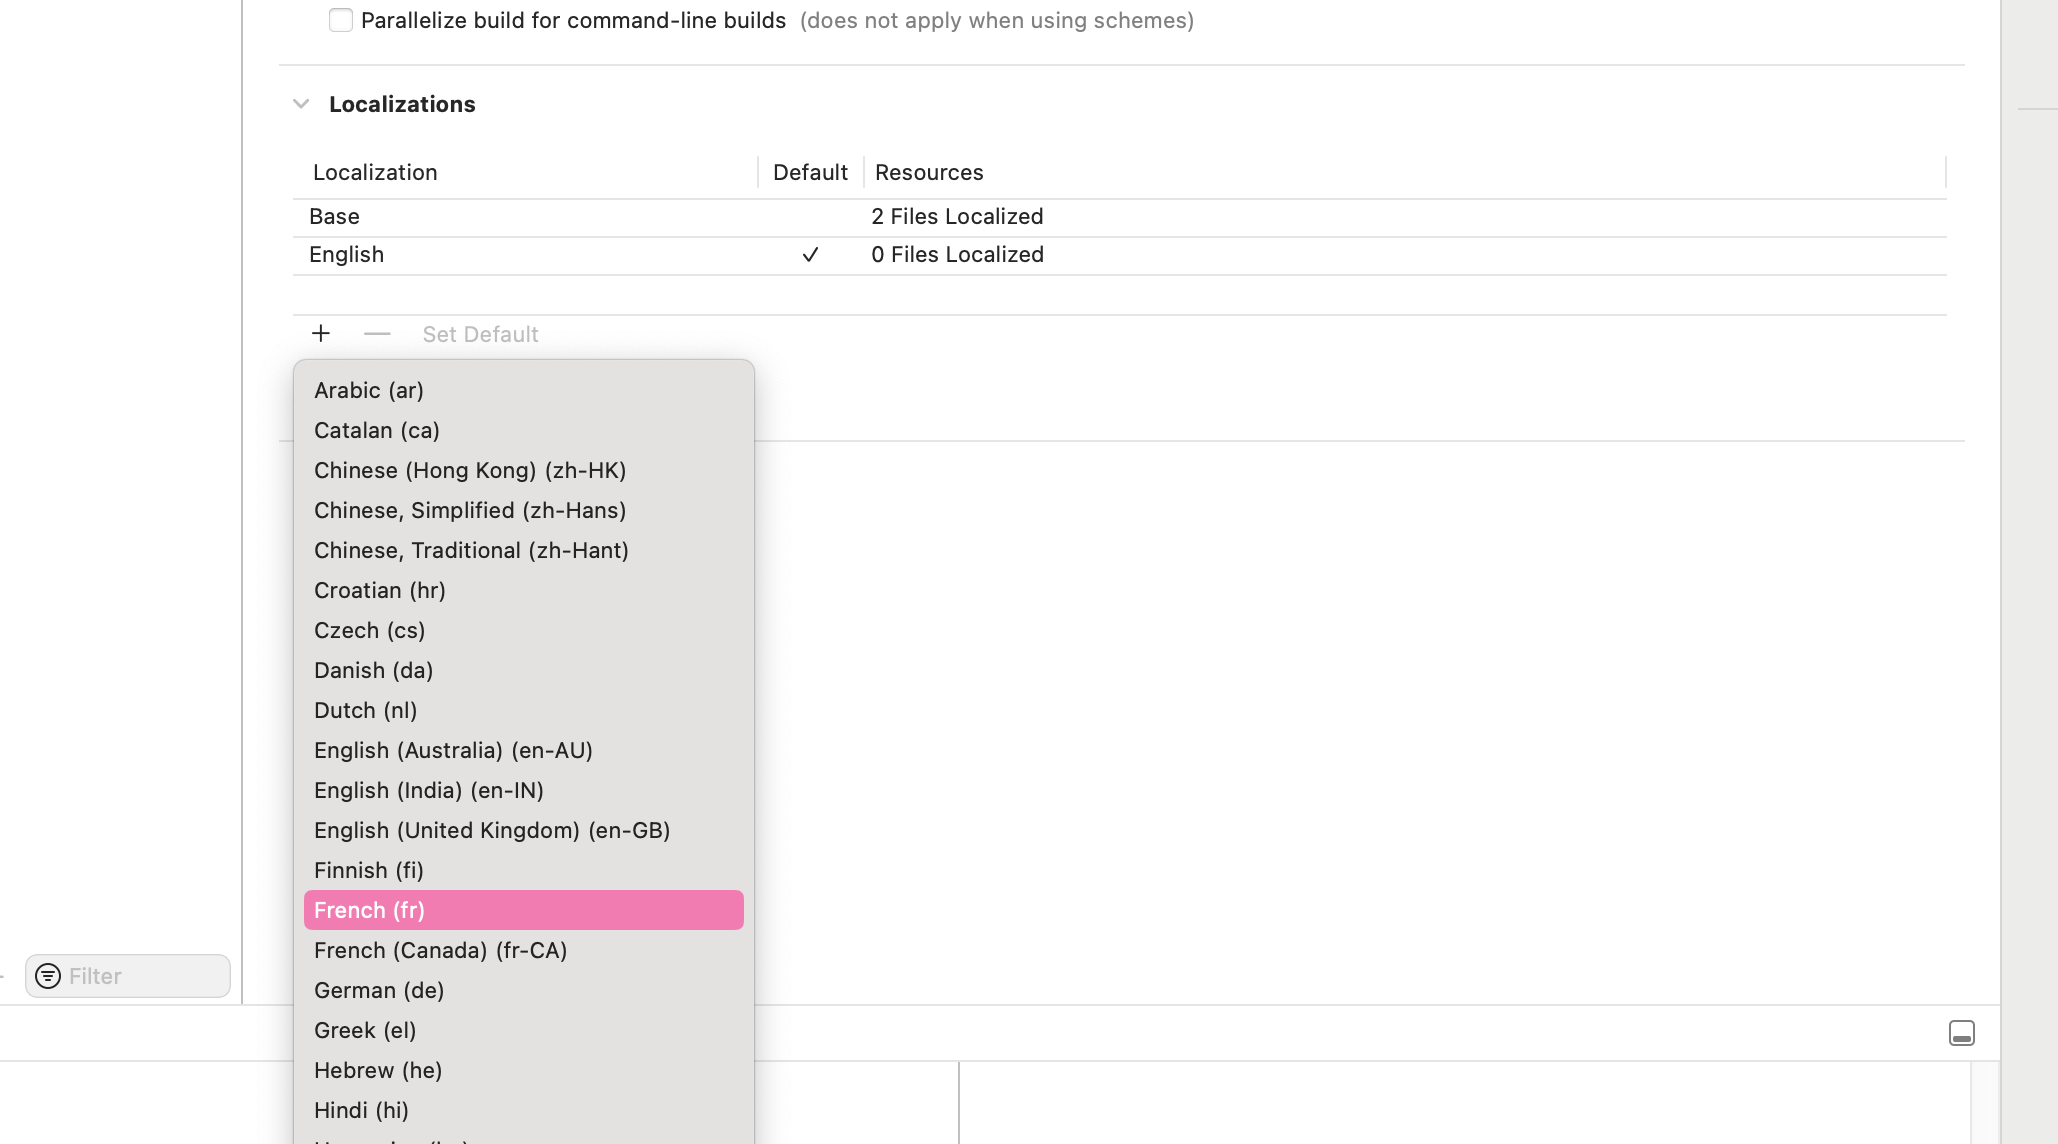
Open your React Native project's iOS project using Xcode. Then, select Project -> Info -> Localizations, click '+', and add the desired language for internationalization/localization, as shown below (make sure to check 'Use Base Internationalization' by default):
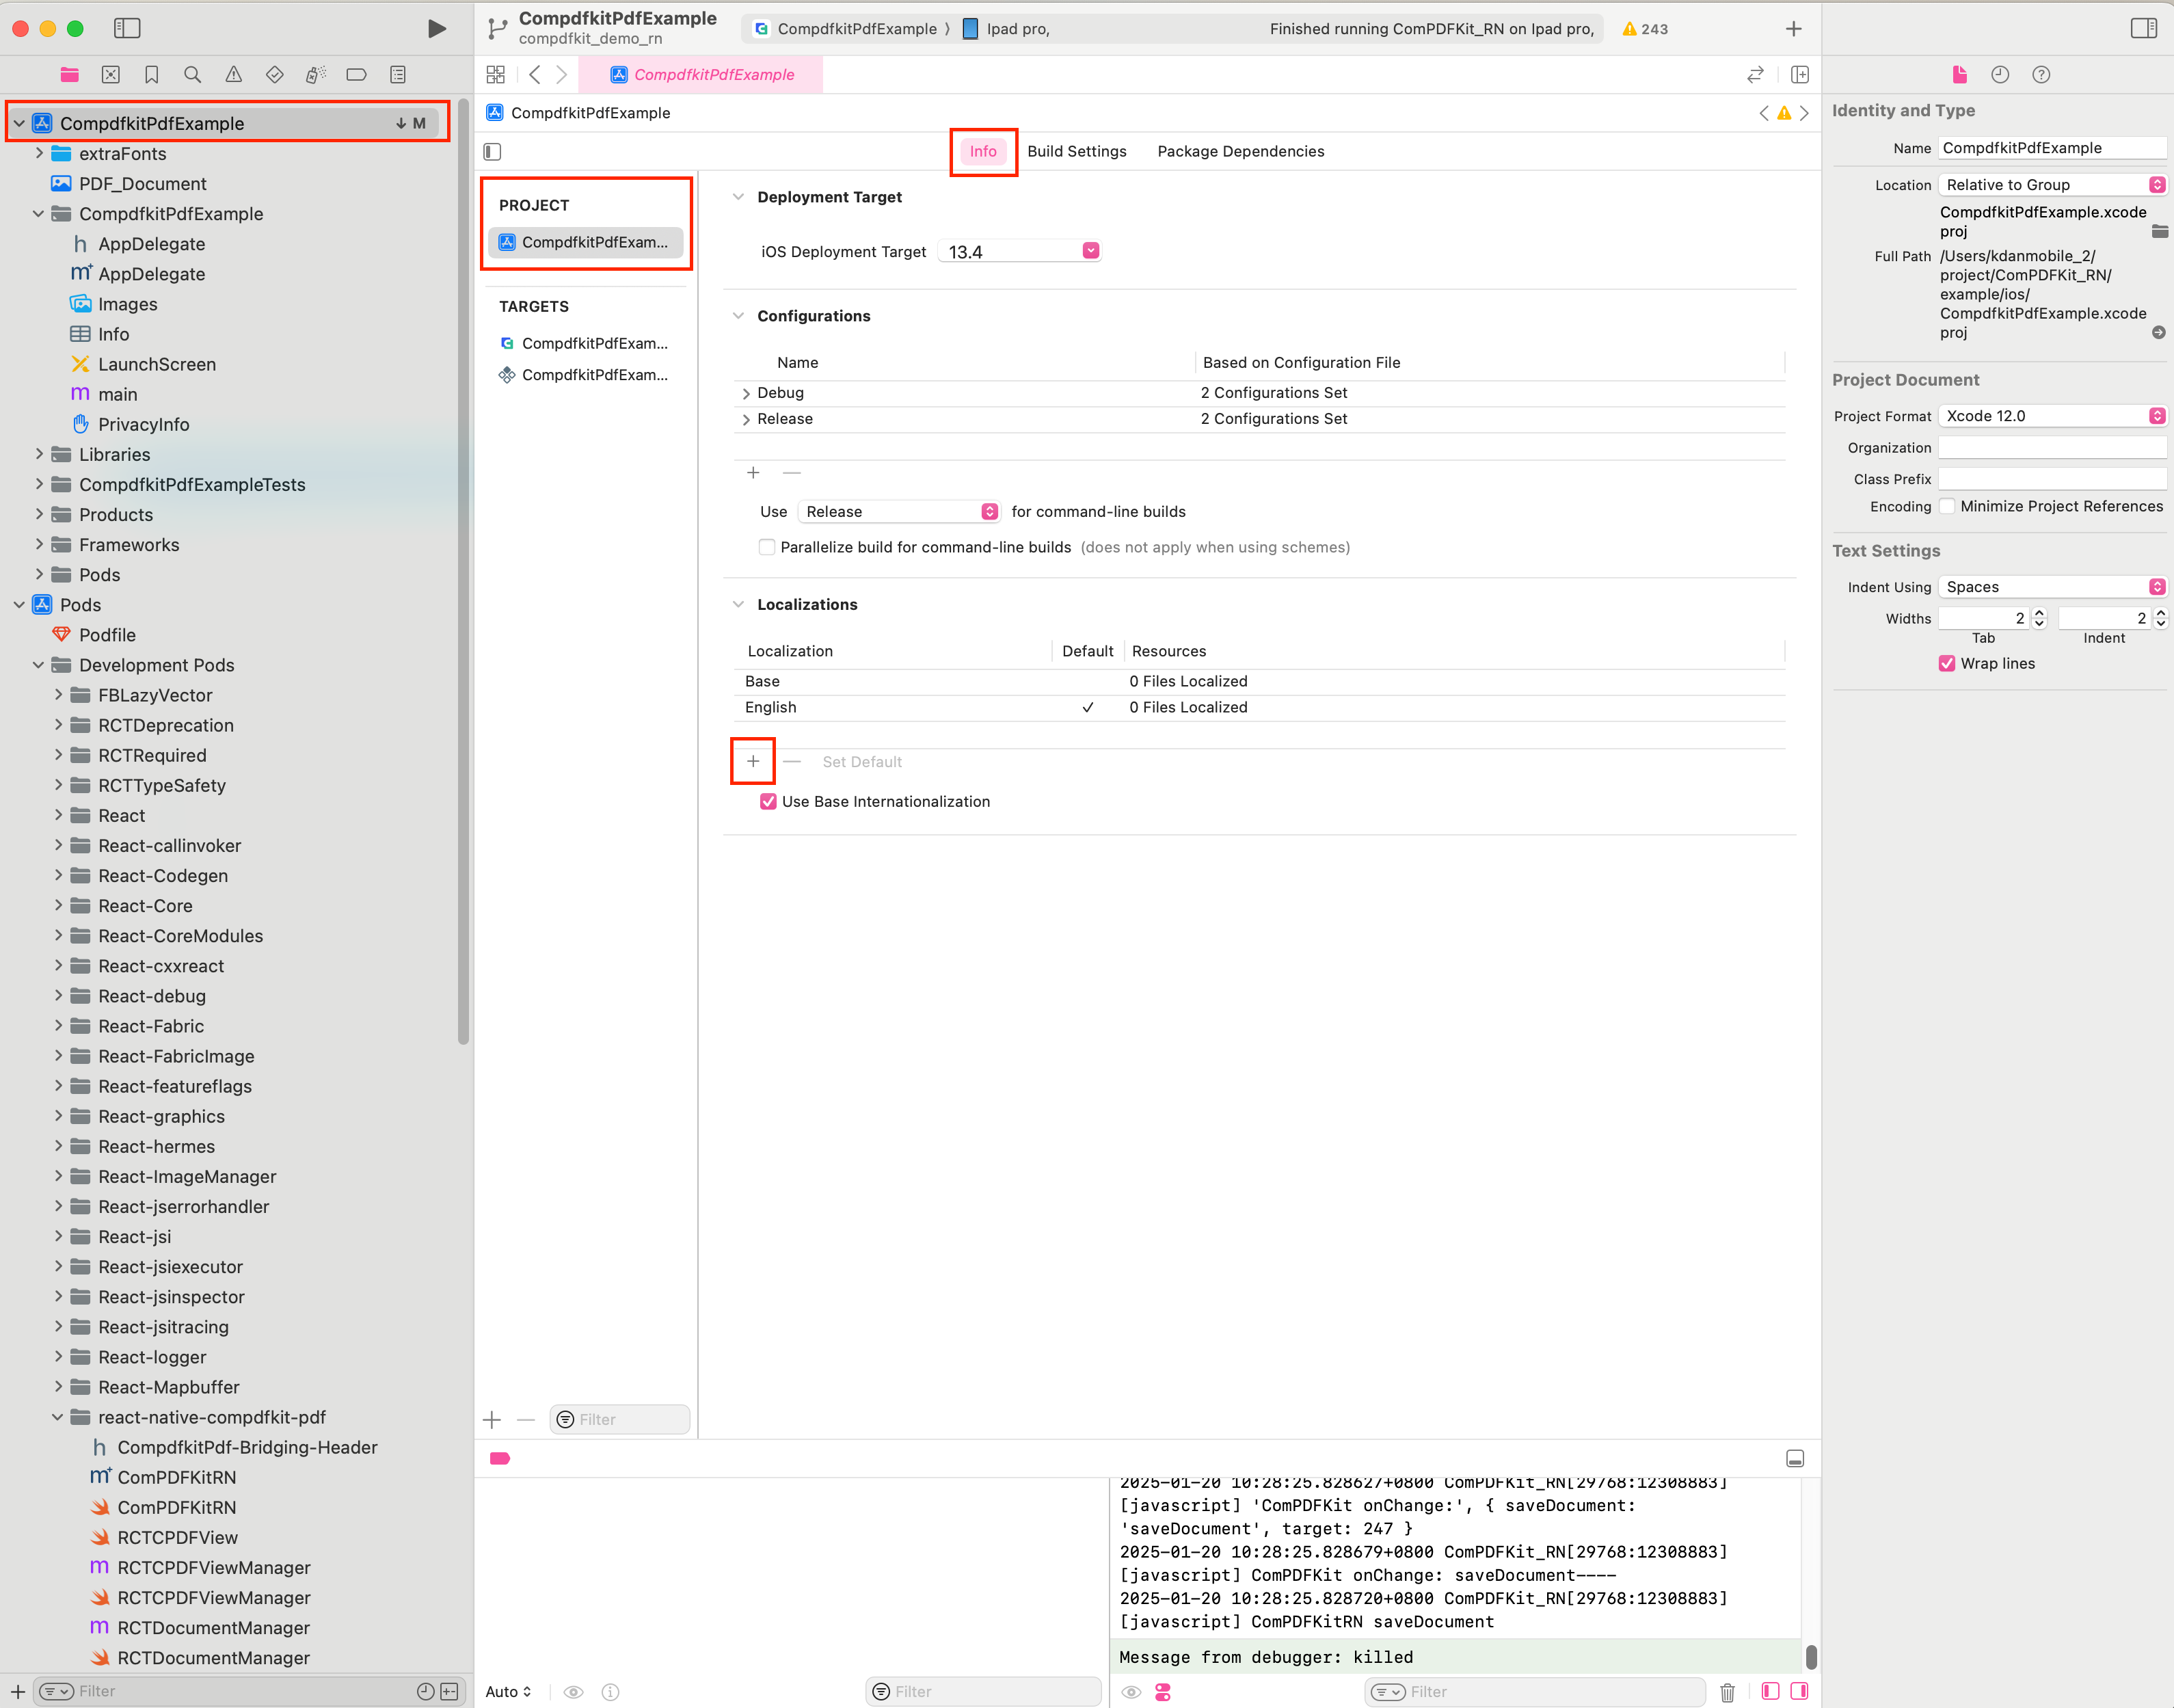
Here, we'll use adding French as an example, as shown below:
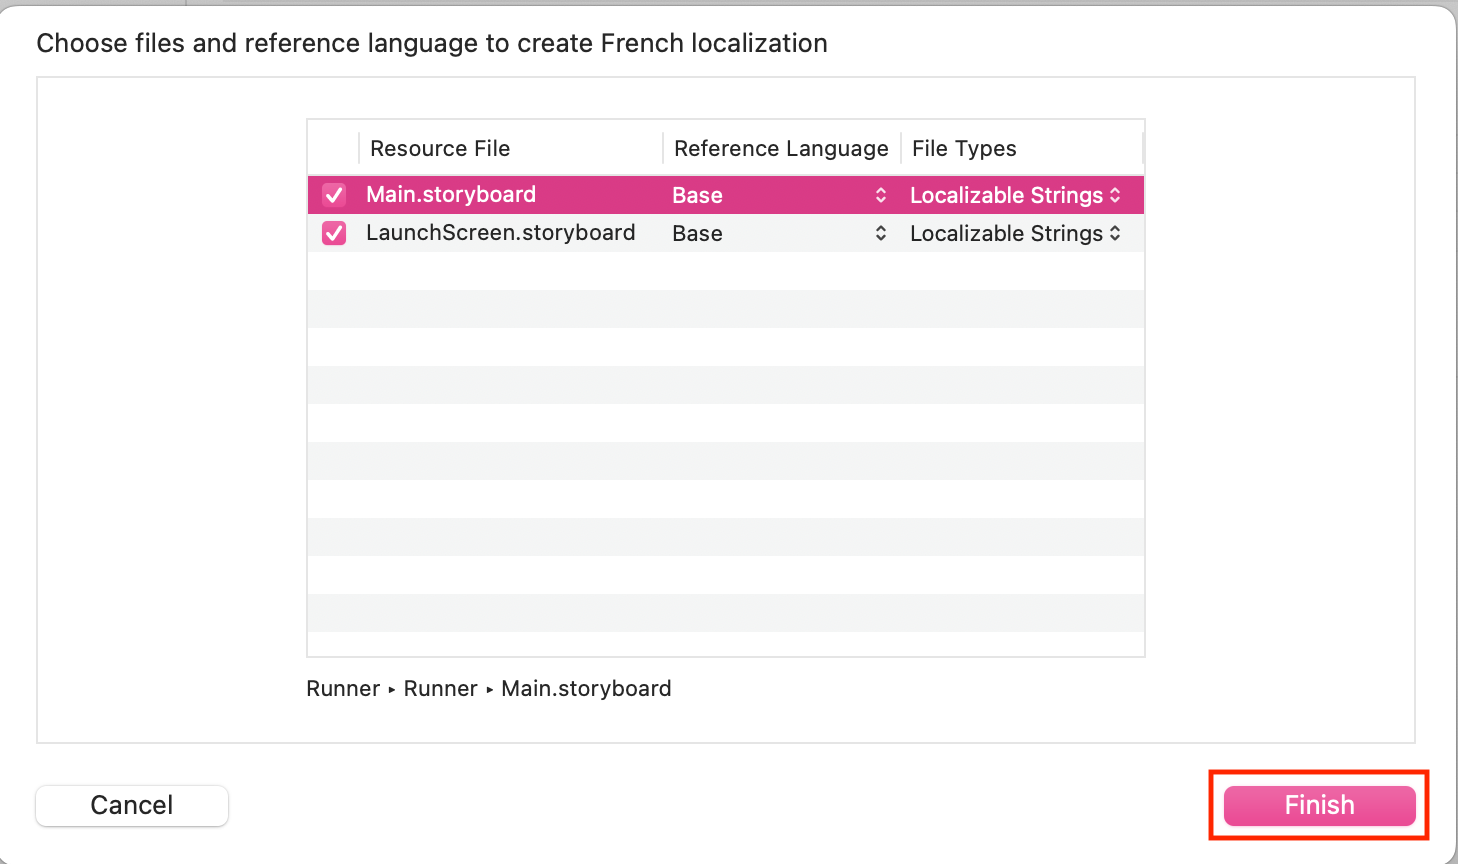
Pop up the following dialog, and click 'Finish' directly, as shown below:
Internationalizing the application name
Internationalizing the application name refers to displaying different names for the same app in various language environments (i.e., the language settings on the mobile device).
Creating Localizable.strings file
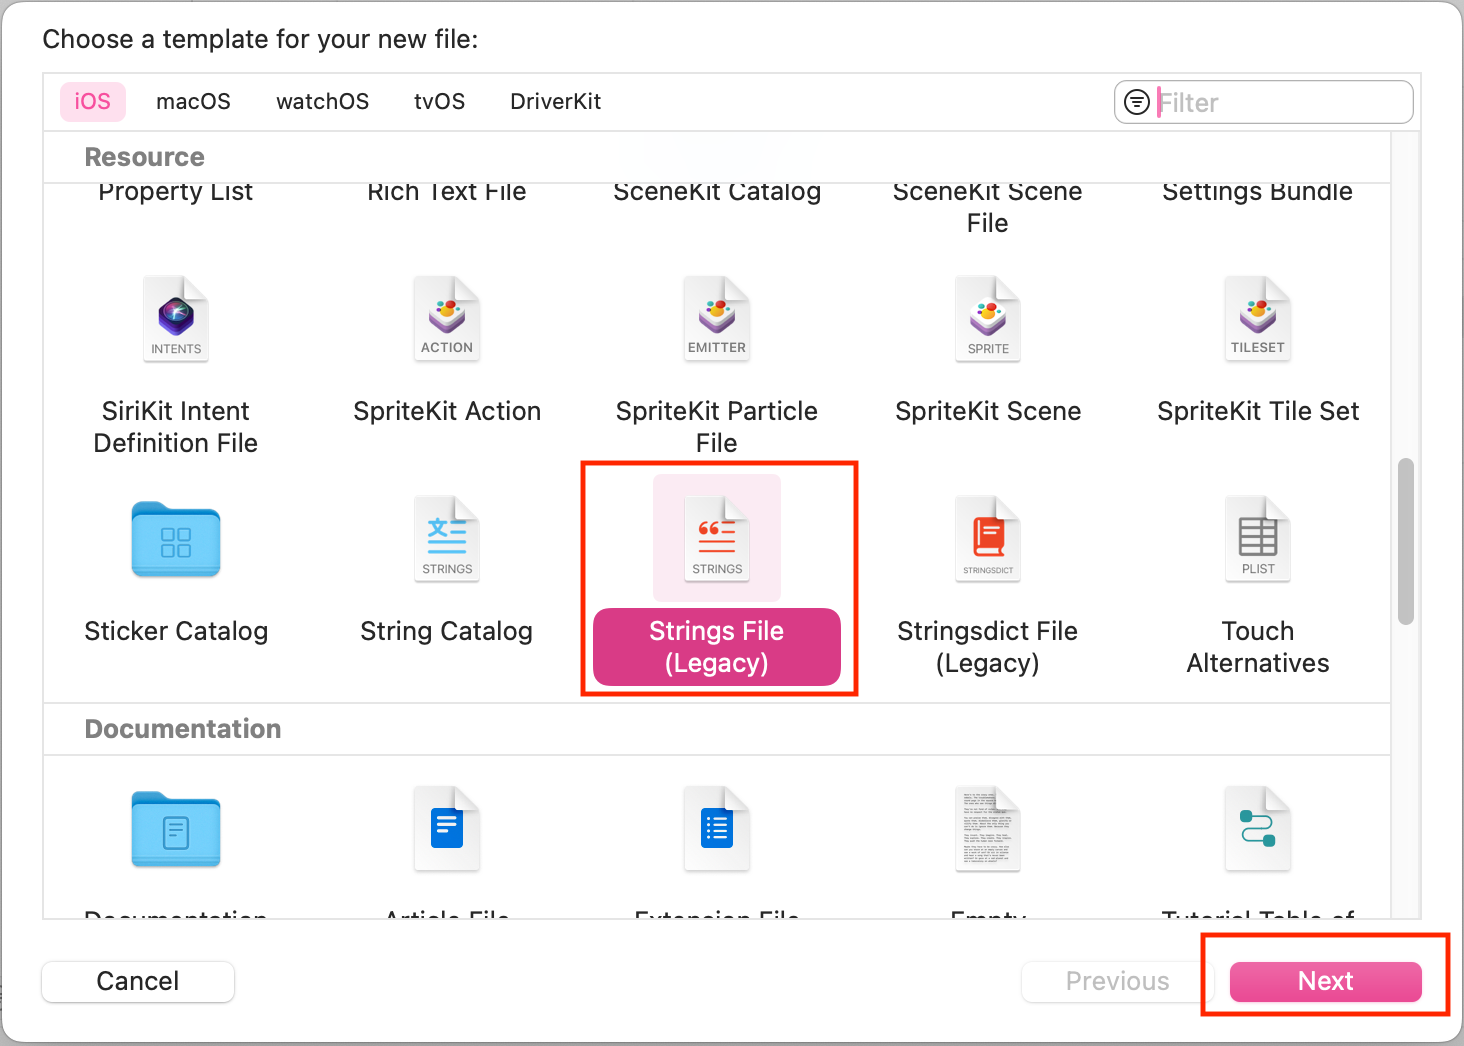
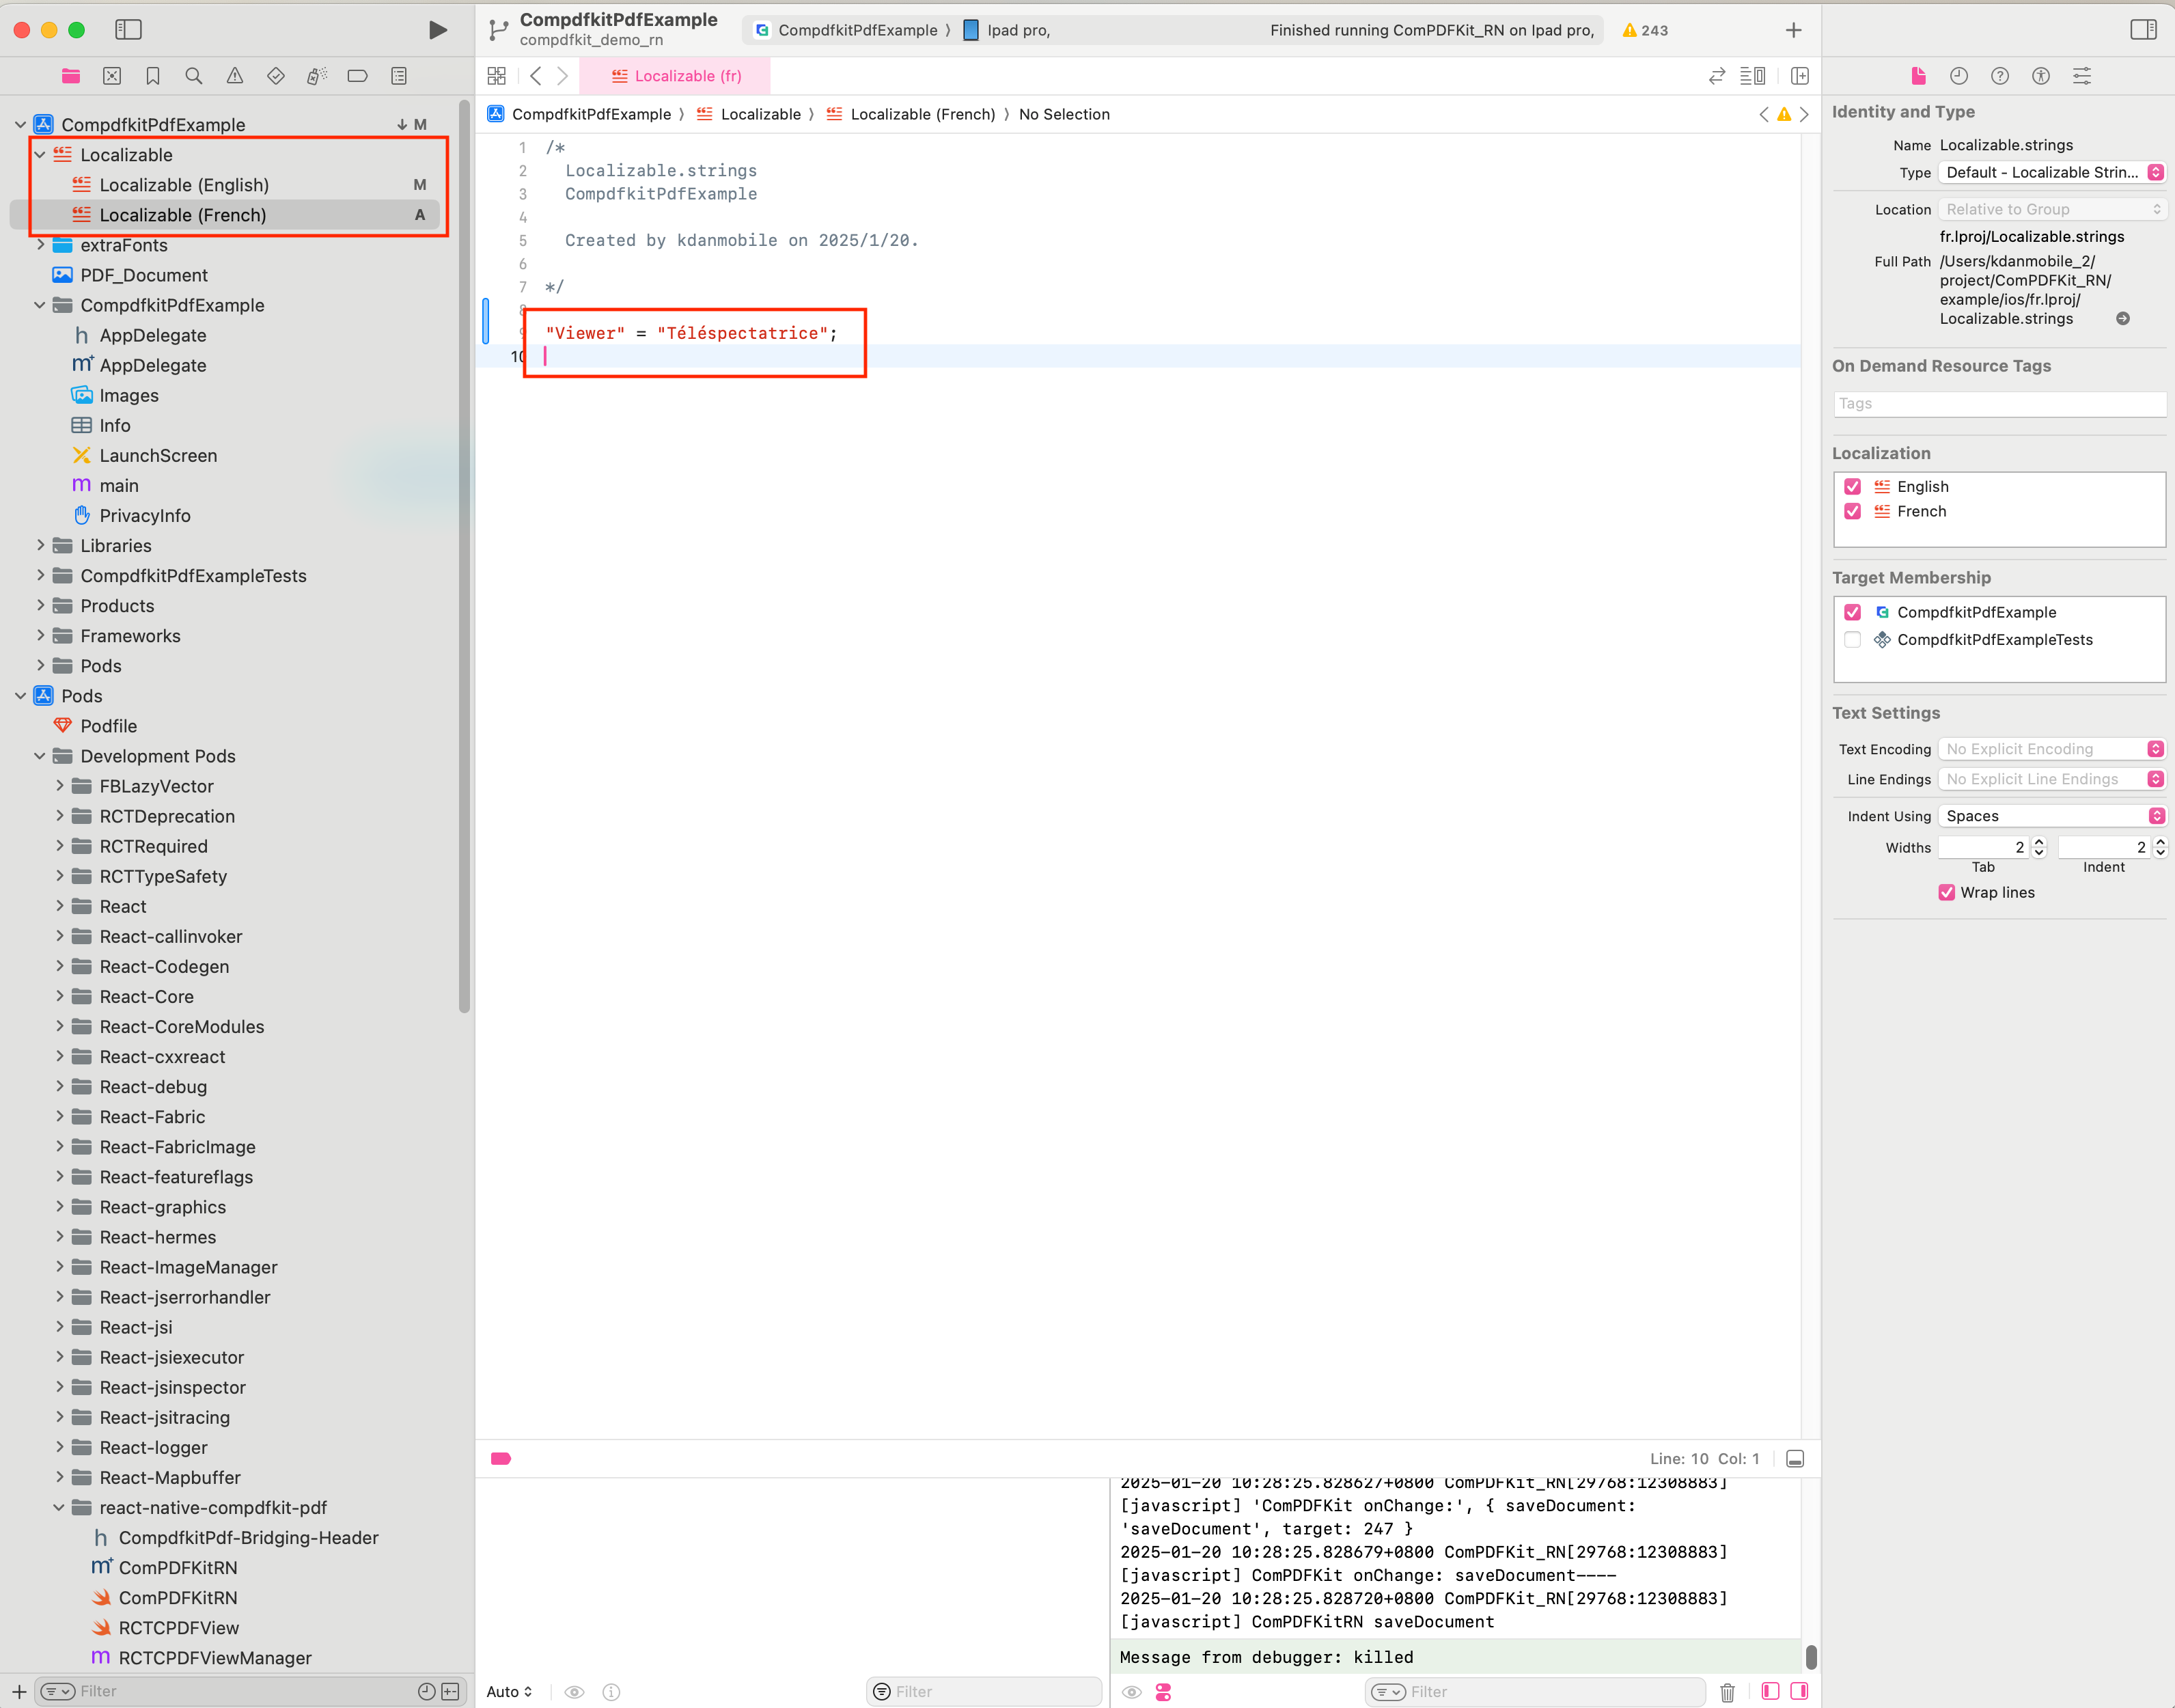
Select Localizable.strings , click on Localize in the File inspection (right-side file inspector) in Xcode. Next, check French and English, as shown below:
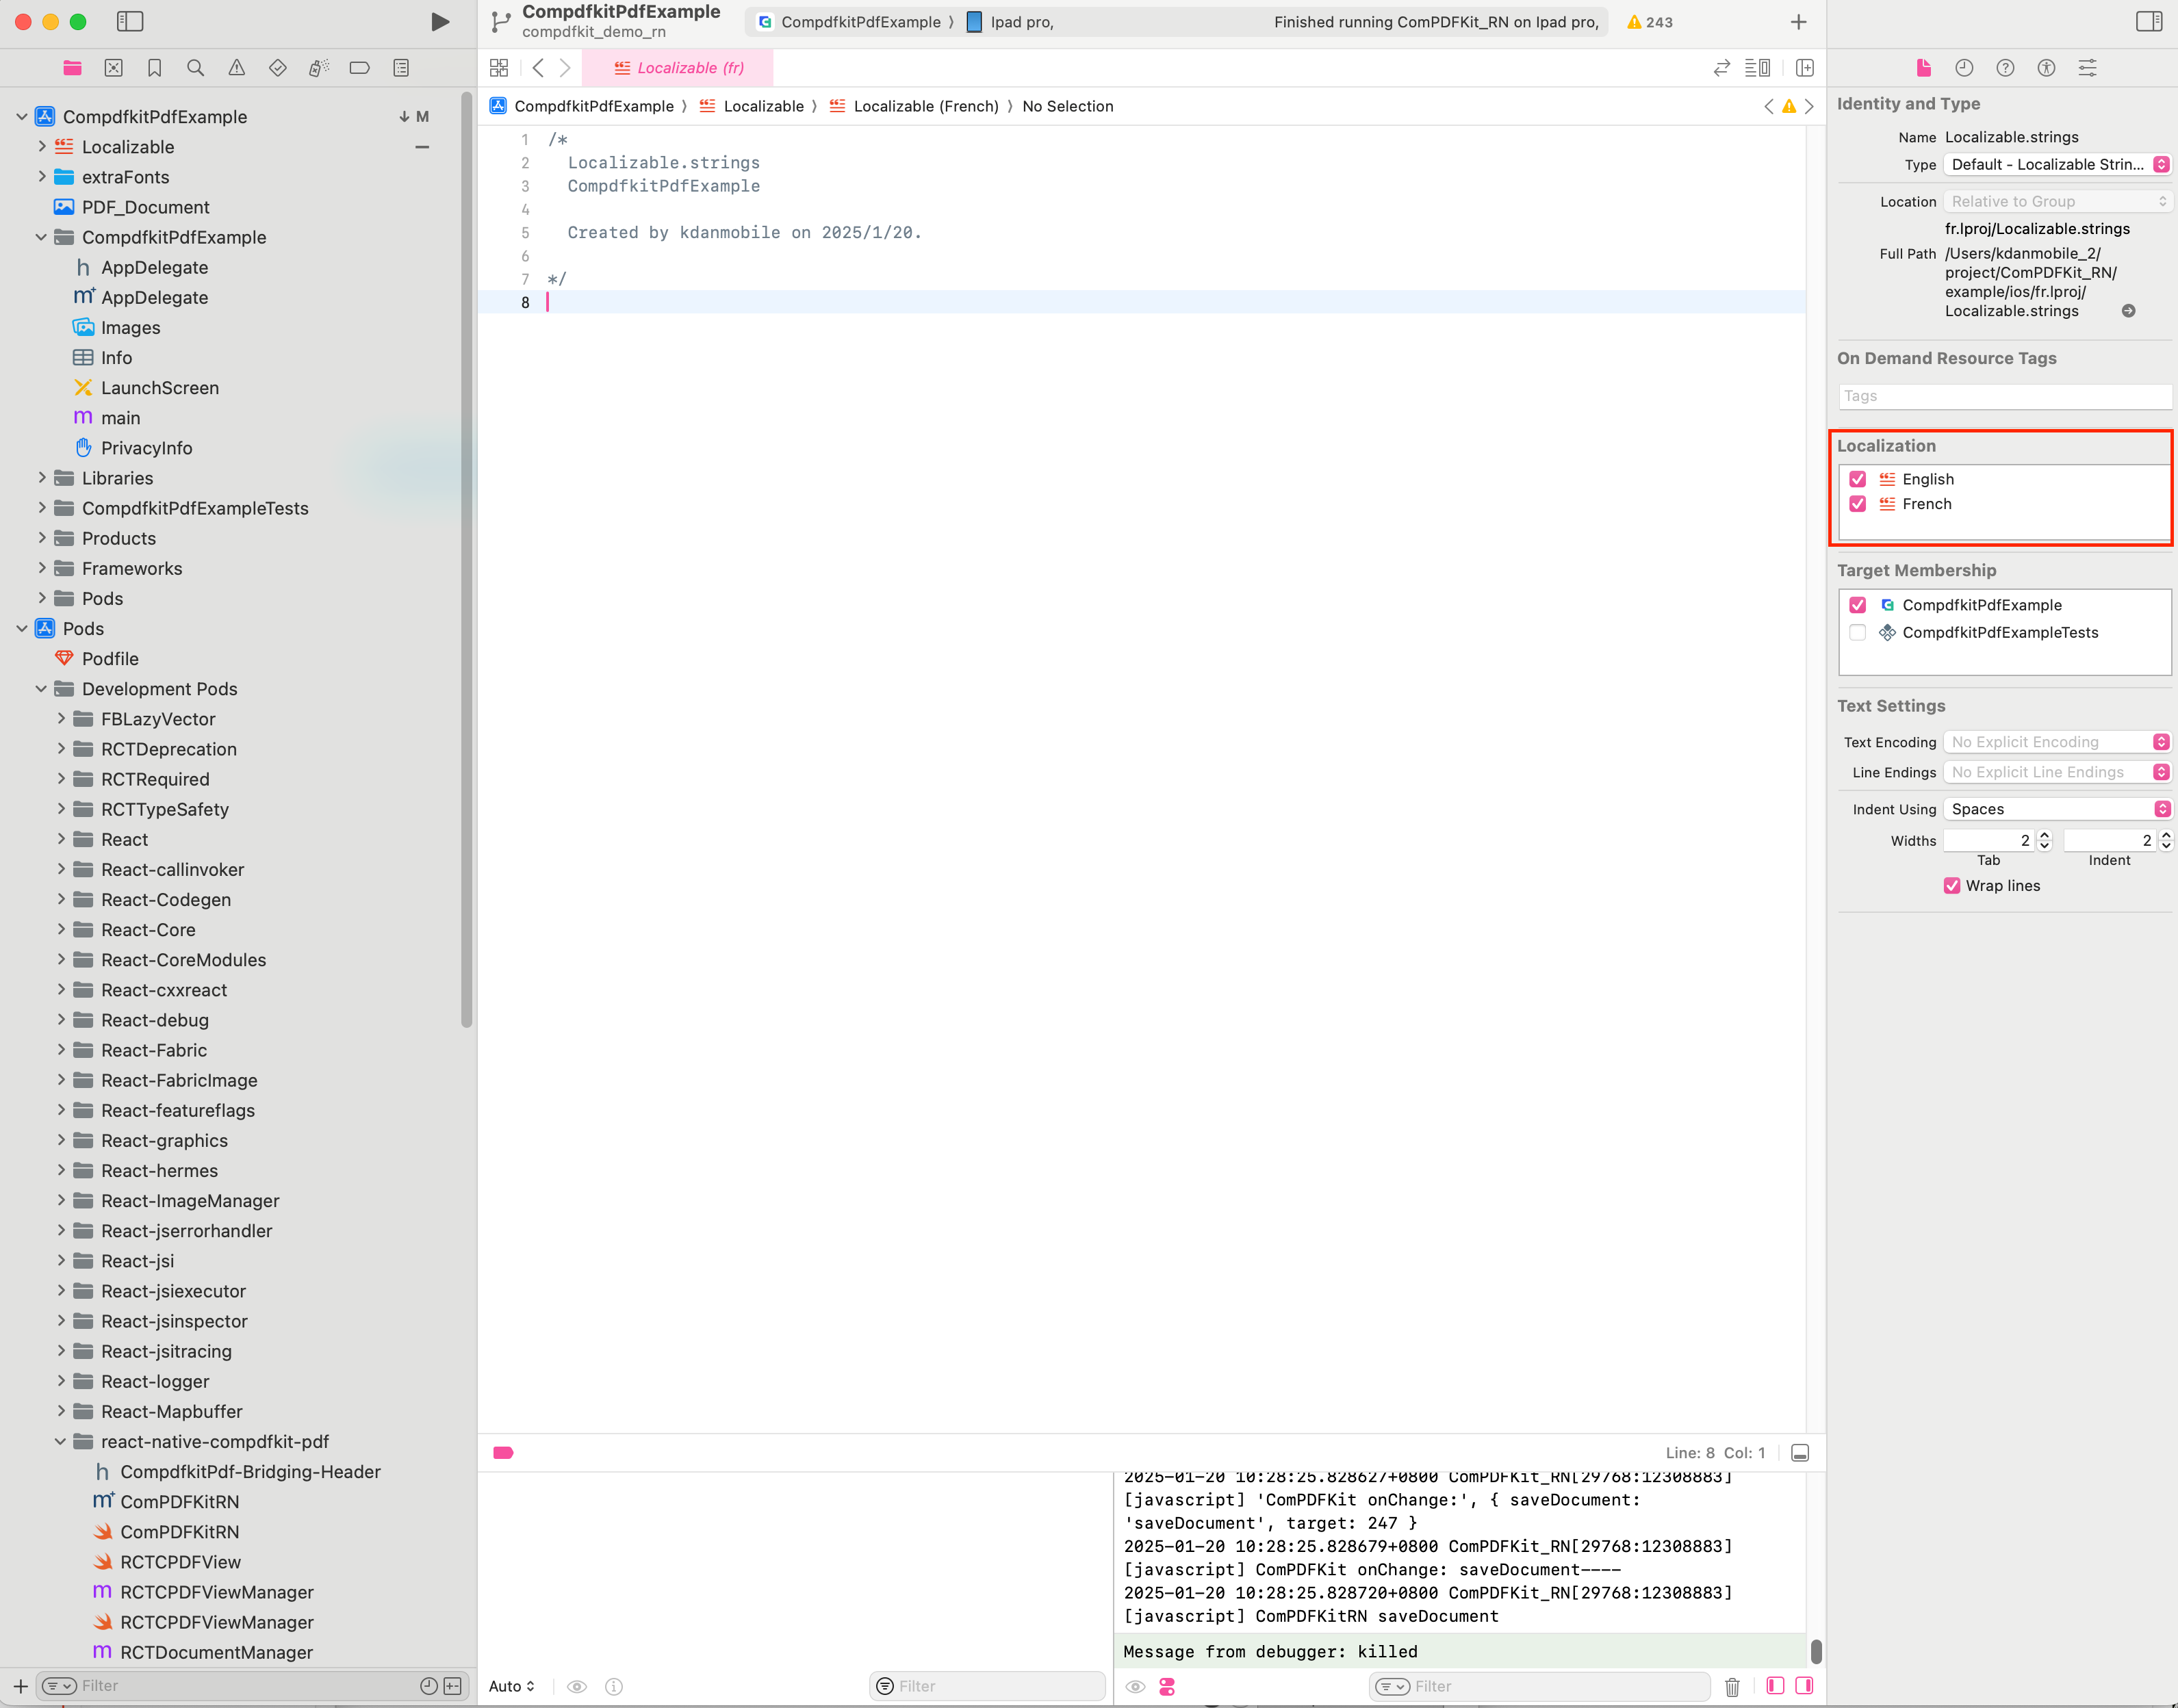
Then open the ComPDF React Native iOS example, find the Localizable (English) file, select all the text, copy it, and paste it into the Localizable (English) file you created.
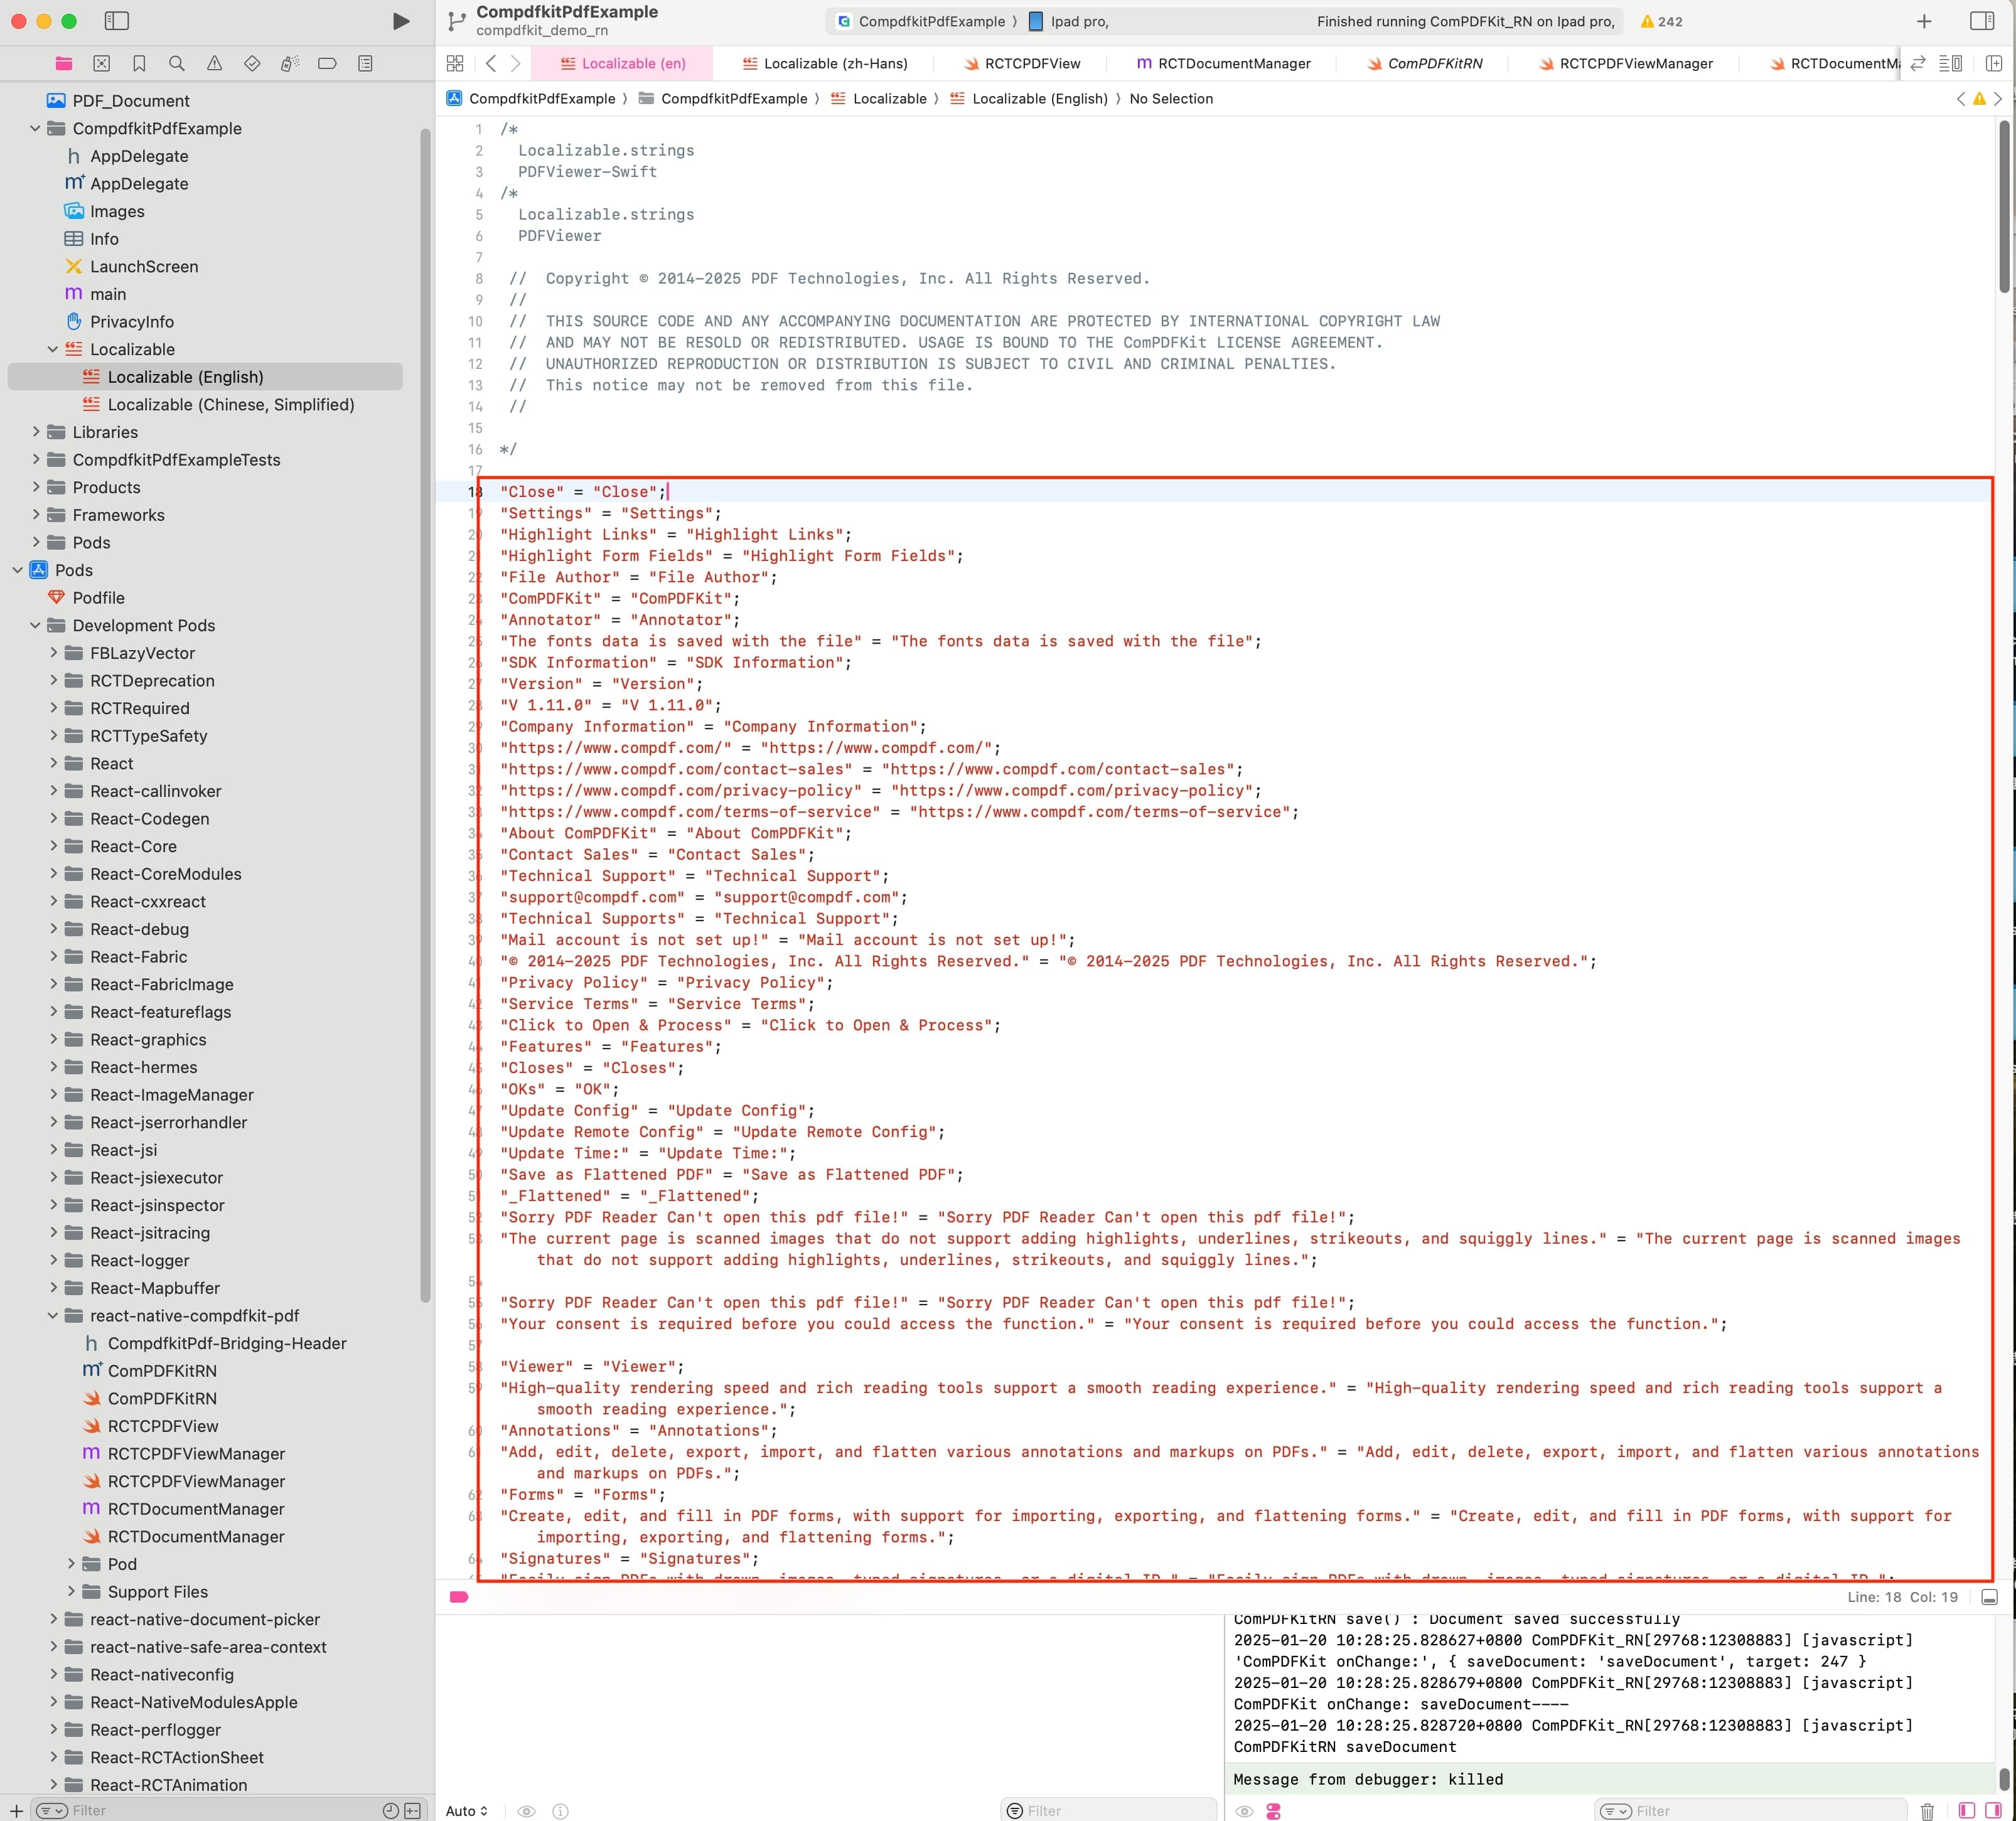
Finally, select the Localizable (French) file and configure the corresponding French translations according to the Localizable (English) file, ensuring that the number of text segments in both files is the same. For example, if the Localizable (English) file has "Viewer" = "Viewer";, the Localizable (French) file should have the corresponding "Viewer" = "Téléspectatrice";.