How to Make a Windows Program in C# with ComPDFKit PDF SDK
Create a New Project
Fire up Visual Studio 2022, click Create a new project.
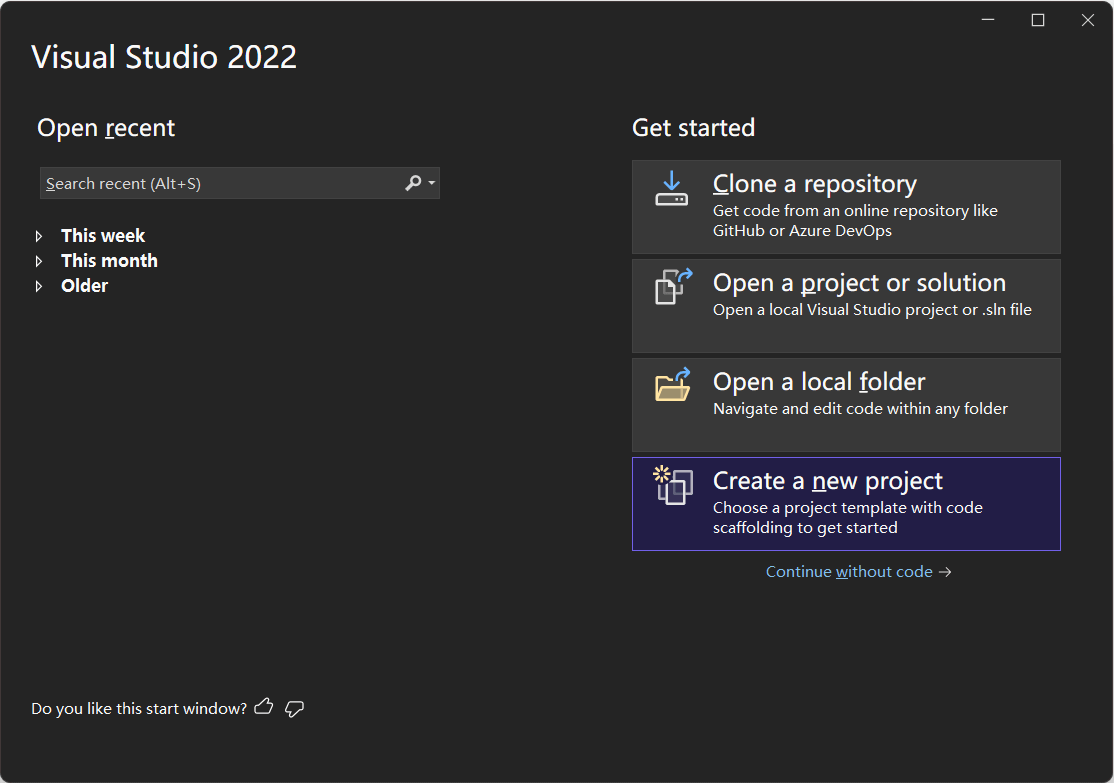
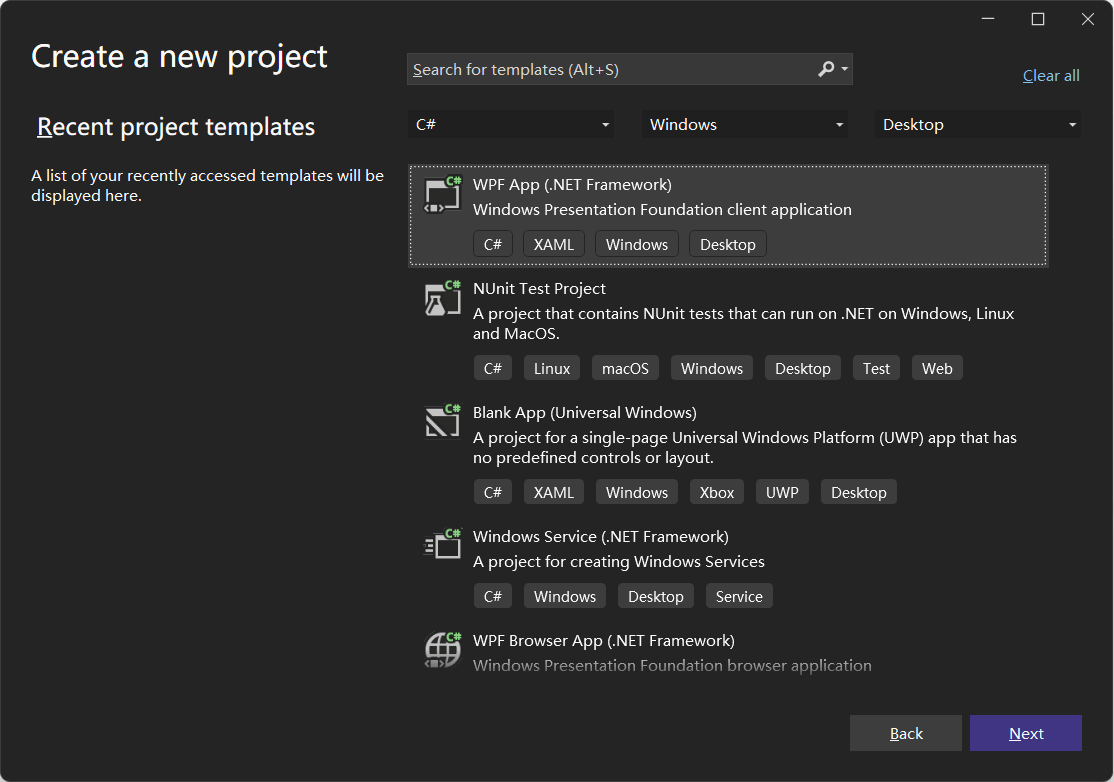
Choose WPF App (.NET Framework) and click Next.
Configure your project: Set your project name and choose the location to store your program. The project name is called "ComPDFKit Demo" in this example. This sample project uses .NET Framework 4.6.1 as the programming framework.
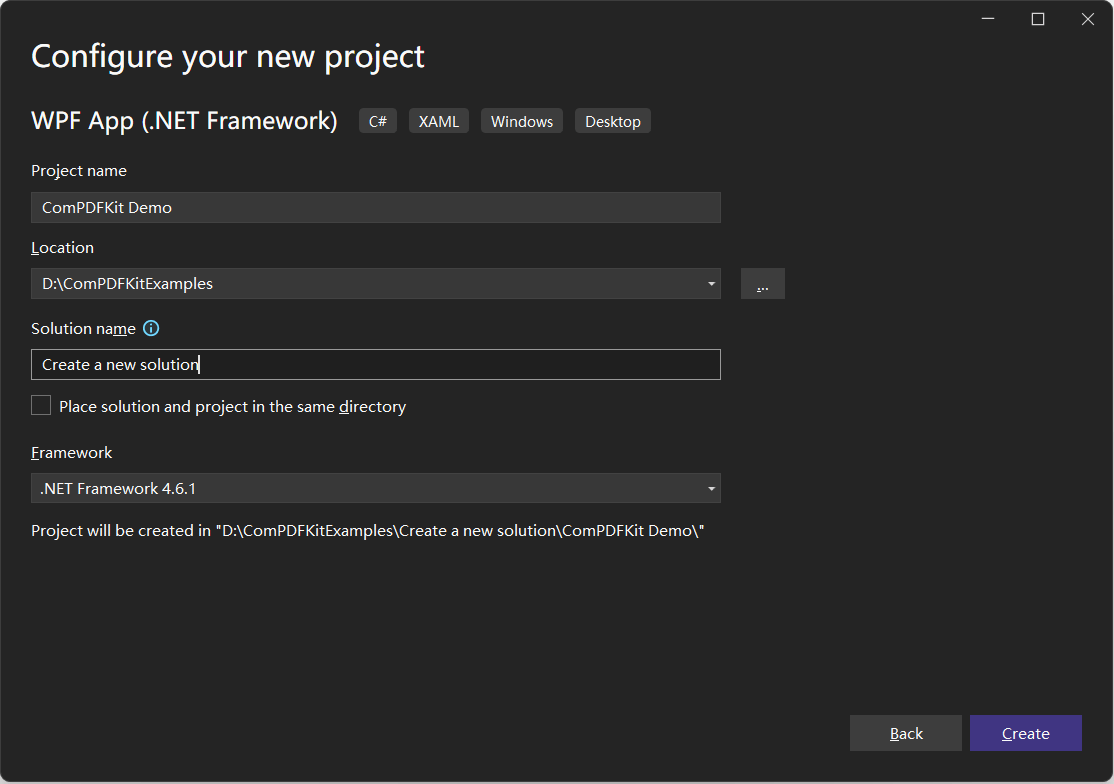
Click the Create button. Then, the new project will be created.
Add ComPDFKit to Your Project
There are two ways to add ComPDFKit to your Project: Nuget Repository and Local Package, you can choose one or the other according to your needs.
Nuget Repository
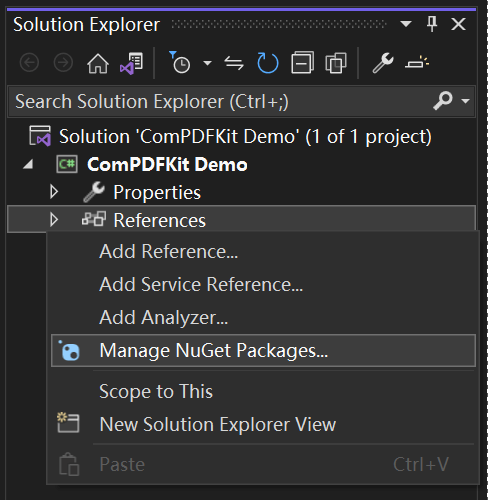
Open your project’s solution, and in the Solution Explorer, right-click on References and click on the menu item Manage NuGet Packages…. This will open the NuGet Package Manager for your solution.
Search for
ComPDFKit.NetFramework, and you’ll find the package on nuget.org.On the right side, in the panel describing the package, click on the Install button to install the package.
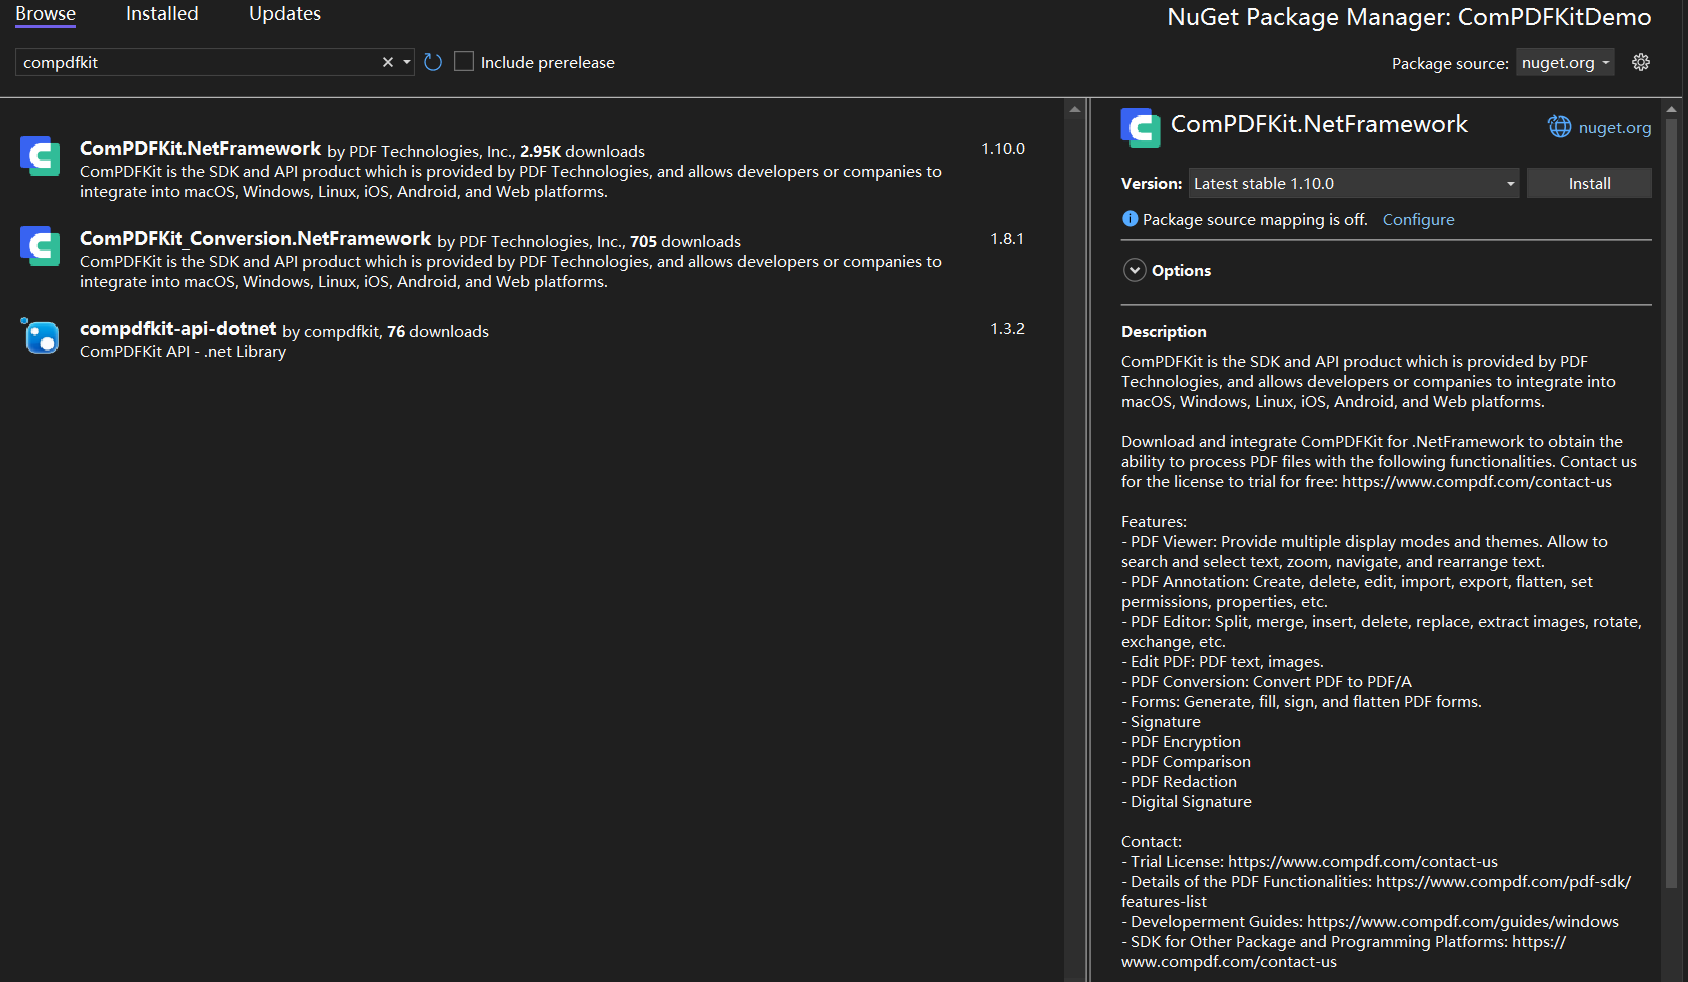
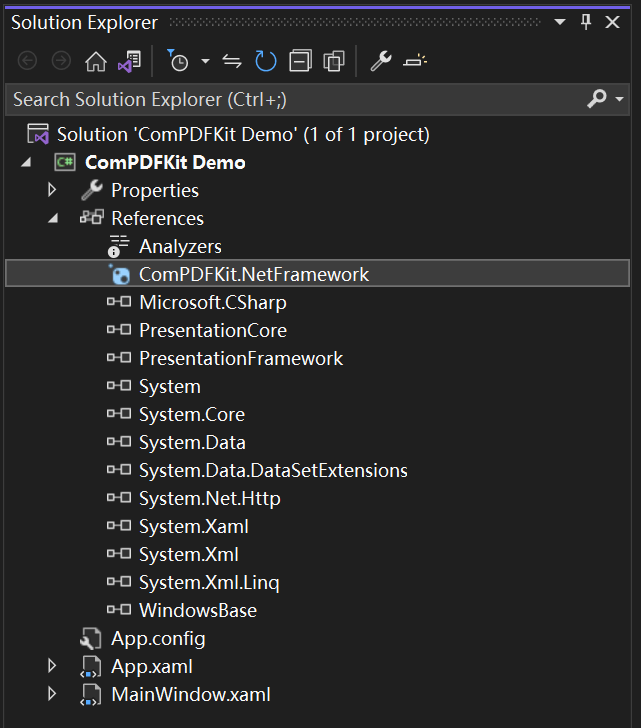
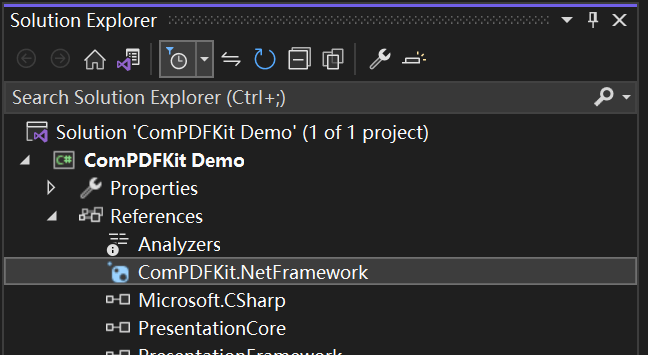
Once that is complete, you’ll see a reference to the package in the Solution Explorer under References.
Local Package
Rather than targeting a package held at nuget.org, you may set up a configuration to point to a local package. This can be useful for some situations, for example, your build machines don’t have access to the internet.
You can find "ComPDFKit.NetFramework....nupkg" file in the SDK Package
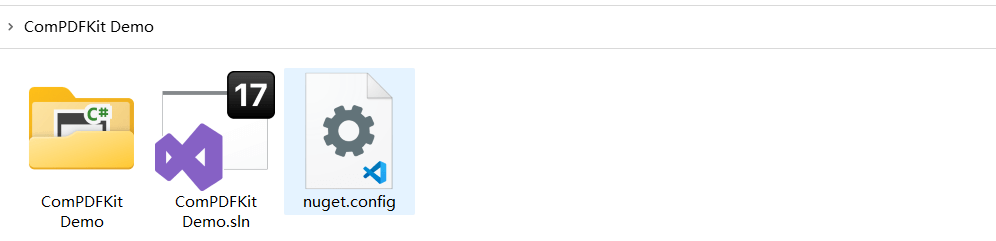
Create or edit a "nuget.config" file in the same directory as your solution file (e.g. "ComPDFKit Demo.sln").
The contents of the file should contain an XML element,
packageSources— which describes where to find NuGet packages — as a child of a root node namedconfiguration. If the file already exists, add the extrapackageSourcesentry shown below. If the file is blank, copy and paste the entirety of the following contents:xml<?xml version="1.0" encoding="utf-8"?> <configuration> <packageSources> <add key="ComPDFKitSource" value="path\to\directoryContainingNupkg" /> </packageSources> </configuration>Edit the
valueof the contents to correctly refer to the location of the directory containing the "ComPDFKit.NetFramework....nupkg" package — for example,C:\Users\me\nugetPackages\. Now save the file, and close and reopen your solution for Visual Studio to force a read of the NuGet configuration.Open your project’s solution, and in the Solution Explorer, right-click on References and click on the menu item Manage NuGet Packages…. This will open the NuGet Package Manager for your solution.

On the right-hand side of the manager in the Package source dropdown window, choose the entry
ComPDFKitSource(or whatever you decided to name it). You should then see the entry for "ComPDFKit.NetFramework".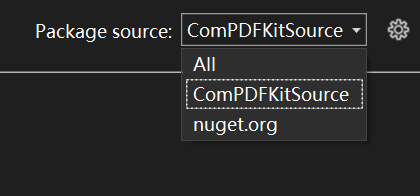
On the right side, in the panel describing the package, click on the Install button to install the package.

Once that’s complete, you’ll see a reference to the package in the Solution Explorer under References.
Alternatively, you can manually integrate ComPDFKit's dynamic libraries into your project.
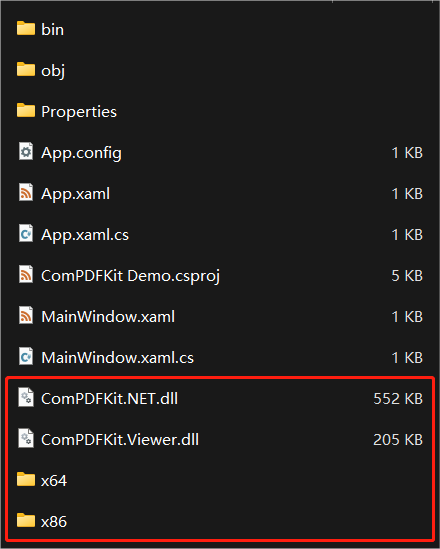
Open the ComPDFKit SDK package that you have extracted, and go to the "lib" folder. Copy the "x64" folder, "x86" folder, "ComPDFKit.NET.dll" file, and "ComPDFKit.Viewer.dll" file to the folder with the same name as your project that you created in 2.4.1. In this project, the folder is named "ComPDFKit Demo". Now, your folder should look like this:
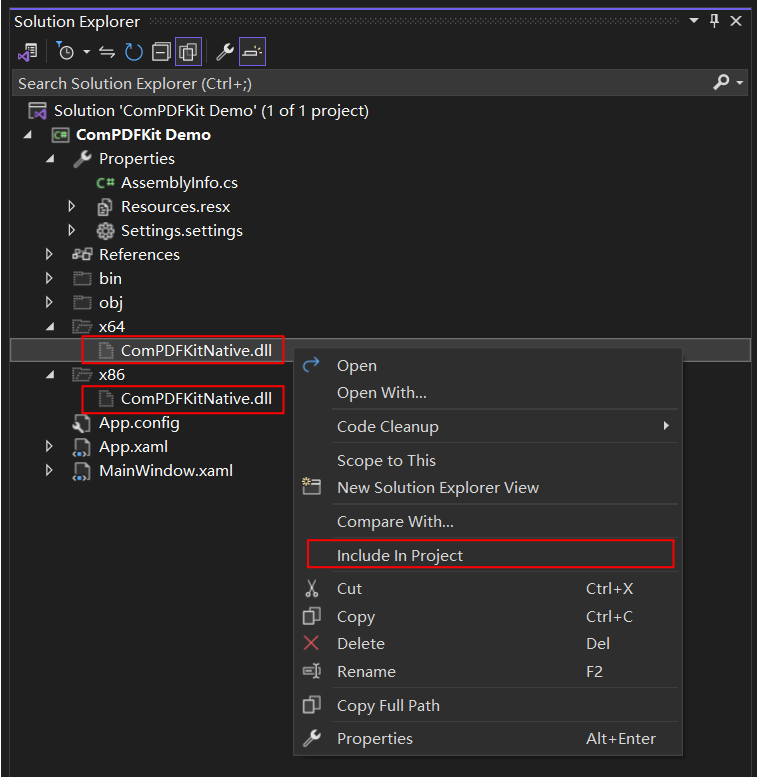
Then click the button Show All Files in the Solution Explorer menu. Find and right click the files you added before, and choose Include In Project.
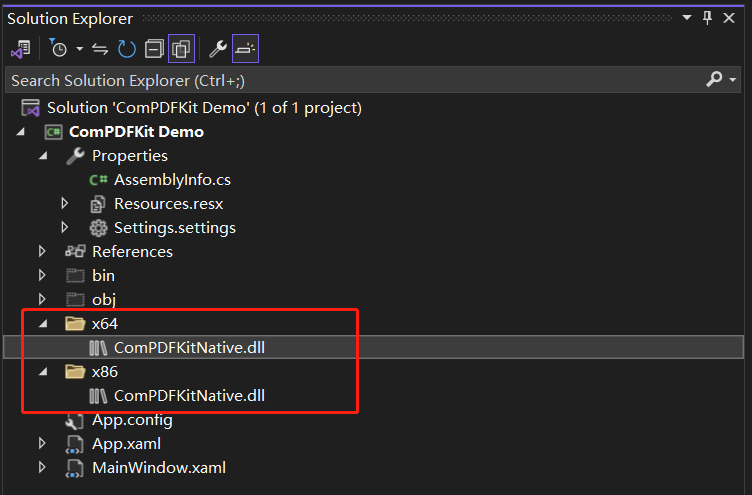
Now the structure of your project will look like this:
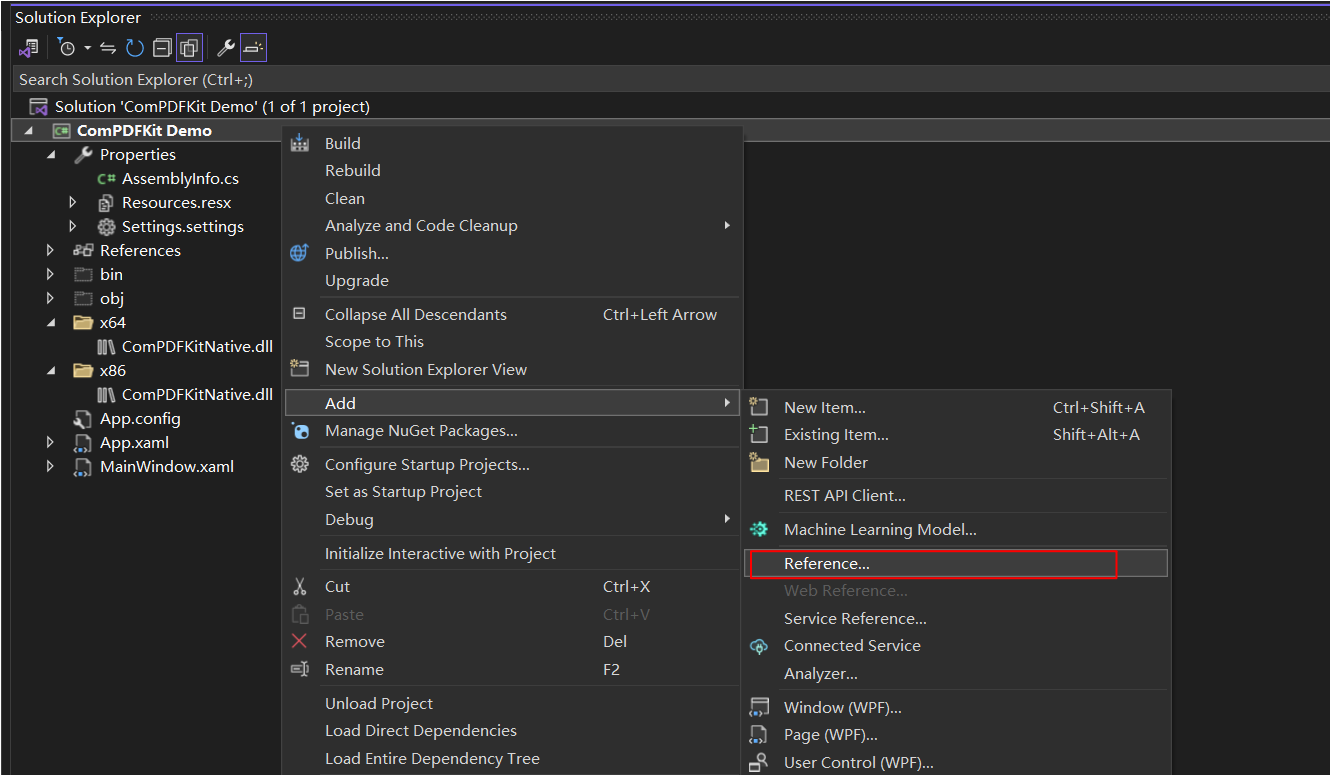
To use the APIs of ComPDFKit PDF SDK in your project, follow the instructions and add them to Reference. Right click the project that you need to add ComPDFKit PDF SDK and click Add. Then, click Reference.
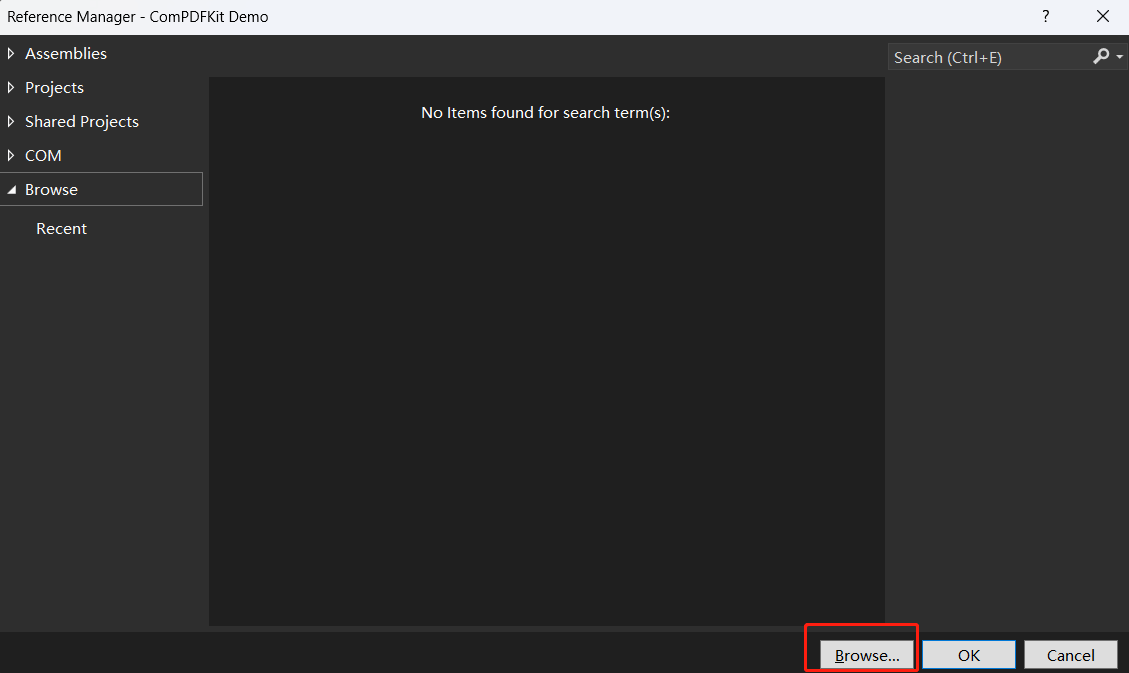
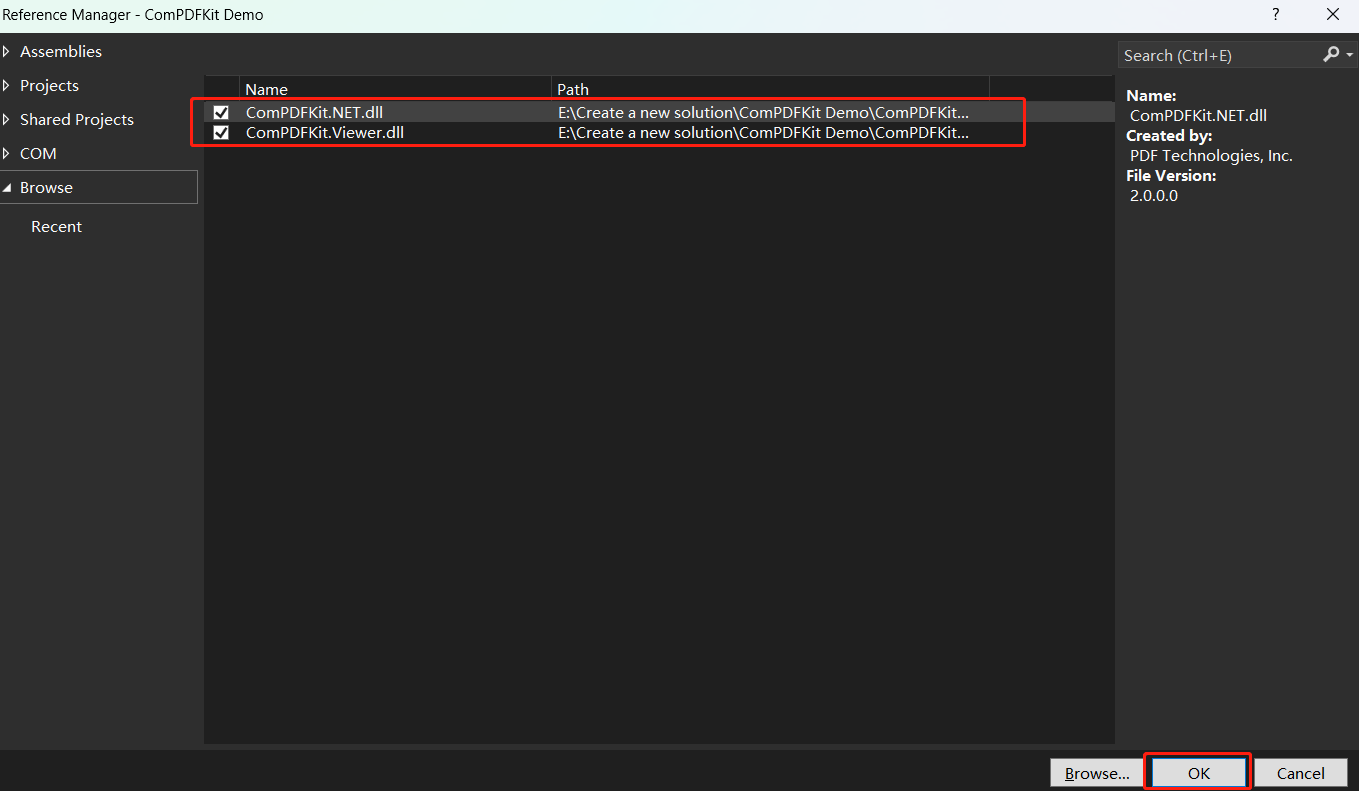
In the Reference dialog, choose Browse, click another Browse button in the bottom right corner, and navigate to the "ComPDFKit Demo" folder which is in your project. Select "ComPDFKit.NET.dll" and "ComPDFKit.Viewer.dll" dynamic library. Then, click OK.
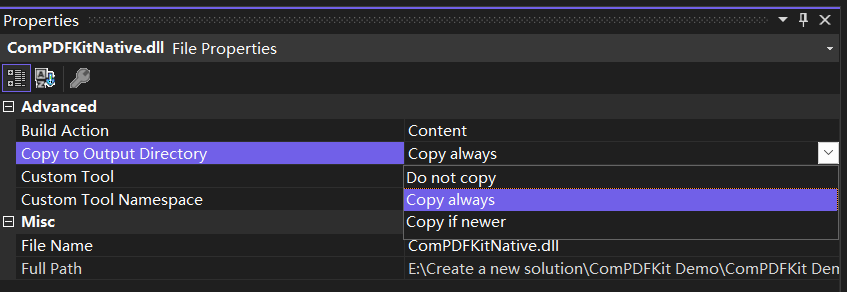
Right click "ComPDFKitNative.dll" -> click Properties.
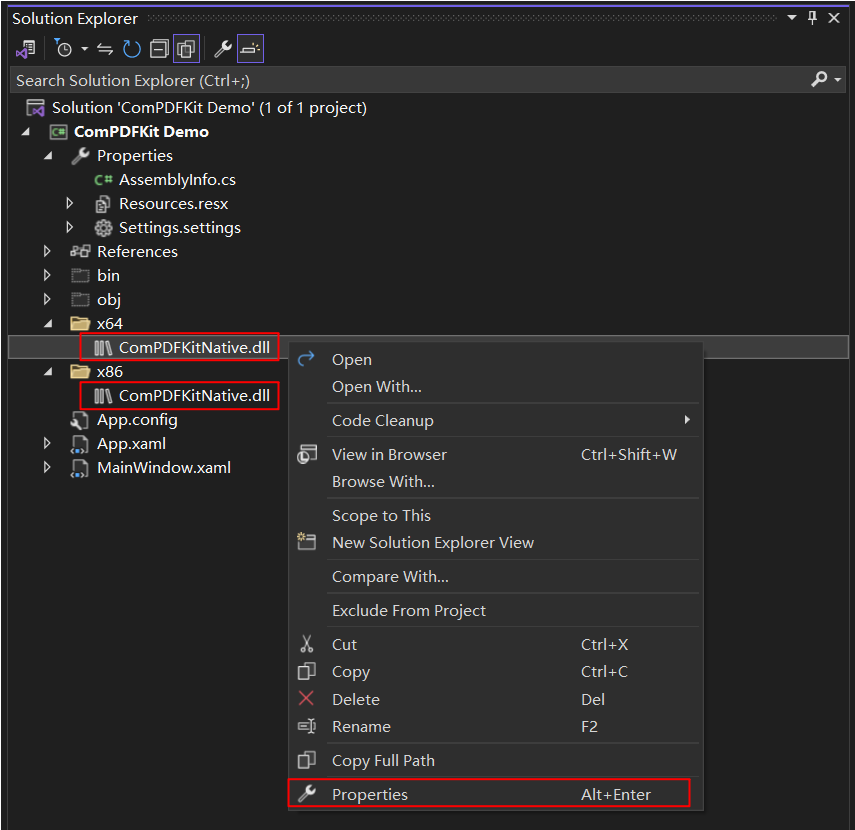
Please make sure to set the property Copy to Output Directory of "ComPDFKitNative.dll" to Copy if newer. Otherwise, you should copy it to the same folder with the executable file manually before running the project.
Apply the License Key
Please refer to section Applying the License Key for detailed steps.
Display a PDF Document
We have finished all prepare steps. Let's display a PDF file.
Add the following code to “MainWindow.xaml” and “MainWindow.xaml.cs” to display a PDF document. Please make sure to replace "ComPDFKit_Demo" with the name of your project. Now, all you need to do is to create a CPDFViewer object, and then display the CPDFViewer object in the Grid (component) named “PDFGrid” using the OpenPDF_Click method.
Now your "MainWindow.xaml" should look like the following code.
<Window x:Class="ComPDFKit_Demo.MainWindow"
        xmlns="http://schemas.microsoft.com/winfx/2006/xaml/presentation"
        xmlns:x="http://schemas.microsoft.com/winfx/2006/xaml"
        xmlns:d="http://schemas.microsoft.com/expression/blend/2008"
        xmlns:mc="http://schemas.openxmlformats.org/markup-compatibility/2006"
        xmlns:local="clr-namespace:ComPDFKit_Demo"
        xmlns:compdfkitviewer="clr-namespace:ComPDFKitViewer;assembly=ComPDFKit.Viewer"
        mc:Ignorable="d"
        Focusable="True"
        Title="MainWindow" Height="600" Width="800" UseLayoutRounding="True">
    <Grid>
        <Grid.RowDefinitions>
            <RowDefinition Height="*"/>
            <RowDefinition Height="52"/>
        </Grid.RowDefinitions>
        <Grid Name="PDFGrid" Grid.Row="0">
            <ScrollViewer Focusable="False" CanContentScroll="True" HorizontalScrollBarVisibility="Auto" VerticalScrollBarVisibility="Auto">
                <compdfkitviewer:CPDFViewer x:Name="PDFViewer"/>
            </ScrollViewer>
        </Grid>
        <Button Content="Open PDF" Grid.Row="1" HorizontalAlignment="Left" Margin="10" Click="OpenPDF_Click"/>
    </Grid>
</Window>Now your “MainWindow.xaml.cs” should look like the following code. Please note: You need to enter your license key. All the places that need to be modified in the code have been marked with comments in the code below. You just need to replace the string content below the comments by yourself.
using ComPDFKit.NativeMethod;
using ComPDFKit.PDFDocument;
using Microsoft.Win32;
using System.Windows;

namespace ComPDFKit_Demo
{
    public partial class MainWindow : Window
    {
        public MainWindow()
        {
            InitializeComponent();
            LicenseVerify();
        }

        bool LicenseVerify()
        {
            if (!CPDFSDKVerifier.LoadNativeLibrary())
                return false;

            string xmlPath = "The path to your license key XML file";
            LicenseErrorCode verifyResult = CPDFSDKVerifier.LicenseVerify(xmlPath);
            return (verifyResult == LicenseErrorCode.E_LICENSE_SUCCESS);
        }

        private void OpenPDF_Click(object sender, RoutedEventArgs e)
        {
            // Get the path of a PDF file.
            var dlg = new OpenFileDialog();
            dlg.Filter = "PDF Files (*.pdf)|*.pdf";
            if (dlg.ShowDialog() == true)
            {
                // Use the PDF file path to open the document in CPDFViewer.
                CPDFDocument doc = CPDFDocument.InitWithFilePath(dlg.FileName);
                if (doc != null && doc.ErrorType == CPDFDocumentError.CPDFDocumentErrorSuccess)
                    PDFViewer.InitDoc(doc);
            }
        }
    }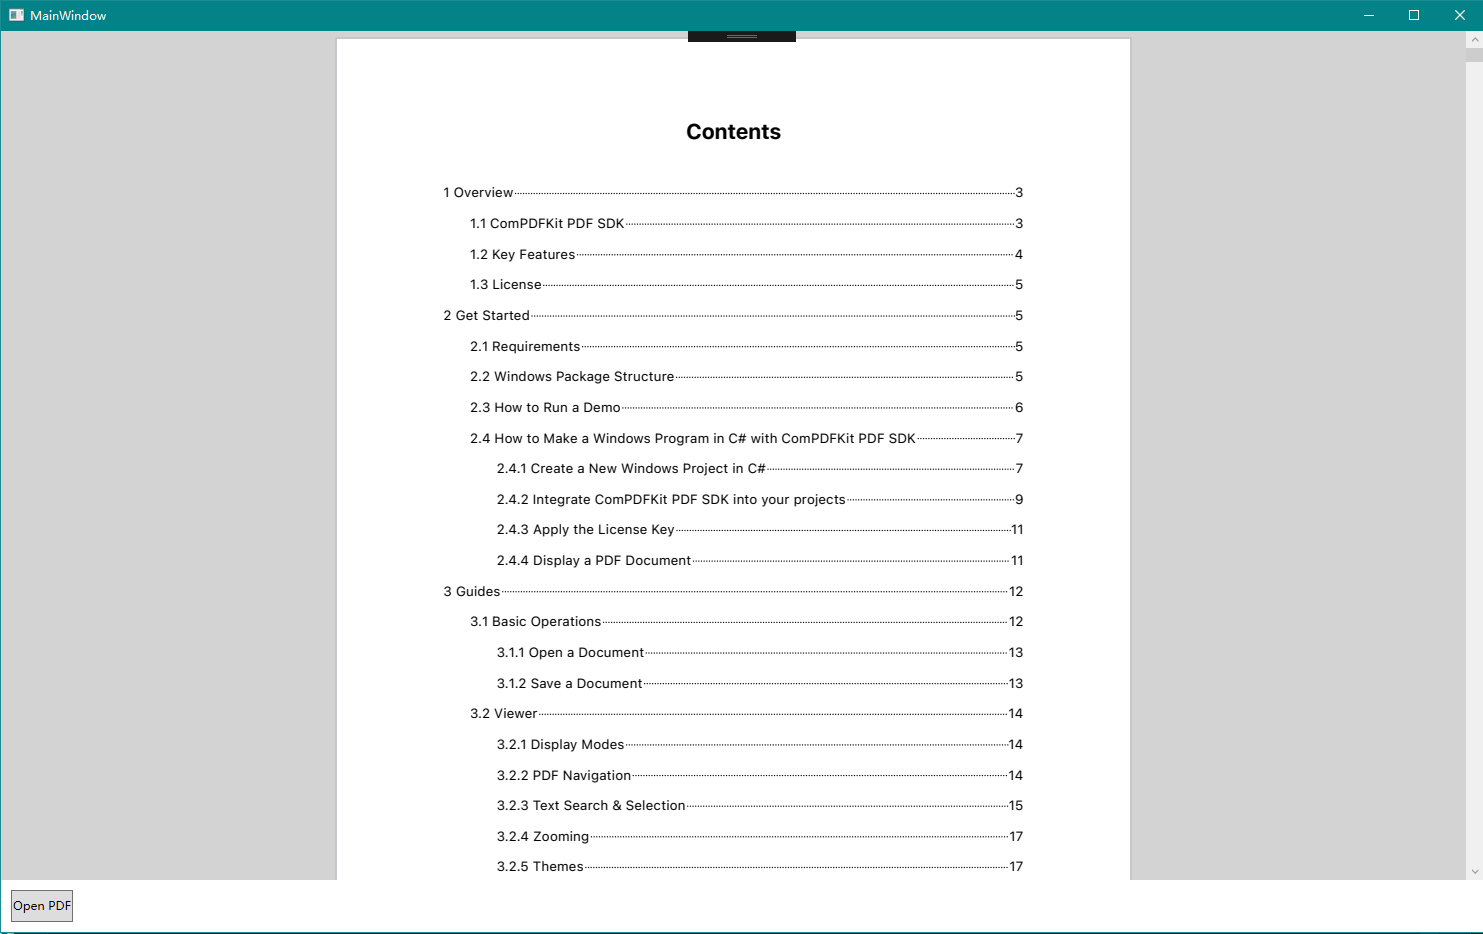
}Now run the project and you will see the PDF file that you want to display. The PDF Viewer has been created successfully.
Troubleshooting
If you meet some other problems when integrating our ComPDFKit PDF SDK for Windows, feel free to contact ComPDFKit team.