ComPDF Salesforce SDK Integration
Integrate into a New Salesforce Project as a Lightning Web Component
This guide will help you integrate a WebViewer into Salesforce Lightning Components. It will help you clone the Salesforce sample repository and show you how to integrate WebViewer as a lightning web component.
Prerequisites
- Latest stable version of Node.js and NPM
- ComPDF License Key
- Salesforce Development Environment
Get your license key
A license key is required to run WebViewer. You can refer to our requirements to obtain a license key.
Set up your Salesforce development environment
For step-by-step help on setting up a Salesforce development environment, please follow the instructions in the Setup Development Guide or in the Setup Development Trailhead Trailhead module. The steps include:
- Enable Dev Hub in you Salesforce organization.
- Install Salesforce CLI. Or see the Salesforce CLI Setup Guide for complete installation instructions.
- (Optional) Install Salesforce Extensions for Visual Studio Code.
Deploying the Package to your Salesforce
To deploy the ComPDF Web SDK package to your Salesforce organization, follow these steps.
Clone the ComPDF Salesforce SDK repository from GitHub repo:
bashgit clone https://github.com/ComPDFKit/compdf-web-example-salesforce.gitIn the terminal, go to the ComPDF Salesforce SDK project folder and run the following command to install the npm modules.
bashnpm installThe ComPDF Salesforce SDK integration example now makes use of the ComPDF Web SDK available from our CDN at
https://static.compdf.com, which means it's no longer limited by Salesforce's upload assets size 5MB limit.In order to set the ComPDF Web SDK version you want to use, open
./force-app/main/default/lwc/compdfViewer/compdfViewer.jsand edit the line 16 to reflect the ComPDF Web SDK version. For example, in order to use version 2.8.2, you should change the URL pointing to the CDN to:js@api assetBase = 'https://static.compdf.com/[email protected]'Add your ComPDF license key to the
licenseKeyproperty value in the./force-app/main/default/lwc/compdfViewer/compdfViewer.jsfile.jslicenseKey = 'YOUR_LICENSE_KEY'If you have not already done so, authenticate with your hub org and provide it with an alias ("DevHub" in the command below):
bashsf org login web --set-default-dev-hub --alias DevHubEnter your Dev Hub org credentials in the browser that opens. After you log in successfully, you can close the browser. Create a scratch org using the
config/project-scratch-def.jsonfile, set the username as your default, and assign it an alias ("myScratchOrg" in the command below).bashsf org create scratch --definition-file config/project-scratch-def.json --set-default --target-dev-hub DevHub --alias myScratchOrgPush the app to your scratch org:
bashsf project deploy start --source-dir force-app --target-org myScratchOrg --conciseOpen the scratch org:
bashsf org open --target-org myScratchOrg(Optional) If you need to upload or save large files (over 6 MB), it is recommended to add your Access Token to the
accessTokenproperty in the./force-app/main/default/lwc/compdfViewer/compdfViewer.jsfile. You can view your org information and obtain the Access Token by running the following command:bashsf org display --target-org myScratchOrgjsaccessToken = 'YOUR_ACCESS_TOKEN'
Next, we still need to do some configuration in your Salesforce organization setup.
Changing the Security Settings
ComPDF Salesforce SDK example uses resource packages provided by our third-party server, it is necessary to add trusted URLs in Salesforce. To change the default security settings, follow these steps.
In Salesforce, go to Security > Trusted URLs.
Click New Trusted URL.
Configure URL properties:
- Customize an API name, such as "ComPDF".
- Write the following URL in the URL input box.
https://static.compdf.com- Ensure that the 'Active' attribute is checked, and check all CSP directives.
Click on Save.
Using the ComPDF Web SDK in Salesforce
Then you can use ComPDF Web SDK in your opening scratch organization:
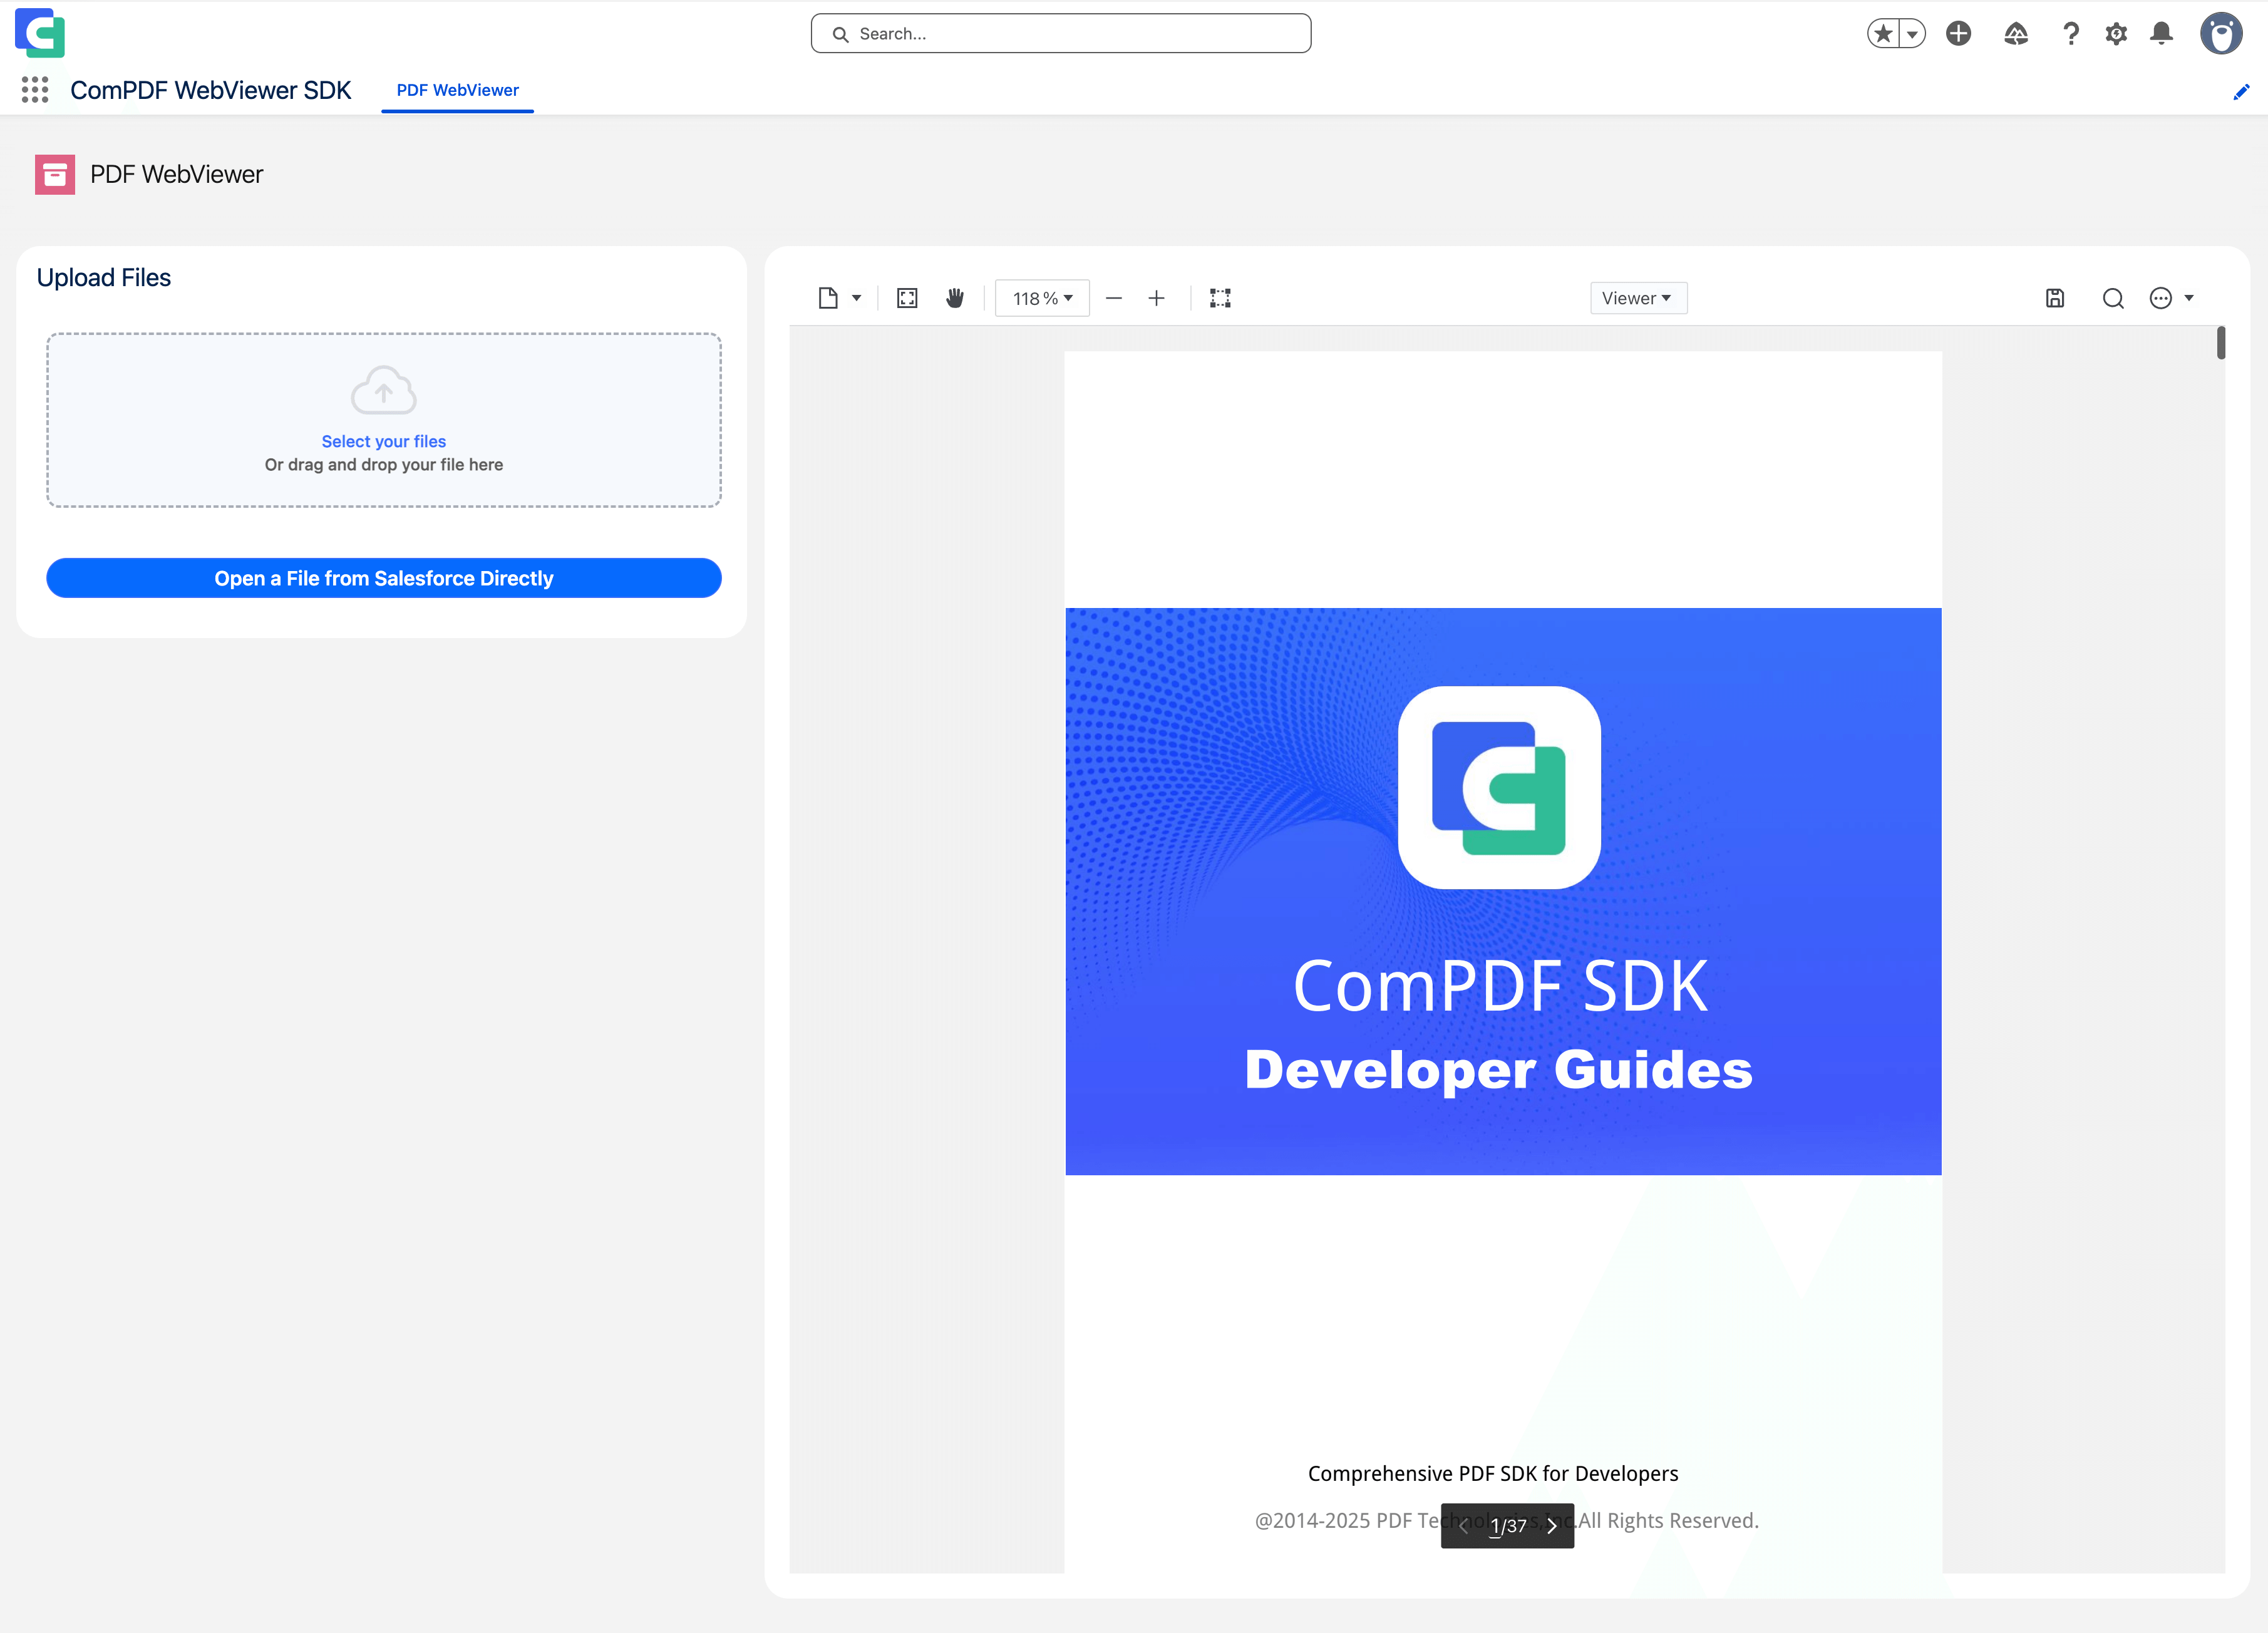
- Click the app launcher icon in the top left, and select ComPDF. Then you should see the application start up.
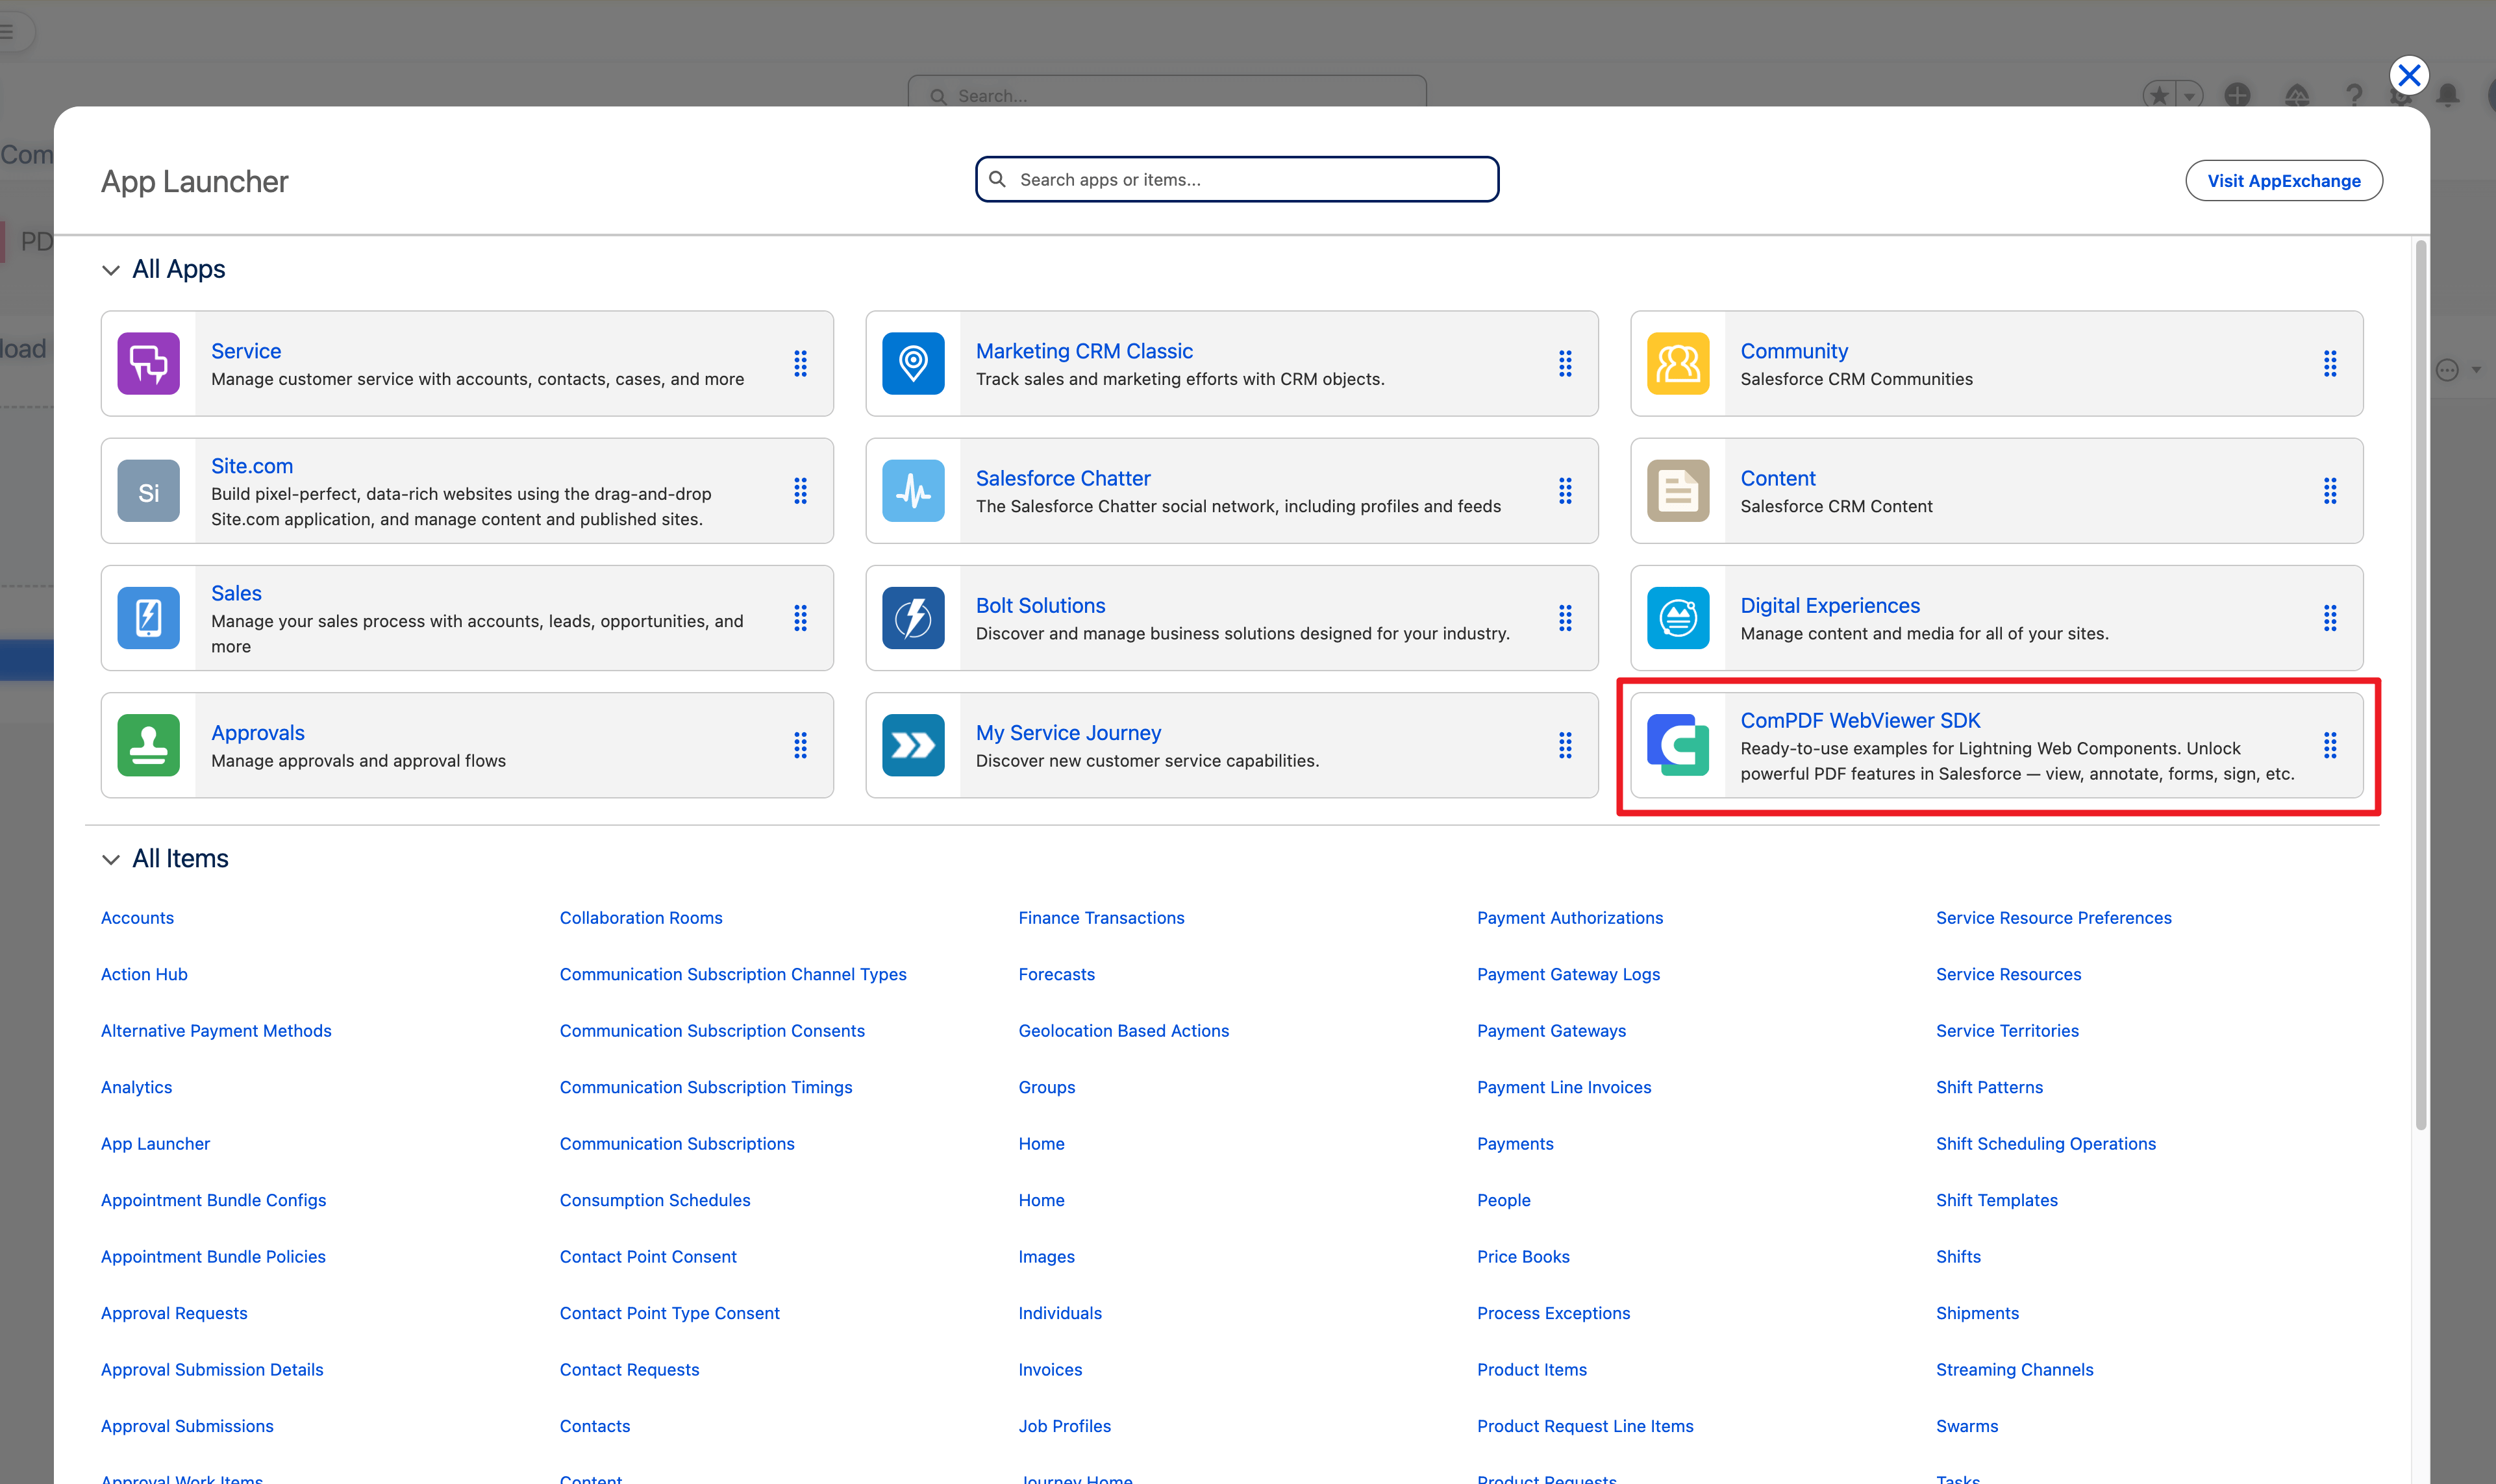
- Click browse to upload local PDF files, or open a file from Salesforce.
How to instantiate WebViewer with Salesforce using a config file
In Salesforce, the config file is used to access WebViewer objects and APIs. The iframe window and document object are still accessible through contentWindow and contentDocument, but it can still be tricky to run scripts or listen to events happening inside the iframe.
The config file can help you to resolve this problem. See more details about config files.